
My bookbinding class ends with literal works of art


Where have I been? I’ve been here, binding books.

For the past ten weeks I have been teaching a course called Book Design Technology. It’s a senior-level course for students of Graphic Communication in our Design Reproduction Technology concentration, which means that it applies to a relatively small number of our students.

The course is mostly about book typography, with the final project being the printing and hand binding of a book. The students go over the top on these projects, producing genuine works of book art that are also examples of perfection in typography and page presentation.

My students fold and sew signatures in class. This day was particularly satisfying – 29 students successfully made their book blocks ready to bind.

In the process, the students learn a lot about book typography, pagination, pattern search strings (GREP), and work flows. The art and science of making books is much more complicated than one would imagine. There were times when I thought it was too complicated, but the students rose to the occasion and exceeded all expectations. Their books are truly amazing.

Most of the book manuscripts were acquired from Project Gutenberg, a source for public domain books. If a book is out-of-copyright, it will likely be found there. The books in Project Gutenberg are typed by good-willed volunteers, and they vary significantly from title to title. Those variations include indented paragraphs, hard carriage-returns, all-cap chapter titles, word-cap subtitles, etc. With these manuscripts, the students learned a lot about strategic find-and-change. Long manuscripts (some of the books have nearly a thousand pages and hundreds of chapters) pose curious challenges to book typographers. How does one manage headlines, chapter titles, first paragraphs, continuing paragraphs? The key is to find patterns in the manuscript that allow for the automation of style tagging so that the students didn’t have to go through the entire manuscript manually applying the various styles to text as they prepared their books.
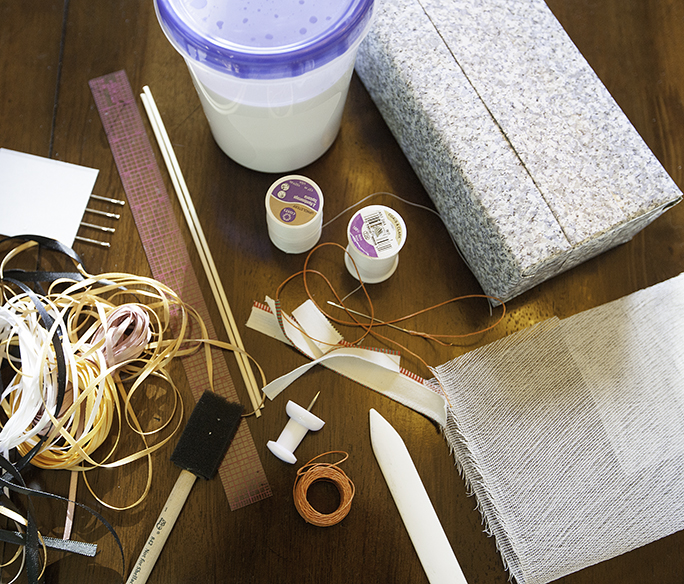
Tools of the trade: a bookbinder’s work requires a variety of tools not found in the average shop. Among them are shish-ka-bob sticks, a tub of PVA adhesive, bricks in wrapping paper, an awl, needles and thread, a bone folder, linen mull fabric, and a center-finding ruler.

The most difficult part of the typography was managing widows and orphans (and runts, which are hyphenated chunks of words). For this there is no shortcut. The students went through their books-in-progress, massaging the text to get orphaned lines to stay behind one page, or the get widows to stop nagging their children.

Once the manuscripts were complete in Adobe InDesign, we moved to the next step, which was pagination. There is no simple solution to book pagination except the professional and expensive imposition programs like Dyna and Preps. Cal Poly owns several licenses for Preps, and I did give it consideration because it makes short work of books. But I changed my mind in favor of a more complex but democratic process that the students could do on their own computers with nothing more than the Adobe Creative Suite.
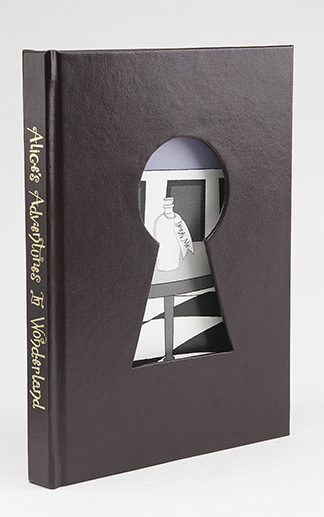
One of my students made this lovely book using bonded leather cover material, a foil-stamped spine, and a hand-cut and shaped cover revealing custom endpapers. The title is hand-lettered, as are all the chapter titles in the book.

Preps would have been more effective in a four-up or eight-up sheet-fed production process. In this class, the students would be printing their final books on a Konica Minolta C8000 digital machine in four-page signatures. For that we used InDesign’s Print Booklet function which is very limited, but works nicely for small presses with two-page capacity. The process was surprisingly complicated. I had the students make 16-page signatures by exporting appropriate groups of pages to imposed pairs in PostScript format. Then, working with Adobe Acrobat Pro, they created a PDF from the long list of imposed signatures. Acrobat doesn’t do this directly, it calls on the almost-forgotten Acrobat Distiller to convert the PostScript pages into PDF en route, then it assembles the resulting files into a large PDF. It’s pretty fast, assembling one 600-page book into PDF in less than four minutes.
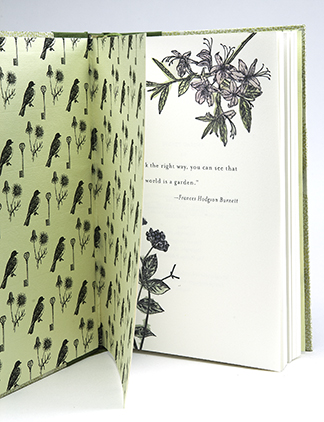
Another book features custom endpapers and hand-colored illustrations and initial letters in the text. This book is the Secret Garden.

The students also had a chance to learn how to calculate the yield of various press-size sheets, and to order enough paper to print a book and still have some paper left over for make-ready or errors. They ordered master sheets in either 23 x 35 or 25 x 38 size, then calculated a cutting list and worked with other students to cut the sheets into press-ready pages with enough outside space for bleeds and marks.

While my students were working on their class projects, I was making custom hand-sewn books for Christmas presents (please don’t tell my siblings). Making this edition of ten books allowed me to keep up with the students on their projects, and to get much-needed experience making books in small editions.

I have printed a lot of books in my career, but I had never hand-sewn a book before binding it (I had used only industrial machines for perfect-binding, or had used small-scale binding machines). Teaching this class required me to learn how to hand-sew book blocks, and then continue with binding. I took a bookbinding course during the summer, then taught my wife how to bind in fall, and I did it myself several times before showing the students how to do it. I also discovered a number of excellent videos on YouTube showing various techniques for binding books the old fashioned way.

At the end of the quarter, each student brought his or her finished book to a Book Fair that we held on the day of the final exam. I photographed each student with their book as a part of that event.

From the beginning of the quarter I was designing and producing a book of my own, using the same manuscript source as my students, and using the same production techniques to make my book. This allowed me to be where they were for the entire quarter. I stayed up late one night, hand-sewing my 632-page book for binding – which took over three hours. Then I glued up the block, added headbands and mull, and was ready to bind the “block” (pages) into the “case” (the cover).

My students printed their book pages, hand-folded and bound a first draft edition, and presented that to me. The purpose of the first draft was to test the process. The second and final book became the one they turned in for a grade. I know they didn’t get a lot of sleep in the last two weeks of the class (I know this because some of the books I received still had damp glue when I got them).

One day I taught the whole class full of students how to sew signatures using the traditional “kettle stitch” and “catch-stitch” technique used for millennia. For many, sewing was easy, for others it represented something they had seldom done in their lifetimes – if ever. Somehow we managed to sew six 16-page signatures in a 90-minute class, and everyone left the room with a complete book block.

The following week I showed them how to build the book case, and how to case-in the book block to the cover. Once again, everyone succeeded, and it was extraordinarily satisfying.

From the first experience with binding (the first book was blank), the students did all but the printing outside of class. At my house, the dining room table was covered with bookbinding supplies and books-in-progress. I am sure it was the same for my students.
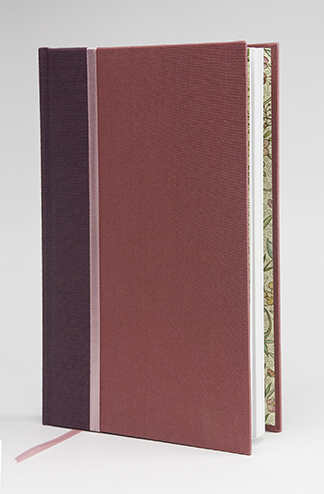
A quarter-bound book by one of my students features three matching tones of book cloth. The workmanship is excellent, the typography flawless. She also added Italian endpapers to complement the book (Pollyanna) and the cover materials.

And, as the quarter came to an end, the pace increased. One cannot make glue dry any faster than it wants to dry, so that process created a natural deadline for the students. All of these fine young people showed up on the last day with a book in-hand. The books are spectacular, some are works of art. All met the requirements of the course, and all of them represent a monumental effort by the students to make a work of typographic art wrapped in a work on bookbinding art.

As a result of the commitment of my students, proven by their extraordinary work, this was the most satisfying class I have ever taught.
Posted in Art, Bookbinding, Imposition and Pagination, Software, Typography | 1 Comment

Bookbinding with needle and thread


I am teaching a class in book design and bookbinding this quarter. I have 30 students in the class; they are working on their manuscripts and will soon be working on their book blocks and book cases. This involves printing, hand folding, hand sewing, hand gluing and much patience. It’s really fun.

The course is largely about book typography, complex find-and-replace strategies, book composition and imposition.

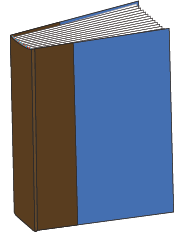
This is a quarter-bound book, one where the spine fabric is different than the other cover material. The origin of this was books that were bound along the spine in leather, and the body bound with book cloth, a less expensive material.

In preparation for this course, I have been making hand-bound books with blank pages so that on the day when the students will be making theirs. I have had a lot of recent practice.

Building a hand-bound book takes several hours over a period of two days, and it requires skills that are not taught in a typical program in the graphic arts. Sewing is one of those skills. Bookbinding requires a simple stitching technique that starts in the first signature, with the needle going in and out of the spine of the folded paper through pre-punched pinholes. When you add the second signature, each stitch must “catch” the parallel stitch on the previously-sewn signature. The ends get either a catch stitch, or a knot.

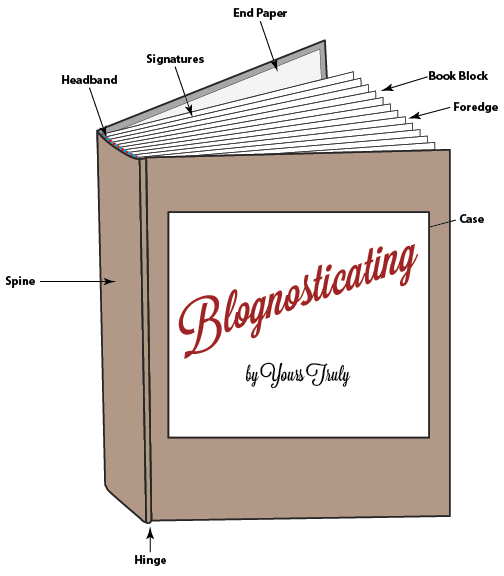
This is a diagram of the stitching, and catch-stitching of several signatures in a book block. The result of this is a sturdy book, held together with thread and glue.

Sewing the signatures results in a block of signatures that are sewn together in a firm, but flexible book body. That block gets the endpapers – these are the connection between the book cover and the book block – and a gauzy fabric called the mull which strengthens that connection. The mull is glued to the spine of the block.

At the edges of the book block are the colorful sewn headbands whose purpose is strictly decorative. These bands are glued to the block, and end up nestled into the book case spine.

All of these parts are held together with water-soluble PVA glue, applied with a brush as the book block and case are built. It’s an interesting and fun process, but it requires discipline and an acute attention to cleanliness – the PVA cannot get on anything it’s not supposed to touch. This requires the insertion of wax paper sheets into the endpapers while the glue dries (to prevent the book from being glued shut), and against the table top while the case dries (as the PVA glue can seep through the bookbinder’s cloth, and can glue that cloth to the table).

We have all of this stuff on our dining room table at the moment. Stacks of scrap paper sit at the back, book blocks are held between wrapped bricks while the book dries. My wife and I will finish our books today, and I will be “current” in my bookbinding teaching skills. Then next week my students will repeat the process in our lab at school, and I will begin the process of overseeing the construction of many lovely hand-made books.

This is an exciting project for the students, whose finished books (they build three books each) are entered in the annual Publishing Professionals Network scholarship competition (previously called Bookbuilders West). Our students have done exceptionally well in this competition in previous years, winning cash awards in many categories.

I will oozing PVA glue in the coming weeks, and will be working with my talented students to guide them through this ancient craft to make their beautiful volumes. I am looking forward to seeing the results, which is the core of my “Final Exam” for this class. It’s more like a book show than an examination, but I assure you – there is a lot of cramming for the test!

Posted in Art, Bookbinding, Education, Imposition and Pagination, Printing and Printing Processes, Typography | Leave a comment

Things I learned on my recent trip to Chicago

Back from Chicago a full week, I was reviewing my notes last night, and I have a handful of observations to share with you.

This year I wore my fedora, with my Blognosticator “PRESS” card sticking out of it. I realized at the end of the day that I was the only person on the show floor with a fedora. This probably shouldn’t have surprised me, but for some reason it did. I also realized that wearing a fedora is easier than stowing a fedora on an airplane. There is nowhere to put a fedora on an airplane, with all the overhead storage filled by the business Bedouins with their “carry-on” cases. So I left the fedora on my head for most of the flight, and put it in my lap when it became a nuisance.

I have an idea for the airlines: instead of charging for checked baggage, why don’t you charge a fee for carry-on luggage, and let people check one bag for free? That would change the character of flight altogether. With every flight full, and every overhead compartment overflowing, it’s getting downright dangerous on U.S. airliners. Just one small jolt on landing, and someone is going to be killed by a flying carry-on carry-on bag. I have seen the doors on overhead compartments pop open on landing, and it’s not pretty.

I was upset when I read the fine print of my “contract” with United Airlines. It says that I must pay $100 to ship antlers as checked baggage. This really threw me, as I was just getting used to the old $50 fee for antlers. I wish they had made this clear earlier.

While searching Google for antler images, I encountered this bizarre offer: personalized art with your name spelled in antlers! I’m not making this up. Go to simplypersonalized.com to find this rare and wonderful gift for the antler lover in your life!

Smoking, a god-given right to some, is still legal in Chicago. People smoke outside of restaurants while having meals and sipping wine at their outdoor tables. I’m from smoking-is-illegal-almost-everywhere-California, and the presence of cigarette smoke in a place where I was eating was unpleasant. Smoking is illegal in the interior parts of restaurants, and for that I am grateful. I really don’t like cigarette smoke. Chicago needs to add outdoor dining areas to its smoking-prohibited areas.

I was amused, as I walked past the Wrigley Building, that the sidewalks are dotted with chewing gum – lots of it. I wonder if Mr. Wrigley had any sense of his contribution to that problem with urban sidewalk scum. That’s not a Chicago-specific problem; I see it everywhere, and I wonder why people who chew gum cannot dispose of it in a less public way. Steam-cleaning sidewalks is an expensive way to deal with already-chewed gum.

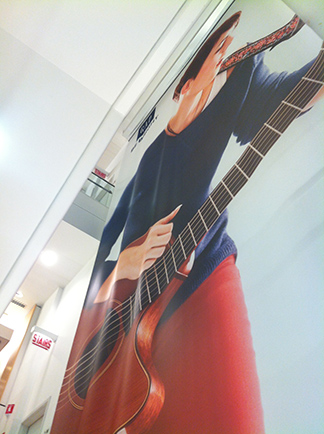
I envy the company that prints the graphics for The Gap store in Chicago. There is an image there that was printed on an ink-jet printer in one piece three stories tall and about 18 feet wide. I imagine this was printed on a grand format machine like the VuTek from EFI. The vinyl material is suspended from the wall above the third floor staircase, and it reaches all the way to the ground floor. What a glorious example of very-large format ink-jet printing! When I look at work like this I think the printing industry is going to get along just fine, as long as there is demand for seamless three-story prints to hang in Gap stores, or antler-themed personalized art.

This is the three-story ink-jet graphic on display at The Gap on Michigan Avenue in Chicago’s Magnificent Mile. I walked up and down the stairs to examine it in detail, searching for seams: it has none.

I love the Blue Line train! What a deal! It allows me to get off of an airplane, and without leaving the terminal, get into a transit train that will take me all the way downtown for less than $4.00. I carried my Chicago CTA card in my wallet for over a year with some money left on it, and I used it to make the trip from O’Hare to Clark & Lake in less than 40 minutes. When I really love the Blue Line is when it goes whizzing past lines of taxicabs stuck in traffic near the airport. If only there was subway service to the Magnificent Mile.

On Sunday, while hiking from my hotel to the Shedd Aquarium, I was approached by a man waving flyers and shouting, “Boycott Bank of America!!” I found this ironic because Bank of America was the sponsor of that day’s fabulously successful Chicago Marathon. I refused his flyer, and explained that I have been boycotting Bank of America since 1970. I’m doing a pretty good job of it too; you can tell that B of A is really suffering because I am not a customer. My feint allowed me to continue on the trek without having to keep, or dispose of his flyer. I wish he had offered me some Wrigley’s gum; at least I know what to do with that when I am finished chewing it.

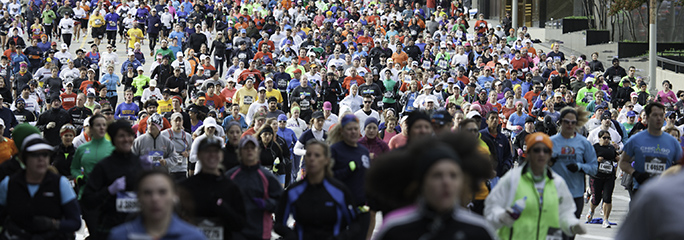
Speaking of the Marathon, I watched and photographed the horde of about 52,000 runners as they passed me near my hotel. In their wake were hundreds of jackets, wind-breakers, sweaters and sweatshirts on the street, dropped by the runners at about mile two as they got warmed. I wondered if they come back to get their discarded garments after running the 26-mile race.

This is a photo of just a few hundred of the 52,000 runners who participated in the Chicago Marathon this year. The winner of the event finished just over two hours later, setting a course record, and making the rest of us feel like useless couch-potatoes.

The Windy City moniker that Chicago has earned was particularly true last week. The usually gorgeous October weather in Chicago had made the left-hand turn it makes every fall, and the temperatures dropped precipitously. I was told by the locals that I should have been there a week earlier; it was 70 last week, they said. It was 38 when I got there, so I bought some new gloves to celebrate the occasion. Nice gloves; I’m not sure what to do with them in the heat wave we are experiencing at home this week.

At the airport on my return to no-smoking California, there was a new sign telling me that if I was born in 1937 or earlier I didn’t have to take off my shoes. That came as a relief, because I was born in 1950, and I just love to take off my shoes at the airport. I use those old fashioned shoes with laces on them, and it’s a joy to take them off and pad through the total-body-scanner in my stocking feet. Elderly terrorists take note: this is your chance!

A week at home has done me some good. It has allowed me to reflect on how much I don’t like air travel (or more correctly, getting through airport security), and how much I like the fall weather in San Luis Obispo. It’s a beautiful morning here, with the temperature pushing 80 degrees at eight in the morning. My commute to school today will take me almost ten minutes on my trusty Specialized bicycle, and once there I will enjoy the company of my wonderful students, eager participants in California’s educational system. Today we will be profiling the Heidelberg press, another source of joy in my life.

I’m glad to be home, yet I look forward to my next trip to Chicago for Print 13 next fall. I already have the gloves in case it gets cold.


Posted in People, Photography, Printing and Printing Processes | Leave a comment

Musings about GraphExpo – the quiet show

My annual GraphExpo journey was, as always, fascinating. GraphExpo, and its companion show, Print, are the big shows for the printing industry in North America. I have been going since the 1970s, and it has been a wild ride for us all over the years.

I mentioned in my Tuesday morning blog that I had attended the press conference/forum for Cabot Corporation where I learned about the new TKS ink-jet press that was installed in Chicago for Newsweb Corporation. That was one of the high points for me.


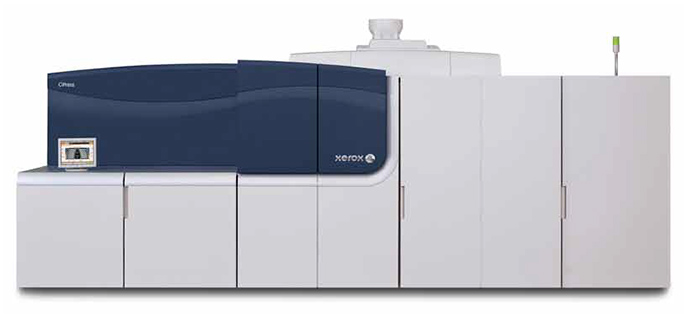
The Xerox CiPress, from their brochure on the machine. In the middle of this behemoth is a massive engine that prints with melted plastic – a process Xerox calls “waterles ink-jet” printing. The press makes a great impression.

The other was to see the elegant new Xerox digital web press called CiPress. This machine uses the melted plastic “crayon” technology developed at the company’s Wilsonville, Oregon research facility (formerly Tektronix). This new press prints roll-to-roll with a 20.5-inch web, both sides, at 500 feet per minute.

The resolution is 600 x 400 spi at that speed, and that resolution can be increased to 600 x 600 if you slow the web speed down a bit. The engineers I met in the Xerox booth were quick to explain the features under the hood, and quick to show me a printed catalog on 20-pound publications grade paper. They claim that an ink-jet web press cannot do that because the water in the ink would cause the web of paper to fail in short order.

What impresses me about this machine is the overall image quality. It surprised me how nicely the device puts halftones on that fragile paper.

Another fact: you can stand next to the machine and have a normal conversation. It’s almost silent, and that is amazing in a world filled with noisy printing presses, binding machines and other devices.

When I first read about the CiPress, I thought it was odd: a melted-crayon inking device (similar to some Xerox-branded office printers that use the same technology) competing against ink-jet presses from HP, Screen, Océ, TKS, KBA, and others? It didn’t make much sense. But, I confess that the proof is in the printing, and this is very good looking printing!

The only thing about the CiPress that isn’t appealing is the price: $3.6 million. And it only prints on one side of the roll! To print both sides, one would need to buy a pair of these machines and run them in tandem. Xerox promises an upgraded version of the CiPress, one with a bender bar in the middle and a method for imaging on the back of the roll at the same speed. For that much money, I hope they print both sides!

Since I am not standing in line to buy one of these machines, it’s relatively unimportant how much it costs. But, in order for mighty Xerox to succeed with this machine, they will have to address both price and the simplex/duplex problem. Beyond that, there is a market out there for this machine.

In the Heidleberg booth was just one press, a 52 cm. Anicolor model which was being used to demonstrate the improved make-ready of that system. The Snellpressenfabrik has been working on the Anicolor system for years, and is now offering it on many of their presses. The claim? With Anicolor, make-ready can be reduced to near-zero. I have seen it work both in Chicago and in Dusseldorf, and it appears to be true. In a world where more and more pressure is being applied to offset printing by competing technologies, reducing make-ready is probably the smartest thing that Heidelberg can do.

That Heidelberg press was the only offset press on the floor of GraphExpo (as far as I was able to see). Think of this in contrast to the years when Heidelberg would have several presses, including a ten-color 40, and down a few booths were four or five gorgeous Komori presses. One year in the not-too-distant past MAN Roland had a 72-inch offset press running on the floor, printing huge maps. It was often so noisy at the show that one could hardly have a conversation.

I thought, as I ascended the escalator on the south end of the building on Tuesday morning, that this year could have been a jewelry show, or a kitchen show. I heard nothing at all as I entered the hall, spare the din of thousands of conversations going on simultaneously. No big machines were running because no big machines were present.

My friend Michael Rodriguez, recently retired from R.R. Donnelley, said that he thought we have turned a corner at GraphExpo. “It’s a different world now,” he said, referring to the new ink-jet and digital devices. He said this about eight feet from the Xerox CiPress, which was running at full speed. I had no difficulty hearing him because this machine makes very little noise when it runs.

About the loudest thing one could hear at the show this year was the canned/live show being put on by Hewlett-Packard in their booth. It was a bit too flashy for my taste, and the canned parts were condescending to the audience.

But, HP’s new, larger Indigo press was there, and it was mighty impressive. This is the press that has changed the complexion of digital printing for the 12 x 18 world – but the new one is twice as large. It’s equivalent to a 74 cm. sheet-fed press, but it uses electroink – HP’s version of toner – to make a mark on paper.

The wide-format ink-jet printers from Epson, Canon and HP were cranking out (though cranking evokes an image of speed, where these machines do not crank) posters of beautiful women and beautiful cars. In the booths of HP, Fuji, Agfa, and EFI, one could see grand-format printers sliding back and forth printing huge graphics. As in recent years, these machines are proving to be the most important area of growth in outdoor advertising, business graphics, signage, and more.

On my way to the airport on Wednesday morning, I counted billboards. There were over 45 (I lost track), and all of them had been printed by ink-jet technology. This is evidence that the world of outdoor advertising has been irrevocably altered by ink-jet printing. I remain dazzled by these machines and by their impact on the printing industry. The screen printers who used to print large graphics, the offset printers who used to print billboards in sections, the billboard painters who used to stand on scaffoldings with brush and easel in-hand – they are all gone now, replaced by large machines that put microscopic droplets of ink onto various substrates.

It’s a brave new world, a quieter one, and a more colorful one.

Posted in Business, Printing and Printing Processes | Leave a comment

A Windy City GigaPan

I just returned from a week in Chicago for GraphExpo, the huge North American trade show for people in the graphic arts industry. I shipped my big tripod and my GigaPan panoramic head to the hotel in advance of my trip so that I could take some panoramic photos while in Chicago. I have done this before, but never with the GigaPan.

On Sunday, October 7, I walked out of my hotel carrying my big tripod and my GigaPan rig, and a full bag of cameras. This was similar to my mountainous treks at home except that I was carrying the complete camera bag. It was my intention to take a taxi to the aquarium, but three taxi drivers refused to take me there, citing the Chicago Marathon as an excuse. Note to self: get in the cab first; they can’t refuse to take a passenger to his destination once the passenger is inside the car.

Being spurned by the cabbies, I walked all the way from my hotel on East Ohio to the aquarium, a distance of 2.65 miles, carrying the tripod on one shoulder or the other, and sometimes carrying it across my shoulders. When I reached the aquarium, I set up on the north side of the lawn, and began my two hour and 28 minute GigaPan experience. The sky was mottled gray, and the light was diffused and soft. These were good conditions for a panoramic photo.

I shot a 360-degree version first, to include the Adler Planetarium and the breakwater, and as I completed that one, the sky cleared to reveal a beautiful sunny day. So, I made a second panorama of just the Chicago skyline. I was shooting for a total of three hours and ten minutes, for a total of slightly more than 2,000 images.

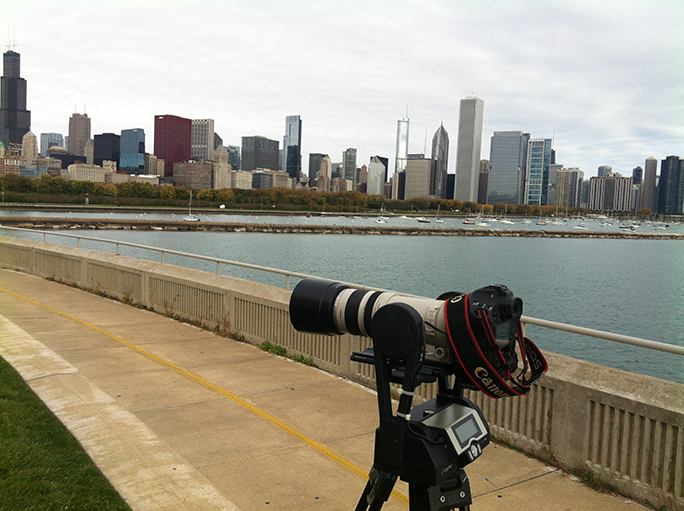
The GigaPan and tripod on the north edge of the Shedd Aquarium lawn. The view of the city of Chicago is spectacular here.

At hour two I was approached by two curious and courteous security guards who wanted to know what I was doing, and if I had “run this by anyone” at the aquarium (two of my tripod legs were on Shedd Aquarium property). I told them I had not run it by anyone, and that I was making a panorama of the cityscape in front of us. Then why, they wondered, was the camera pointing at the Shedd Aquarium building? It was down to the last 200 shots at that point, taking photos of the way-too-close stone wall and windows of the aquarium. I explained that it was a 360-degree image, and that it was finishing the back side of the photo at that point. I’m not sure my explanation made any sense. They looked at my ID, and they left, as courteously as they had arrived.

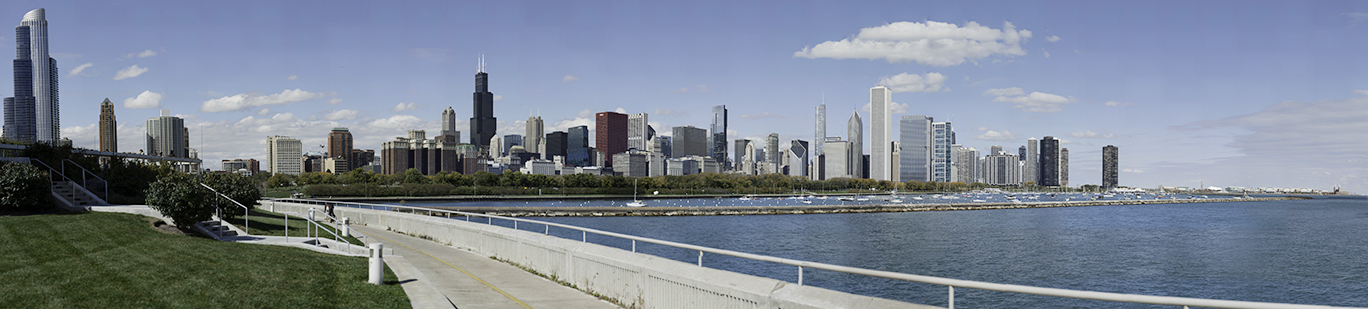
This is my clear sky version of the Chicago cityscape GigaPan. The full-resolution file is over 14 GB, and it has incredible resolution. Click on the image for a larger version. When it comes time to print this one, it can be reproduced at over 38 feet in width at 300 ppi resolution.

It was a chilly morning on Lake Michigan, with bitter winds blowing from the west across the lakeshore and over to the aquarium lawn where I stood. I was pretty well dressed, but standing still for over three hours in that wind was starting to take a toll on me. I was counting down to zero as my camera finally made the last shots to the north across the lake to the Navy Pier in the distance. When it was finished I packed it up and made my way quickly to the driveway of the building on the south side, and got into a cab before telling the driver where I wanted to go. The return trip to my hotel was uneventful; Lake Shore Drive was open (it had been all morning, despite what the other cabbies asserted) and I was back in my hotel in minutes.

I changed into my trade show garb and zoomed off again in the opposite direction to McCormick Place, and spent the next few hours manning the Cal Poly booth with my colleagues.

That evening, after transferring the thousands of images to my MacBook Air, I rested. I waited until tonight, Thursday, to put them into the GigaPan Stitch software on my desktop computer at home. It just didn’t make sense for me to process the images while staying in a hotel room. GigaPan Stitch software takes hours to run, and I didn’t need to add that burden to my journey to the Windy City.

I’m glad I stayed the extra half hour and took the second partial panorama. It turned out very nicely. The light is even, and the blue sky is lovely, dotted by just a few clouds that add a lot to the image.

This view of Chicago is simply gorgeous.

Posted in Art, Panoramic Photography, Photography | 2 Comments

A new ink-jet news press debuts in Chicago

In the Four Seasons hotel in Chicago last night I attended an interesting panel discussion on ink-jet printing of newspapers.

The event was hosted by Cabot, an international manufacturer of the components of ink. They make, among other things, carbon black, which becomes the primary constituent of printing ink, and is also used in the manufacture of tires and other rubber products. Apparently carbon black adds strength to rubber, and obviously it provides color to ink. The panel was moderated by Jim Hamilton of InfoTrends.

The occasion of the panel discussion was the first installation of a TKS ink-jet press in America. That machine has been installed in Chicago at a plant called Newsweb Corporation, a company that prints over 100 newspapers here. The TKS press is made in Tokyo, Japan, and this particular one was on display at DRUPA in Germany earlier this year.

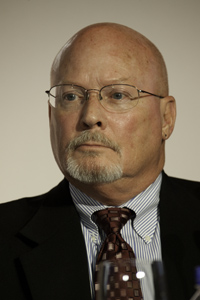
Rodd Winscott, President of Newsweb Corporation in Chicago.

The panel included Rodd Winscott, the President of Newsweb Corporation, who talked about the installation and the use of the press, which has been running for only one week in his plant. In addition to “hundreds” of offset publications, his firm prints about 30 non-English language newspapers, papers which are run in fairly short editions. According to Mr. Winscott, the new press is a perfect match for his firm’s need to print these short runs. He credited the TKS press with having essentially no make-ready, no change-over, no plates, and tremendous efficiency.

The TKS press, called the Jet Leader, has the ability to print every copy of a newspaper with different copy and photos on the sheet – a full variable-data newspaper. And, the simpler task of queueing up a number of short=run publications is the perfect use for this new machine. The Jet Leader can print in sections, and collate papers in-line, producing a traditional looking paper on the press. That, combined with the ability to control the cut-off length, makes the press quite versatile.

Without plates, the time to make plates, and the time to shut down one paper, and set up for the next, Newsweb’s new press is poised to be a more efficient producer of news publications at the Chicago plant.

Oliver Baar, Project Manager for Development of Digital Presses at KBA

Another member of the panel, Oliver Baar, of KBA, Germany, spoke of the value that new ink-jet news presses bring to the market. His company will be shipping a new ink-jet press, built in collaboration with R.R. Donnelley. That press, called the RotoJet, shares many of the same capabilities of the TKS machine. Mr. Baar pointed out that the new ink-jet presses allow for printers to change their production philosophy from title-centric publishing – printing an entire edition of one newspaper at a time, to a shipping-centric production model. With the shipping-centric model, a printer could print an adequate number of titles of various newspapers on an ink-jet press based on the distance the delivery trucks need to travel. Getting the papers printed in any quantity and in any order would allow the truck traveling to the most distant distribution point to leave the plant first. Then production of the next-most-distant point could take place. Mr. Baar referred to this capability as a “flying job change.”

Because there is no change-over between publications, the press can print one copy, then change to the next publication, and print one copy, and so on, in any combination. It would be possible under this model to print any partial run of any publication in any order to fill a truck and get it on the road in the most efficient manner.

Newsweb’s week-long experience with their new TKS press shows that this can work. They printed a number of newspapers this week, with only one newspaper wasted in change-over (to underscore this comment, that is exactly one copy). That’s quite an accomplishment for a printer with many years of offset experience. Mr. Winscott said that on his traditional web presses, a change-over can take as long as an hour, including the time it takes to make numerous printing plates, to change those plates, and to complete the make-ready for the next publication. By contrast, the ink-jet press stops printing one paper, and begins on the next impression with no waste between jobs.

I was impressed by the optimism that the speakers had in discussing the reality of ink-jet press capabilities, and the near-term future of these very new machines.

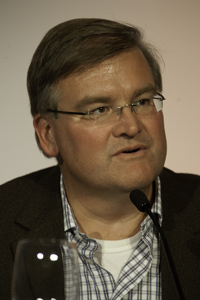
Paul Cousineau of Dow Jones

Paul Cousineau, Vice President for Prepress and Continuous Improvement at Dow Jones, spoke about his company’s quest to use ink-jet presses in their smaller market regions to print the Wall Street Journal and other publications. He made a point about how his firm has searched for the right combination of technology and suppliers who can put an ink-jet press into operation, and divorce the machinery from the supply charges. He commented that several of the other ink-jet production press makers (and I assume his was talking about Screen, Océ, Hewlett-Packard and others) want to sell ink at per-page prices and to charge “click-charges” for the operation of industrial-scale printing machines.

Both TKS and KBA will be installing their machines without supply tie-ins or these click charges.

Mr. Winscott siad his firm was unwilling to purchase a printing press from a manufacturer with a requirement that his company buy ink from them, or to pay per-page fees.

Mike Shafer of TKS

Also on the panel was Mike Shafer, Director of Sales and Marketing for TKS. His company took the approach of making a newspaper press like an offset press, one that has variable cut-off, the ability to gather printed pages into signatures, and to fold and deliver a finished newspaper that both looks and feels like a conventional paper. His company makes offset news presses with the ability to do all of these things. Changing the press to an ink-jet device meant only the imaging components had to be engineered and built. The other components were supplied by those divisions of TKS that were already making them for conventional presses. The TKS press is sold without string attached; the buyer is free to purchase ink from any qualified supplier, and there are no click-charges for running the press.

I have not had a chance to visit the Newsweb plant in Chicago, but I plan to visit as soon as I can make arrangements to do so. I look forward to seeing the new machine in operation. In the short term, I came away from the panel discussion last night with the knowledge that our industry has accepted ink-jet technology in a big way, and the presence of a working news press that uses ink-jet technology is the first step in an exciting future for the industry.

It’s no longer just talk – this press is in full production.

Posted in Business, New technology, People, Printing and Printing Processes | 1 Comment

Meadows Software releases a clever QR Code generator for Adobe InDesign


Variable-data software publisher Meadows Publishing Solutions has developed a new plug-in for Adobe InDesign that makes QR codes inside any text box in that application. The product can make three different types of bar codes: QR, Data Matrix and PDF 417.

Meadows is offering the QR code plug-in module free for a limited time for people to test in InDesign. I downloaded and installed the plug-in, and I am impressed to see that Meadows is making these QR codes with a type font, rather than attempting to render them as vector or raster graphics.

I built this page in Adobe InDesign, and inserted the QR code in the middle of the text in a text box. To make the code, you create a text box, then type your copy into the Meadows software dialog box, and it generates the code on your page. It takes about 0.7 heartbeats to complete.

The plug-in is designed to be used with the company’s Design Merge Pro software, or its AutoPrice software. When combined with Design Merge, the QR code generator can make variable-data QR codes, each one personalized to the recipient.

In a video on the company’s web site, the code generator is demonstrated making codes for Personalized URLs, each one specific to a recipient, and each one colored to match the color of the accompanying document. I am a QR code junkie, and I have made many of them using online tools that generate the codes as PNG files. What impresses me most about the Meadows offering is that the company has made a special font, called IDAutomation2D, that draws the codes inside of InDesign.

As a result of using a font to render the codes, these QR codes are razor-sharp, and can be scaled easily without damage, something that is not true of any raster-based images of QR codes. I tested a few for The Blognosticator blog site, and read them with a dozen iPhone bar code readers that I have. On most of the bar code readers I was successful immediately. A few of my readers did not interpret the codes correctly. I write this off to the reader, not the code.

The free plug-in is limited to making QR codes. The full version of the Bar Code Generator from Meadows includes the ability to make Data Matrix codes, which are similar to QRs, and PDF 417 codes, which are commonly used by delivery companies to mark packages with addressee information. Not related to Adobe PDF, the PDF 417 bar code uses four bars and spaces in 17 unit-wide codes. These codes look like a cascade of pixels.

These are the glyphs in the Meadows IDAutomation2D font. It has only as many glyphs as are necessary to draw QR, PDF 417 and DataMatrix codes. The results of using this font are excellent.

Looking at the IDAutomation2D font, I discovered that Meadows is making all of the possible QR code components with just 22 characters. This shouldn’t be a surprise, as the QR code is made up of a small number of potential patterns. The font also includes the characters used by Meadows to draw the PDF 417 codes, which include narrower guard bars on the ends to define the code.


Meadows will be demonstrating their Design Merge software, and the new Bar Code generator, at Graph Expo this next week in Chicago. I commend them for this innovative implementation of bar code rendering.

_____

Join me at GraphExpo for several presentations:

Saturday, October 6 • GraphExpo conferences
1:00 pm-4:00 p.m.
PDF File Preparation for Success in Color Printing
You can save $50 on your registration by using the special discount code: SAVE50

Tuesday, October 9 • Print Buyers International
10:00 – 11:00 a.m.
Implementing Color Management in a Day to Day Production Work Flow

Tuesday, October 9 • Print Buyers International
10:00 – 11:00 a.m.
How to Prepare a PDF That is really ready to print


Posted in Business, Printing and Printing Processes, Software, Typography | 2 Comments

…another cheese sandwich and a GigaPan photo

It turns out that tying the camera to the GigaPan mount wasn’t adequate to make a successful panorama. So, even though I thought I could fix everything by straightening the horizons of 858 photos using the Image Processor and an Action in Photoshop, it did not solve the problem (though the technique is still valuable for those with a large number of images that need correction).

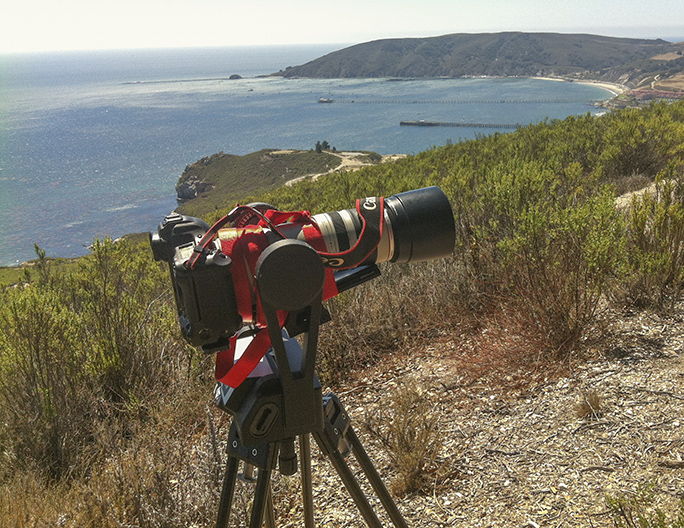
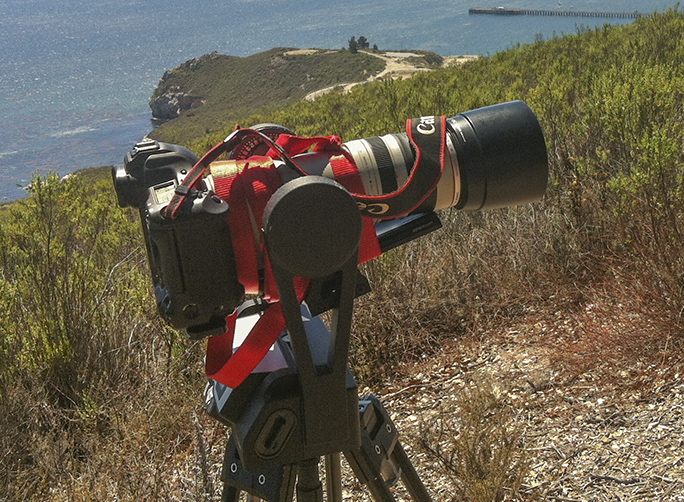
Here is my Canon camera and lens tied to the GigaPan mount. This didn’t work very well.

The camera must have moved inconsistently on the mount as it traveled through its rows and columns of images. The second stitch was almost as bad as the first, and equally unacceptable in the end. So I threw the whole thing away and hiked up to the top of the ridge again to do it over.

This time I tried focaccia for my sandwich, from a different deli. The hike up to the ridge was easier, even though I was carrying two tripods and two cameras. I will never understand my body and its abilities. The second camera and its carbon fiber tripod were light, and the hike isn’t that difficult, so I got up there, took 850-plus photos, then hiked back down, all in about two hours and 15 minutes.

The GigaPan image of San Luis Obispo Bay from Sycamore Crest. On the left in the distance is Pismo Beach, left-center distance is Point Sal in Santa Barbara County, and on the right is the town of Avila Beach with its three piers. You can see a larger version of this by clicking on the image, or go to GigaPan’s web site and see the ultra-high resolution version. In the far distance is China.

My objective was to test whether a GigaPan could/should be shot with the lens set to autofocus. In the GigaPan manual, they recommend fixed focus, and I have made all of my GigaPan images so far with fixed focus. But there is mention of autofocus in the GigaPan manual, and I thought that I would take two: one with fixed focus, and a second with autofocus turned on. Once I finished the first complete set of images with fixed-focus, I turned on autofocus and started a second round. It didn’t work, and it was obvious immediately. The autofocus did well when there was something in the foreground or middle distance, but the camera couldn’t get a fix on the blue sky, and I noticed immediately that it wasn’t shooting because it couldn’t focus. I stopped it as soon as I noticed this, then packed up and hiked back down the hill.

I checked that off my list of things to try.

I was shooting with my Canon 1ds Mark III body and my 100-400 Canon lens at the 400 mm end of its zoom. I focused carefully on the most-distant object I wanted in the image, set the exposure to give me maximum depth-of-field at f22, and then made the first set of images. This time I shot with 11 images in each column, 53 rows total. It is little shorter than the image I attempted to make a few days ago.

While the camera was shooting, merrily moving and clicking along, I savored my sandwich and a large part of my water. I sat in the shade of a well-placed Quercus Agrifolia just uphill from my perch atop the ridge line. A few people were hiking the trail behind me, and a some stopped to chat and ask what I was doing. I explained that I am shooting hundreds of photos to be stitched into GigaPans, and that my objective is to document the region from its various mountaintops. Everyone was interested in the camera, moving and clicking.

The images resulted in a lovely panoramic photo. There was a little more haze on the second day, and a fog layer in the extreme distance, but it won’t hurt because the ocean and the bay before me were as smooth as glass. A passing motorboat made a wake at one point, but otherwise the water was nearly still, and exceptionally beautiful. It was worth the hike to get back up there and take the photos correctly.

While stitching the photo, I encountered a problem that I have not encountered in my previous GigaPan images. After the stitching process was finished, and after I uploaded the image to GigaPan’s web site, I attempted to save the file as a Photoshop Raw image (the only format that will support an image of this size). After thinking for a while – about an hour – I received a dialog indicating that an unknown error had prevented the GigaPan Stitch software from saving the file. I tried saving the image as a TIFF, but that wouldn’t work because the image is too big for TIFF. So I canceled, and gave up.

The next morning I tried the whole process again, stitching the image over again and attempting to save it as a Photoshop Raw file. No go. I cancelled another time and set the job aside for a few days. Today I tried it again, and this time I tried a feature I have not attempted before, that being the stitch at half-size function in GigaPan Stitch. When finished, I saved it to my computer again, and I succeeded. I guess I will never know what caused the full-resolution image to fail.

Click here to see a time-lapse movie of the GigaPan mount moving my camera.

This afternoon I am returning to the plaza in front of Mission San Luis Obispo de Tolosa to make a second pass as a GigaPan in a populated situation. One I made in June was odd because of the bits and pieces of people captured by the camera as they – and it – moved around to take the photos. Results of that experiment will be posted here in the coming days.


Join me in Chicago at GraphExpo!
1:00 pm-4:00 pm, Saturday, October 6
for my seminar: PDF File Preparation for Success in Color Printing

You can save $50 on your registration by using the special discount code: SAVE50

Posted in Panoramic Photography, Photography, Photoshop techniques | Leave a comment

Tying one (camera) on to the GigaPan rig

Blognosticator graphic

Yesterday, my friend Sophie Nuber and I hiked to the top of a hill overlooking San Luis Obispo Bay, near my home. The climb was tough for me because: 1) I am old, and 2) I was carrying the tripod, the GigaPan unit, a large cheese sandwich, 2 liters of water and my Canon camera – a total of about 40 lbs. of gear. This gear was recently lightened by my discovery (duh!) that I didn’t need the fluid head on the tripod when making GigaPan images. So I removed the fluid head (about six pounds) and replaced it with a simple 75mm ball socket base on the GigaPan itself. I’m surprised it took me so long to figure that out.

At the top of the hill I set up for the photo only to discover that I had failed to bring the dumb little tripod adapter that attaches the lens to the GigaPan bracket. I wasn’t about to go back down to get it; that would have taken an hour, and I didn’t have the energy to do it again. Sophie suggested that I use the strap from the backpack to hold the camera to the mount. That turned out to be a great idea, and soon the problem was solved. The Canon and its 100-400mm lens were solidly (?) attached to the bracket and I started the panoramic image with the GigaPan device.

The red strap is from my backpack. I used it to hold the camera to the mount, just a little bit crooked.

This particular photo is going to be nice because it includes more than 180 degrees of the vista from the hilltop, called Sycamore Ridge, and three piers that go out into the bay. A couple of days earlier I might have captured a couple of humpback whales that were visiting, but yesterday there was no evidence of them.

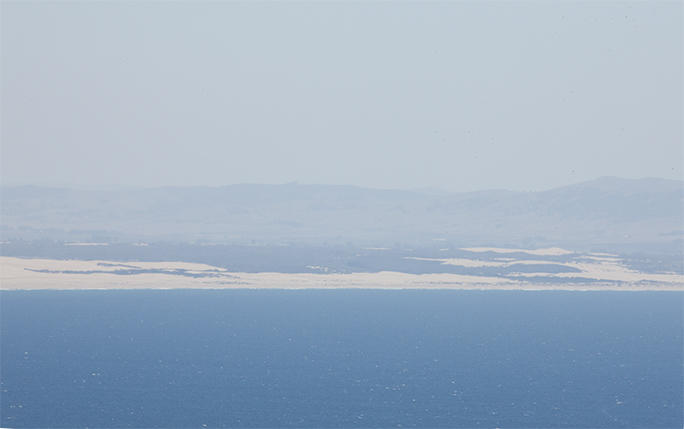
There is an additional pier that will be visible in the finished panoramic image, that one being the pier at Pismo Beach, which is in the photo in the slightly hazy distance. Also visible in the photo is the beautiful Pismo Beach sand dune area, a huge stretch of white sand that goes from the city of Pismo Beach for several miles all the way into Santa Barbara County to Point Sal, just north of Vandenberg Air Force Base.

The GigaPan calculated that I needed 858 photos – 66 columns of 13 rows of images. It took about an hour to make the necessary shots.

What I failed to notice was that the camera and lens were slightly off-keel on the horizon, about 2.4 degrees off, a result of my strapping the camera to the mount a little bit awry. This meant that I took all 858 photos a tiny bit off-axis.

Of course this was obvious in the images as I transferred them from the memory cards to the computer, but I assumed that the GigaPan Stitch software could correct for this. PTGUI, the other stitching program I use, can correct for horizontal axis errors. Hours later, when the GigaPan Stitch software was finished, it was obvious that it cannot correct for that much horizon error. My piers were chopped-up into zig-zag lines, the hilltops in the distance were inconsistent and broken. My GigaPan was a no-go. A disaster.

My options were to fix it using software or to hike back up there and do it again. This, of course, would require another cheese sandwich.

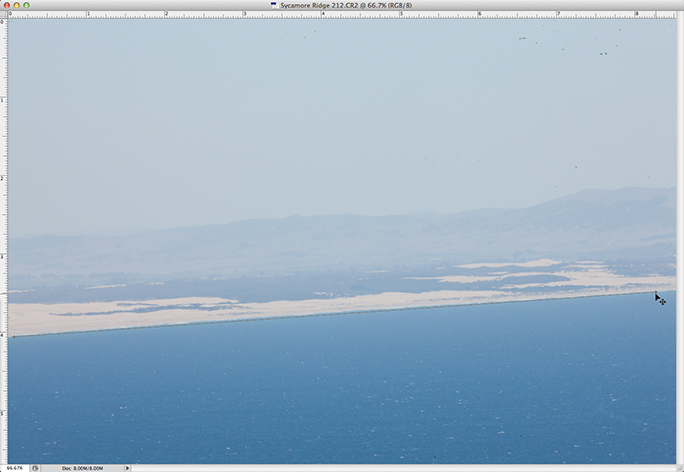
So instead of heading over to the deli, I decided to try it with software. I made an Action in Photoshop, one which straightens the horizon of a photo by the necessary 2.4 degrees (as measured with Photoshop’s Ruler tool). (In Photoshop CS6 there is a also minor change to the Straighten command that I will discuss in a future blog.)

This is one of the 858 crooked photos. You can just see Photoshop’s Ruler tool ending on the right edge. To use that tool, you draw a line where you want the horizon to be, then click on the Straighten button at the top. This image shows some of the beautiful sand dunes south of Pismo Beach, California.

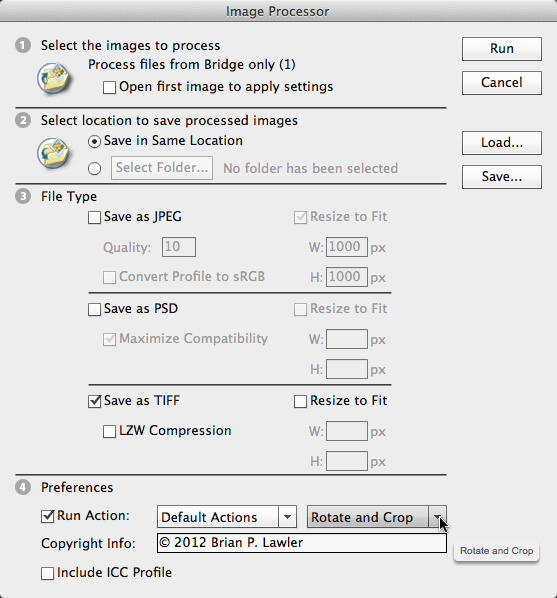
The straightened image has a perfectly level horizon, and still has enough overlap with the adjacent images to make a panoramic image in GigaPan Stitch. I recorded this horizon correction as an Action in Adobe Photoshop, then applied it with the Image Processor, which converted the images from Camera Raw to TIFF at the same time.

Once this Action was built and saved, I tested it on a few images to ensure that it worked correctly, and then I instructed the Image Processor to straighten the horizons of all 858 images from yesterday’s hilltop photo. GigaPan Stitch requires photos to be in either TIFF or JPEG for processing, so I had the Image Processor make that conversion (from Camera Raw) at the same time. It took over an hour to run all 858 images through the process, but it worked fine, resulting in those images being straight, and in TIFF format, ready for the GigaPan stitching program.

That program is running now on the newly-processed images, and it takes a long time. I will post an example of that image once it’s complete.

Posted in Panoramic Photography, Photography, Photoshop techniques | Leave a comment

The idea of a “mirrorless” camera – good and bad

I have a very nice Canon professional camera. I love it. But it’s really noisy when the shutter is activated. It makes a clop-snap sound that is sometimes unacceptable to the circumstances. When I was photographing the Festival Mozaic concerts last week it was unacceptable. I have a few strategies for dealing with this. One is to wrap the camera and lens in a sweater, which helps quite a bit. Another is to shoot only in the fortissimo parts, which is even harder because you have to anticipate these and not goof.

Sony has pioneered a number of professional cameras that are correctly called mirrorless SLR cameras. They use a partly-reflective mirror that remains in place in front of the image sensor, and does not move for exposure. This, of course, takes a small toll on the amount of light that strikes the sensor, but with the sensitivity of sensors these days, it’s probably unimportant (except in very low light).

Nikon and others have come to market with “mirrorless” cameras in the last year, and these seem to be successful. They take good photos, and they are perhaps mis-named. Canon announced their first “mirrorless” camera last week, a camera that looks an awful lot like one of their point-and-shoot cameras, but with interchangeable lenses, and the ability to accept almost all of the company’s pro lenses.

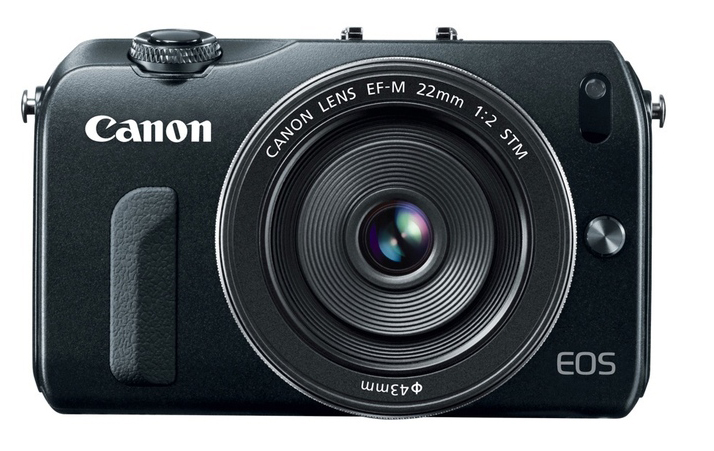
Canon’s EOS-M “mirrorless” camera looks more like a point-and-shoot than a pro camera, and it is. But it is a silent, 17+ megapixel camera that accepts most Canon lenses.

At first I thought, “what the heck, all point-and-shoot cameras are mirrorless,” and in fact this one is a 2/3 size sensor camera body without a pentaprism viewfinder. The camera uses an LCD viewfinder on the back and has no optical viewfinder at all. Canon and others argue that this constitutes “mirrorless” and I am loathe to disagree. But I want an optical viewfinder.

The benefit of such a camera would be its silence – no mirror slapping and no shutter curtain snapping. The problem with a camera that has no optical viewfinder is that I can’t use them to compose photos very well. I have tried with my Canon T2i camera, and it’s extremely difficult for me. In daylight I can’t see the viewfinder well enough to focus, and that is the greatest weakness of this new camera from Canon. At the Bonneville Salt Flats two years back I tried, fruitlessly, to photograph race cars with the T2i in broad daylight. I couldn’t see a thing on the viewfinder, so I built a cardboard viewfinder-extender and taped it to the back of the camera. This provided me with a bit better view of things, but it was still nearly impossible.

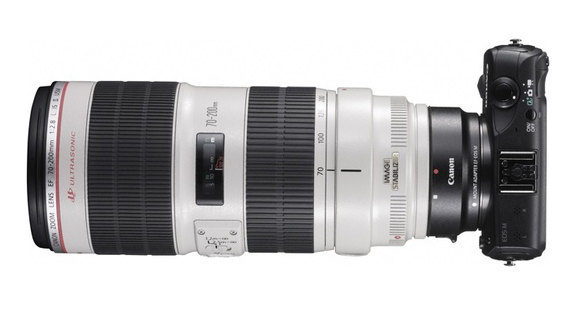
The newly-announced Canon EOS-M camera fitted with the Canon 70-200 mm f2.8 zoom lens. The idea of putting a large professional lens on a camera like this intrigues me. It would make classical music concert photography much more practical because of its silence.

A benefit is that the lenses that I already own will work on this new camera (with an optional lens mount adapter), and I welcome that. I would buy one just to use for photography at concerts with one of my long lenses. Such a camera would be a delightful alternative to shooting with my noisy 1ds Mark III camera.

From the top-down, the same camera and lens combination shows the optional lens mount adapter on the camera that allows the big lenses to be mounted on the new camera.

I would welcome some version of a true mirrorless SLR from Canon, one without a mirror that moves out of the way for the photos to be taken. In the short term, the new mirrorless camera from Canon will make a difference to me. Maybe I will join the ranks of zillions who have pre-ordered the new camera from Canon.

Posted in New technology, People, Photography | Leave a comment