

I have now digitized over 2,000 photos from film, mostly 35mm color slides. It has been fun, and relatively easy.
My system is holding up well. The archiving envelopes are working well enough, and the small corrugated boxes that I bought for 35mm slide storage are great. I can fit just under 200 slides in a single box, and each box takes up a lot less space than a binder with plastic divider sheets carrying the same number of slides. That part is working well.
Digitizing color negatives hasn’t been much of my work load, as I was never much of a color negative user when I was shooting film. That’s not to say I don’t have color negatives, I do. But I haven’t found any binders in the cabinets yet that hold negative film. I have thousands of snapshots, accompanied by 35mm color negative film strips, but I am leaving those for later.
Digitizing 120 size film is not as easy as digitizing slides, as feeding the film strips into the Negative Supply Basic 120 film transport is imperfect. It’s very easy to slide the film below the tiny slot opening that is intended to be the place where the film goes. This could be much better engineered. Also, the 120 size film doesn’t fit into a No. 10 envelope in strips of four frames (most of my 120 film is in these strips, as these were fit into plastic binder sheets designed for four frames-per-strip). I found another corrugated carton that can hold my 120 x 4 and 70mm x 4 strips. These should do the job. With these cartons I will have two standard storage boxes for film: one for slides and one for strips of 120 and 70mm film.
I did not purchase the 70mm film transport accessories made by Negative Supply. I’m doing my first full album of 120 size film first.
One thing is for certain: feeding fewer than three frames of 120 film into the Negative Supply holder is a mistake. Short strips (2 or fewer) get lost in there, and there is no easy way to get them out. Negative Supply does not make a film holder for individual unmounted 120 size frames. I need to digitize short strips of 120 and 70mm film, often just single frames that were cut from longer rolls.
So (of course) I decided to make my own film holder! This would be an opportunity to test my growing skills as an Autodesk Fusion practitioner, and would allow me to ask my friend Bryn to manufacture it for me on his 3D printer! I could have machined it out of aluminum on my CNC machine, but that machine is in storage while my building is being completed – and it will be a few months before that is back up and running.
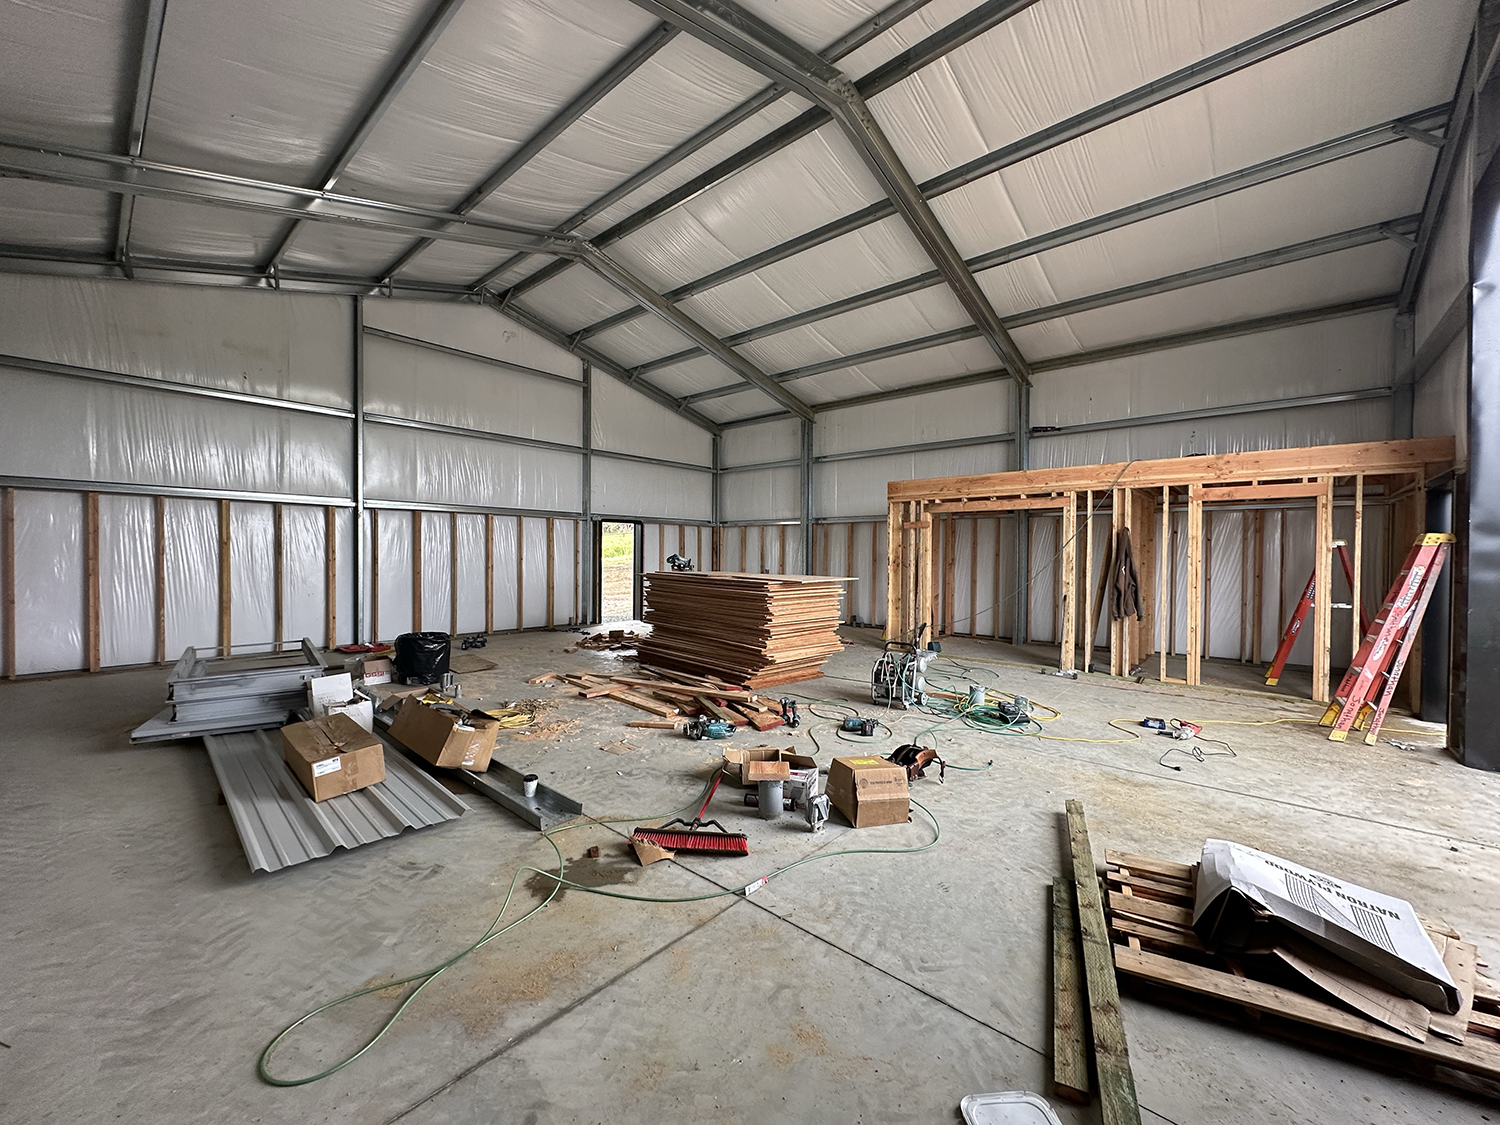
Progress! This is my new shop taking shape. It’s still a couple of months from completion, so not ready for me to be building things yet.
My plan was to make a plate that will fit precisely inside the Negative Supply light source, and allow me to slide four-frame strips of film through it by hand. I decided to start with a holder for 70mm film, as I have thousands of frames of that size to digitize. If it works well, then I will ask Bryn to print one for 120 size. I suppose I could even make a similar holder for 35mm film. We’ll see.
70mm film is exactly 70mm wide, and has sprockets along both edges (the sprockets are the same as those on 35mm film). This is the film size that is used to make IMAX movies. I wrote about my affair with 70mm film in another post. I shot this film for years using my Hasselblad 500 ELM camera with a 70mm film back on it. That allowed me to shoot about 70 frames per roll, and I loved that.
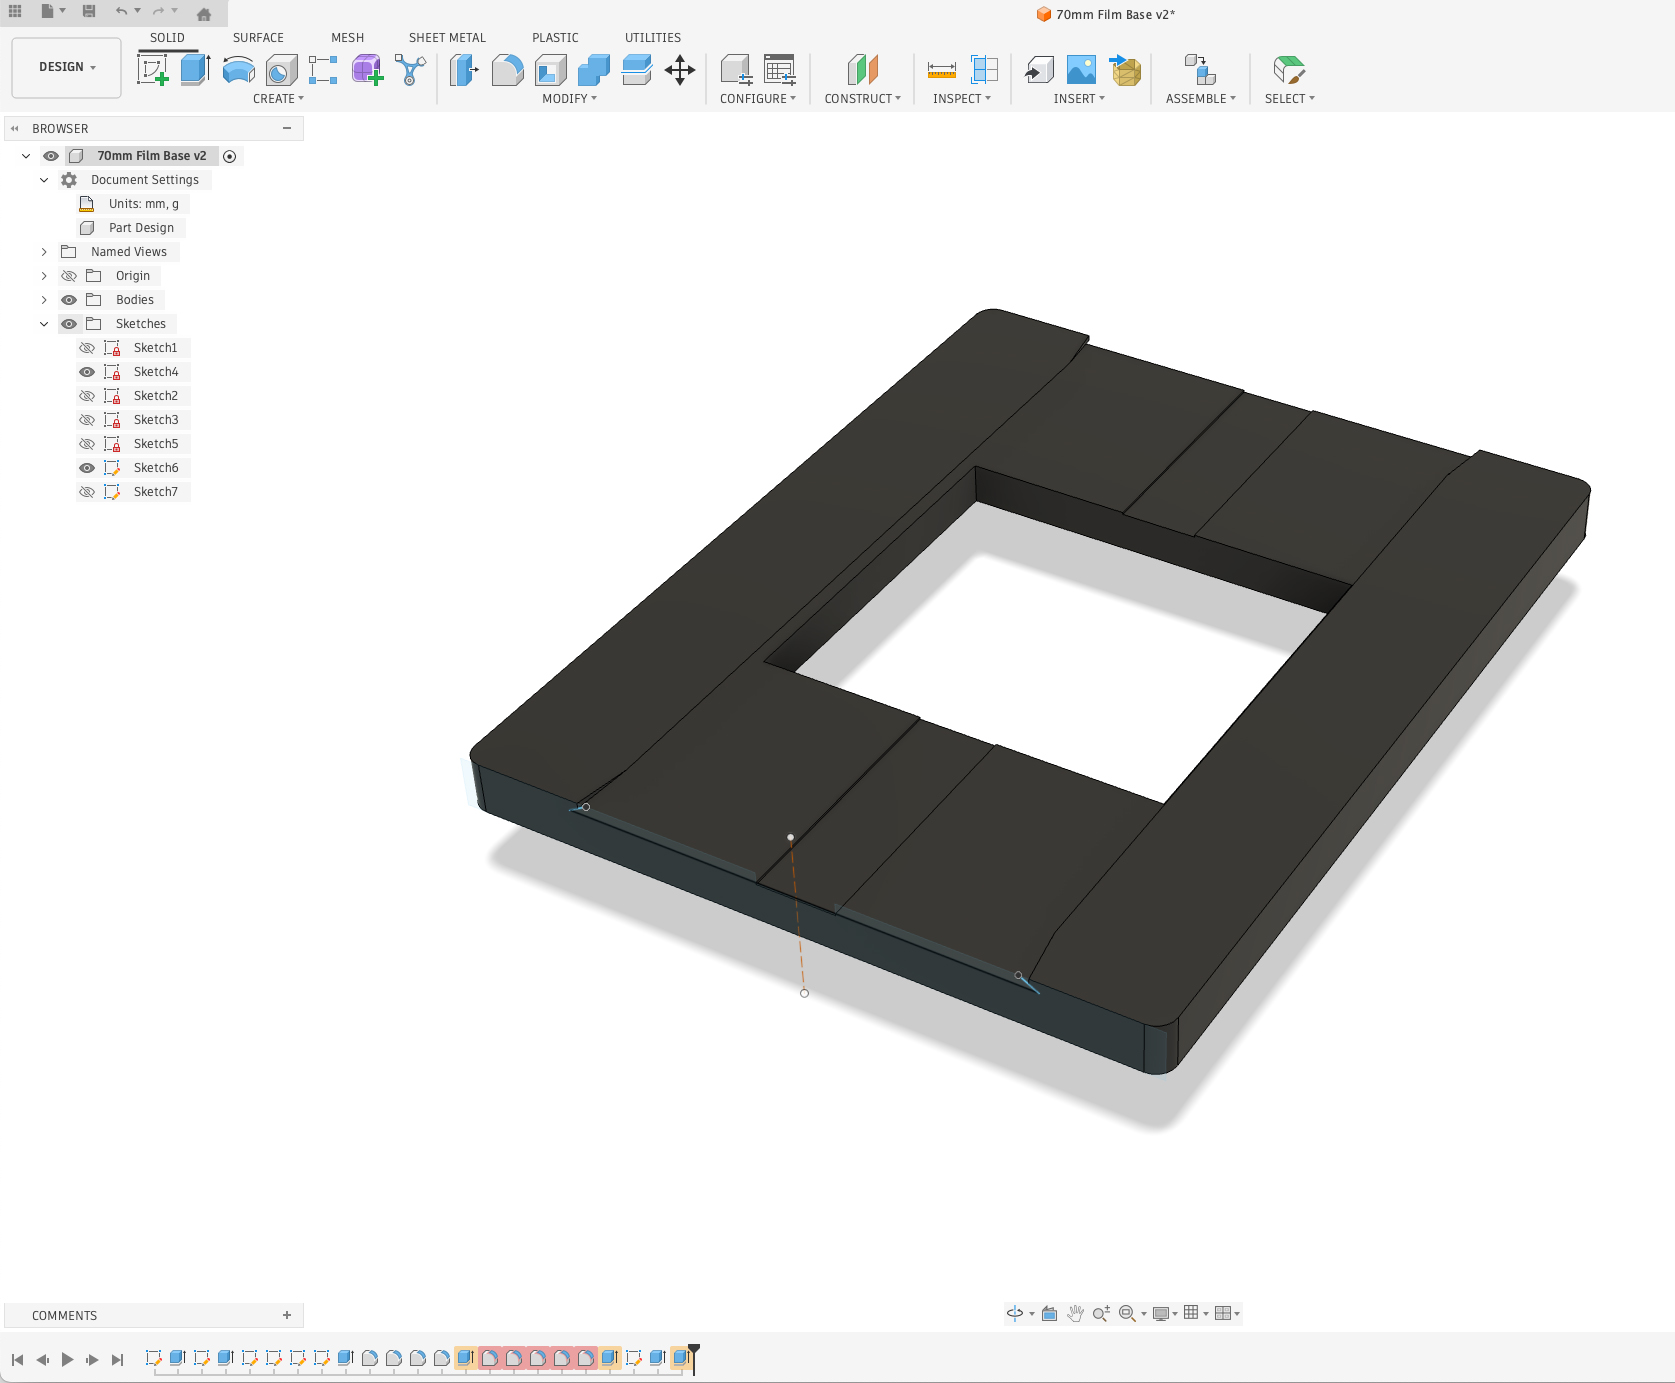
This is my Autodesk Fusion screen with the 70mm film carrier shown. It’s a very simple device that allows me to digitize short strips – or individual frames – with my copy stand system.
The image area of my 70mm frames is exactly the same as a Hasselblad 120 size film frame: 56mm square. And, a telltale: all Hasselblad cameras expose two tiny triangles along the left edge of every frame. These are helpful in orienting the film, and knowing which side is up. 120 size film is just under 62mm wide. I looked it up on Wikipedia to learn that 120 film is not precisely made. The size varies from between 60.7 mm and 61.7mm (that’s really dumb!).
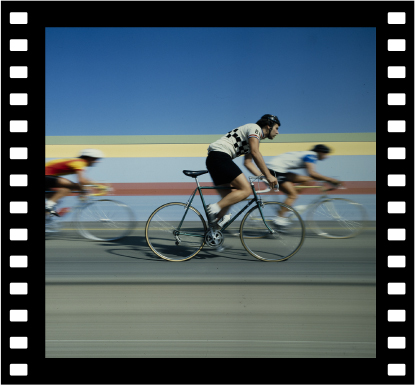
This is a typical frame of 70mm film from the Hasselblad. The film itself is 70mm wide, and the image is the same size as a 120 or 220 size frame: 56mm.
My new film bracket is 8mm tall, which will put its top edge above the recess on the light source. I designed a dovetail into the horizontal track to retain the film and to keep it flat. The aperture for the image is exactly 56mm square. I designed my lateral opening to be a little larger, 63mm, so that I will photograph about one-third of the sprocket holes along both edges.
I will be able to feed a single frame, or strips of 70mm film into the bracket and slide them along under the dovetail edges as I digitize the images. I incorporated a shallow channel down the center to allow a fingernail to push a frame of film through the plate.
Fusion has taken me months to learn, and I am barely literate with that software now. I am awed by its capabilities, but have brought only one other project to completion in that application (I’ll tell you about that project when the finished part arrives in my mailbox in a few weeks).
I have focused my Fusion training so far on CNC machining, so this project opened my eyes to another technique – 3D printing, and that has different requirements. Fortunately, my friend Bryn has tutored me on those requirements to the degree that I can be successful with this part. The only worry I had was the dovetails, which create an unsupported edge in the bracket. With 3D printing, unsupported surfaces can collapse because the machine is injecting molten plastic into space with nothing under it to keep it from collapsing. Bryn and I think that these dovetails are so small as to pass the unsupported test without failing, but again, we’ll see.
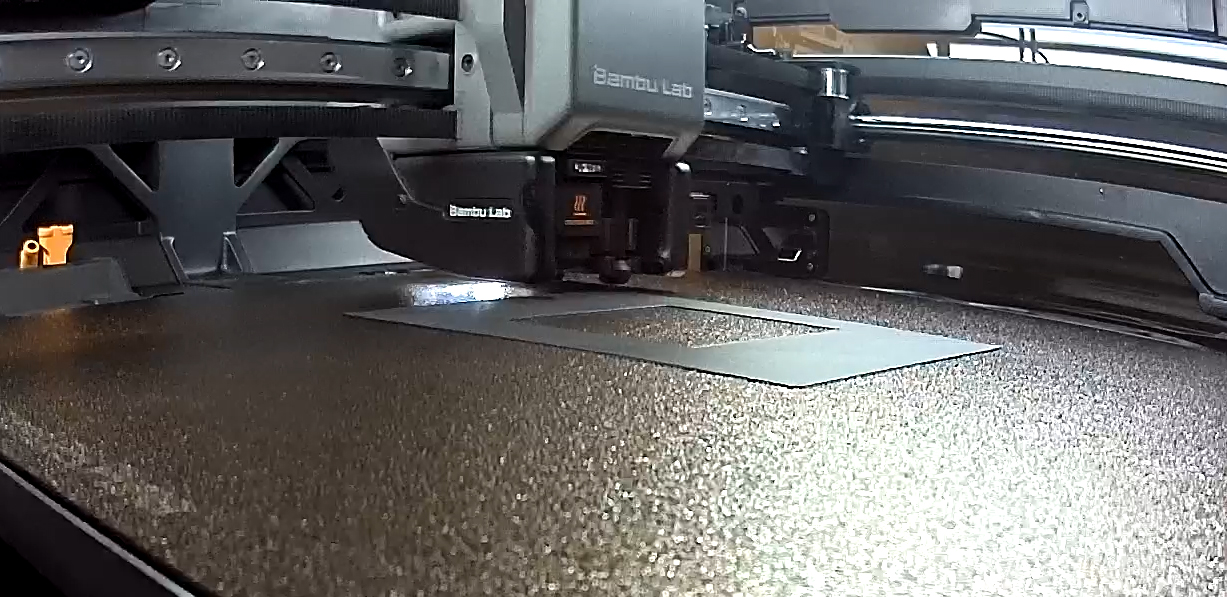
This is my 70mm film bracket being made inside the Bambu 3D printer. There is a built-in progress camera in that machine that automatically makes time-lapse movies of your creations.
It took the Bambu 3D printer just under an hour to print the part, using 14 grams of filament. It turned out that our concerns about the unsupported edges were unsupported. The 3D printer filament was adequately supported, and didn’t collapse.
I brought the plate home and put a strip of 70mm film into the opening. It didn’t sit perfectly flat, instead bowing upward, indicating that the width of my dovetail tunnel was slightly too narrow.
I went back into Fusion, chose the sketch for that element in my design, added 0.75mm to the dovetail, then exported a new version in .STL format and e-mailed that to Bryn. Just an hour later he told me it was printed!
Version 2.0 was dramatically better, but still a teensy bit (a scientific term, similar to a scosh) too narrow. So, again, I added 0.5mm width to the opening for the film and exported another .STL file. I am very close. I feel as though I should have been able to measure and correct the error by measuring the vertical bow in the film, then adding that value to the width of the dovetail. That bow is over 1mm, and I am skeptical that adding 1mm to the width of the dovetail would be correct – the film would probably flop around inside if I added that much.
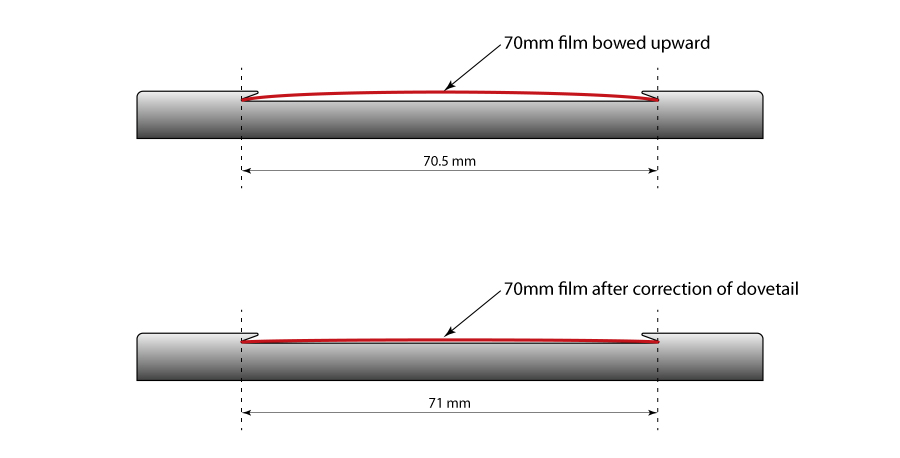
This diagram shows how adding just 0.5mm to the width of the channel that holds the film made the difference between an unacceptable bow in the film and getting the film in place for accurate digitization. Click on the image to enlarge.
The addition of 0.5mm turned out to be the perfect amount to make the film travel smoothly, yet firmly through the gate, while still remaining flat enough to photograph without going out of focus. Success!
Now I am going to digitize a batch of images and see how it behaves in production.
To read the next post on this topic, please click here.