Russell Brown, Senior Creative Director at Adobe Systems, created an application plug-in for Photoshop years ago with help from some of the programmers on the Photoshop team. It was first made available on Russell’s “off-campus” site as Russell Brown’s Image Processor.
It was so popular with imaging geeks like me that he was eventually able to convince the powers at Adobe to include it in the Photoshop product so it’s available to all of us without having to go get it and install it.
The Image Processor gives us the power to process any number of photo files, and convert them into other formats. It can also resize images simultaneously, which is what I asked it to do last night to 2,058 images. On a project like this I do not embed the ICC profile into every image, as it would just bulk-up the photos by many megabytes. Instead, I assign the profile to the complete after stitching – then it is only put there once.
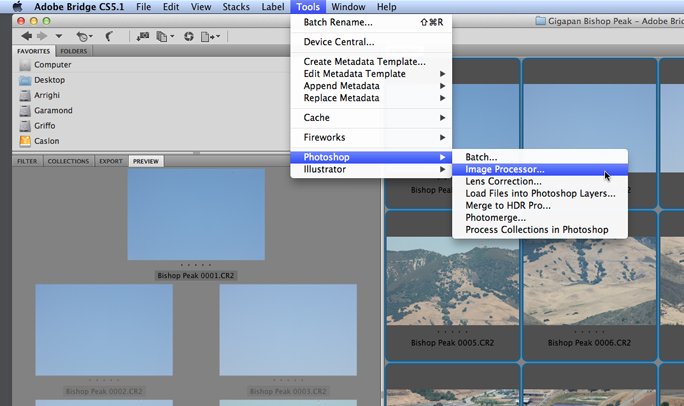
Image Processor is in the Photoshop menus (under Scripts), and it’s available from Bridge (under Tools>Photoshop):
This handy piece of software is what you use when you need to change the resolution of 1,515 images while converting them from Camera Raw to TIFF, or JPEG, or Photoshop – or all three at once. It’s the tool I used last night to prepare 2,058 for my next GigaPan image. You may have read my blog from last week about creating a file that is too big for Photoshop.
The one I took this week is even bigger, and I have decided to make it compliant rather than to make it giant. I have no need at the moment for a single photo that is 63.8 GB – that’s overly large. But I do want the largest photo I have ever made to be able to be opened in Photoshop so I can retouch a few pixels here and there.
My GigaPan work flow is evolving, and has a new step of making the photos smaller than I shoot them (when necessary) so that I can create Photoshop-compatible images of less than 300,000 pixels on the long dimension. I am also shooting in Camera Raw which is not a format fit for the GigaPan Stitch software.
I spent a few minutes with some scratch paper and my trusty HP 12C calculator (the real thing, not an app). I took the size of my 1,515-frame photo from last week, extrapolated the size of the photo from this week, and grumbled and mumbled until I came up with a formula for determining the correct resolution to reach the maximum size allowable in Photoshop, then applied that modification to the 2,058 photos I took this last Sunday from Bishop Peak in San Luis Obispo.
My camera (Canon 1ds Mark III) shoots photos that are 5,616 x 3744 pixels in size. After the mathematical monkeying-around, I determined that I needed each frame to be reduced in resolution to 3,057 x 2,038 pixels so that when I stitch the 98 rows of 21 columns of photos into one whole GigaPan image, it will fall just under Photoshop’s 300,000 pixel limit. There are at least two ways to do this that I know. One would be to make an Action in Photoshop to change the resolution and save the files as TIFFs, while the other way is to use Image Processor to reduce the resolution, and save the files as TIFFs in a separate folder.
It’s probably a toss-up when it comes to image processing, as both techniques use Photoshop to do the processing. I like Image Processor better because it requires fewer steps.
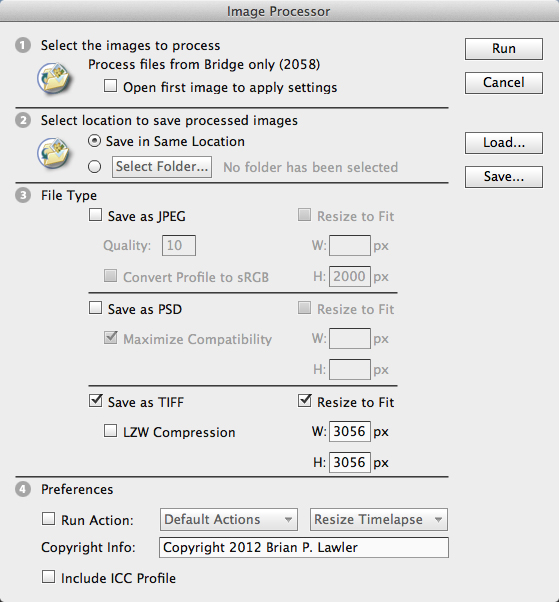
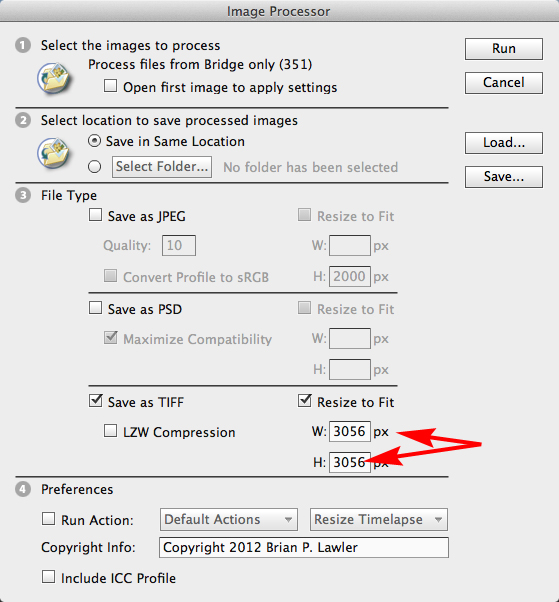
This is the Image Processor palette as I configured it for last night’s adventure. Note that I am converting to TIFF only (I could simultaneously make JPEG or PSD files – in any combination). Note also that I have entered the resolution I want into both Width and Height windows. This translates to “convert the longest dimension to 3,056 pixels.” This last item is handy when you are converting images that are either horizontal or vertical, and you want them all resized similarly.
I started the Image Processor on that task last night a bedtime, and it was finished when I woke up at 3:30 this morning to check on it (I don’t know how long it took). I like to let big jobs like this work while I am sleeping. I now have 2,058 TIFF images at the exact resolution I need for the next step, which is to stitch them in GigaPan Stitch.
One thing that Image Processor does that an (easy) Action will not do is to change resolution logically. That is to say it knows how to make a decision about the longest dimension of an image so that you can ask it to change a folder full of images – both vertical and horizontal – and convert the longest dimension of each one to a new dimension. This eliminates any need to attempt to build an Action that asks the question about whether the image is horizontal or vertical. I didn’t need this last night as all of my images are horizontal, but it’s nice to know it’s there.
Image Processor will also embed an ICC profile or a copyright message, and it will also run an Action of your choice simultaneously if you want it to.
Now on to the stitching step. I will let you know if something goes wrong there – I don’t expect trouble.


Hello Brian,
I’m thinking of getting a gigapan pro, as I do a lot panoramic images with a standard pan head on my tripod, but it is limiting in what I can do with it. I recently had a job to photography a room that was full of antique goods arranged as an authentic country store of the mid 1800’s. I had very little space in the room to get far enough away to use a 50mm lens and had to shoot at 35mm focal length. Of course I got some distortion, and it is very difficult to stitch by hand, though Photomerge in photshp won’t do it properly. Do you think I could have done this better had I had the gigapan?
My experience with Photoshop stitching panoramas is dismal. It works fine when there is nothing in the foreground (scenic shots work great). Your photo of the interior of the country store is nothing but close-up information, so Photoshop will probably not do it justice.
I recommend – highly recommend – PTGUI Pro, which will stitch almost anything perfectly (this for standard panoramas).
When I bought my GigaPan Epic Pro I also purchased the companion GigaPan Stitch software, which works very nicely.
Unfortunately I have no experience making an interior GigaPan photo, so cannot attest to the success of GigaPan Stitch to make the final images. But, judging from many of the fabulous panoramic images on the GigaPan site, I think it should be able to do a good job for you.
All of my work with the GigaPan so far is exterior work. I’m headed to Chicago this week to make a GigaPan or two. It will be fun!