

This is part 2 of a series on my new Adirondack chairs. Click here to read the first part.
After a month in the kiln, I picked up my Monterey Cypress lumber at the mill in Paso Robles and drove it home on the roof of my VW Touareg. I was dodging rain flurries for this pick-up, and I really didn’t want the wood to get wet while in transit. I managed to get it to my shop without getting any rain on the boards.
After letting it sit in the shop for a week, I took my planer out into the main work area and connected it to the dust collection pipe there. I then planed four boards to .875 inch thickness and the remaining boards to .75 inch. This would allow me to run them through the drum sander to get them to the finished dimensions.
No good deed goes unpunished though! A rehabilitation of the drum sander was needed, as I don’t use it very often, and it has been a long time since I replaced any of its parts. I bought a new feed board belt from Amazon, and installed it. Since it was an after-market part it didn’t fit perfectly, so I had to disassemble the table and machine slots into two of the original parts that didn’t allow enough horizontal adjustment to make the new belt fit and work correctly.
The Cypress wood is quite brittle, and it is pocked with many small knots. The boards also have a tendency to split along the grain, making a lot of the wood unusable. I cherry-picked the boards (Cypress-picked?) for areas from which I could cut my largest boards. For this I printed my pattern on my Epson ink-jet printer, then used the print-outs as size templates on the lumber. I put pencil marks on each board to indicate which parts would come from which boards.
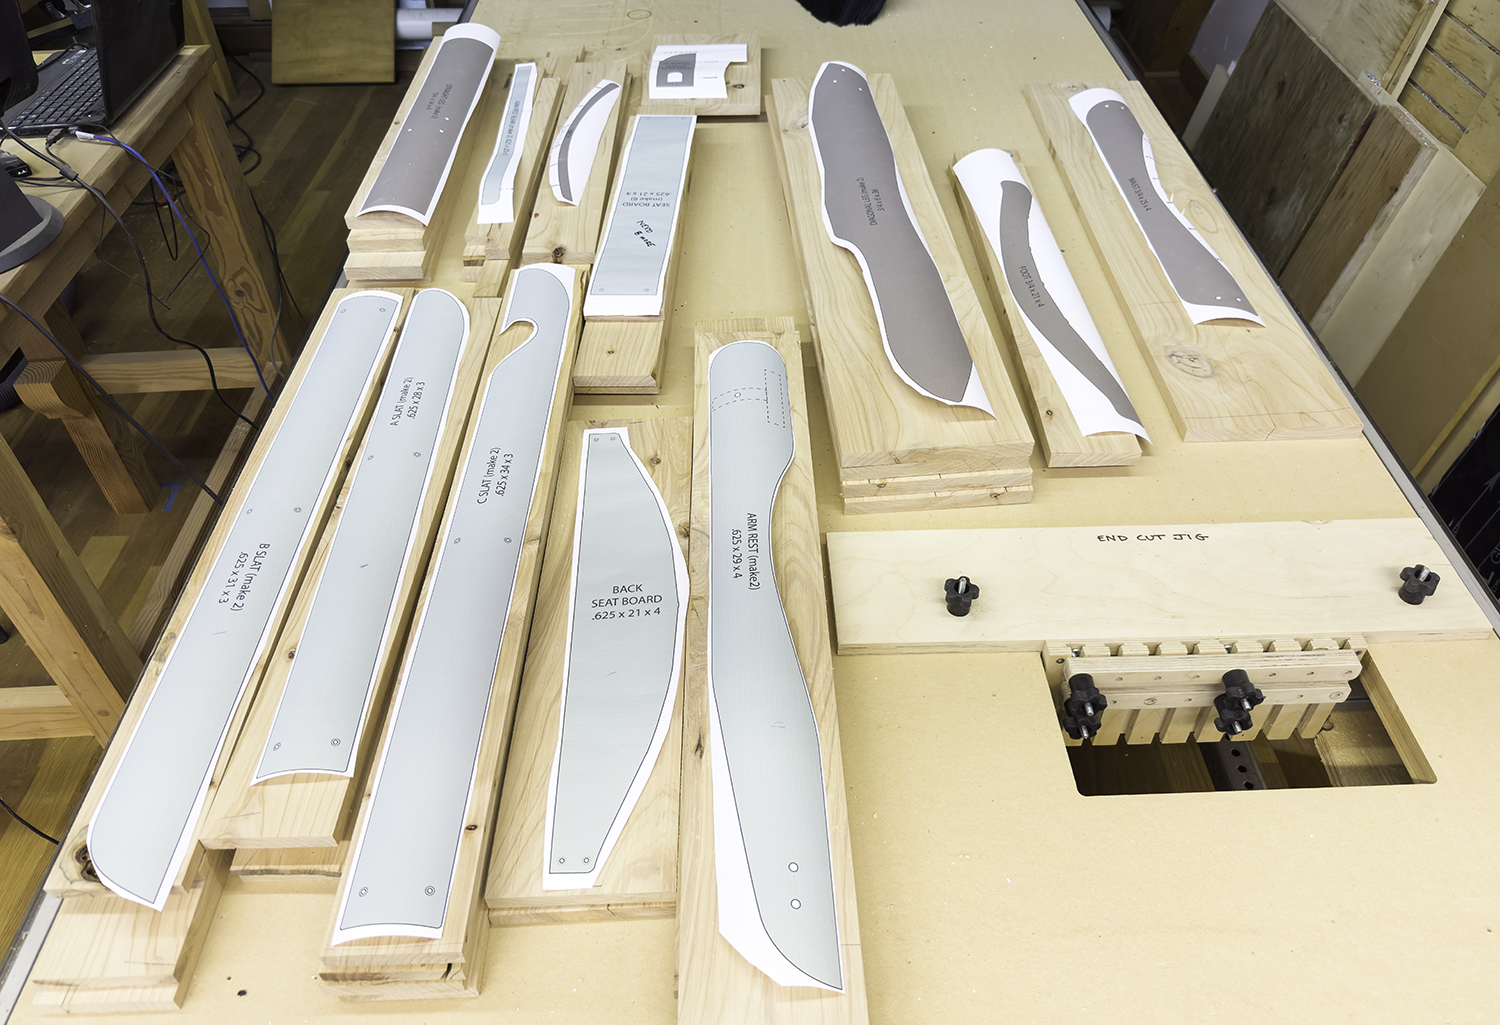
Once I had determined which boards were for which parts, I cut them to rough size. Then I set up a jig for machining the parts on the CNC router table. I put my T-slot spoilboard on the bottom, and them added low-profile aluminum clamps on the spoilboard, supplemented by quoins that expand to hold the rough cut boards in place for machining.
The trick is to cut the parts with minimal or no damage to the spoilboard. To accomplish this I set my Z-axis (up-down) to zero on the spoilboard itself. That way I could write the cutting code never to cut below zero. This worked pretty well, though there are some cutting marks on the spoilboard now, after all the work was done.
My jig system allowed me to cut a variety of boards with a common lower-left X-Y starting point. I had only to change the clamps and quoins to hold the top and right ends of each board according to its size. I used the CNC machine mostly on the complex parts – the armrest boards and the waist and foot boards where the vertical slats are affixed. For the slats themselves, I machined only the last few inches at the top of each, and the inverse-heart shape on the C-slats. This required cutting out the negative part only. To do this I copied the shape of the heart and made it into a negative shape that I programmed the machine to cut out of the slat. This saved time.

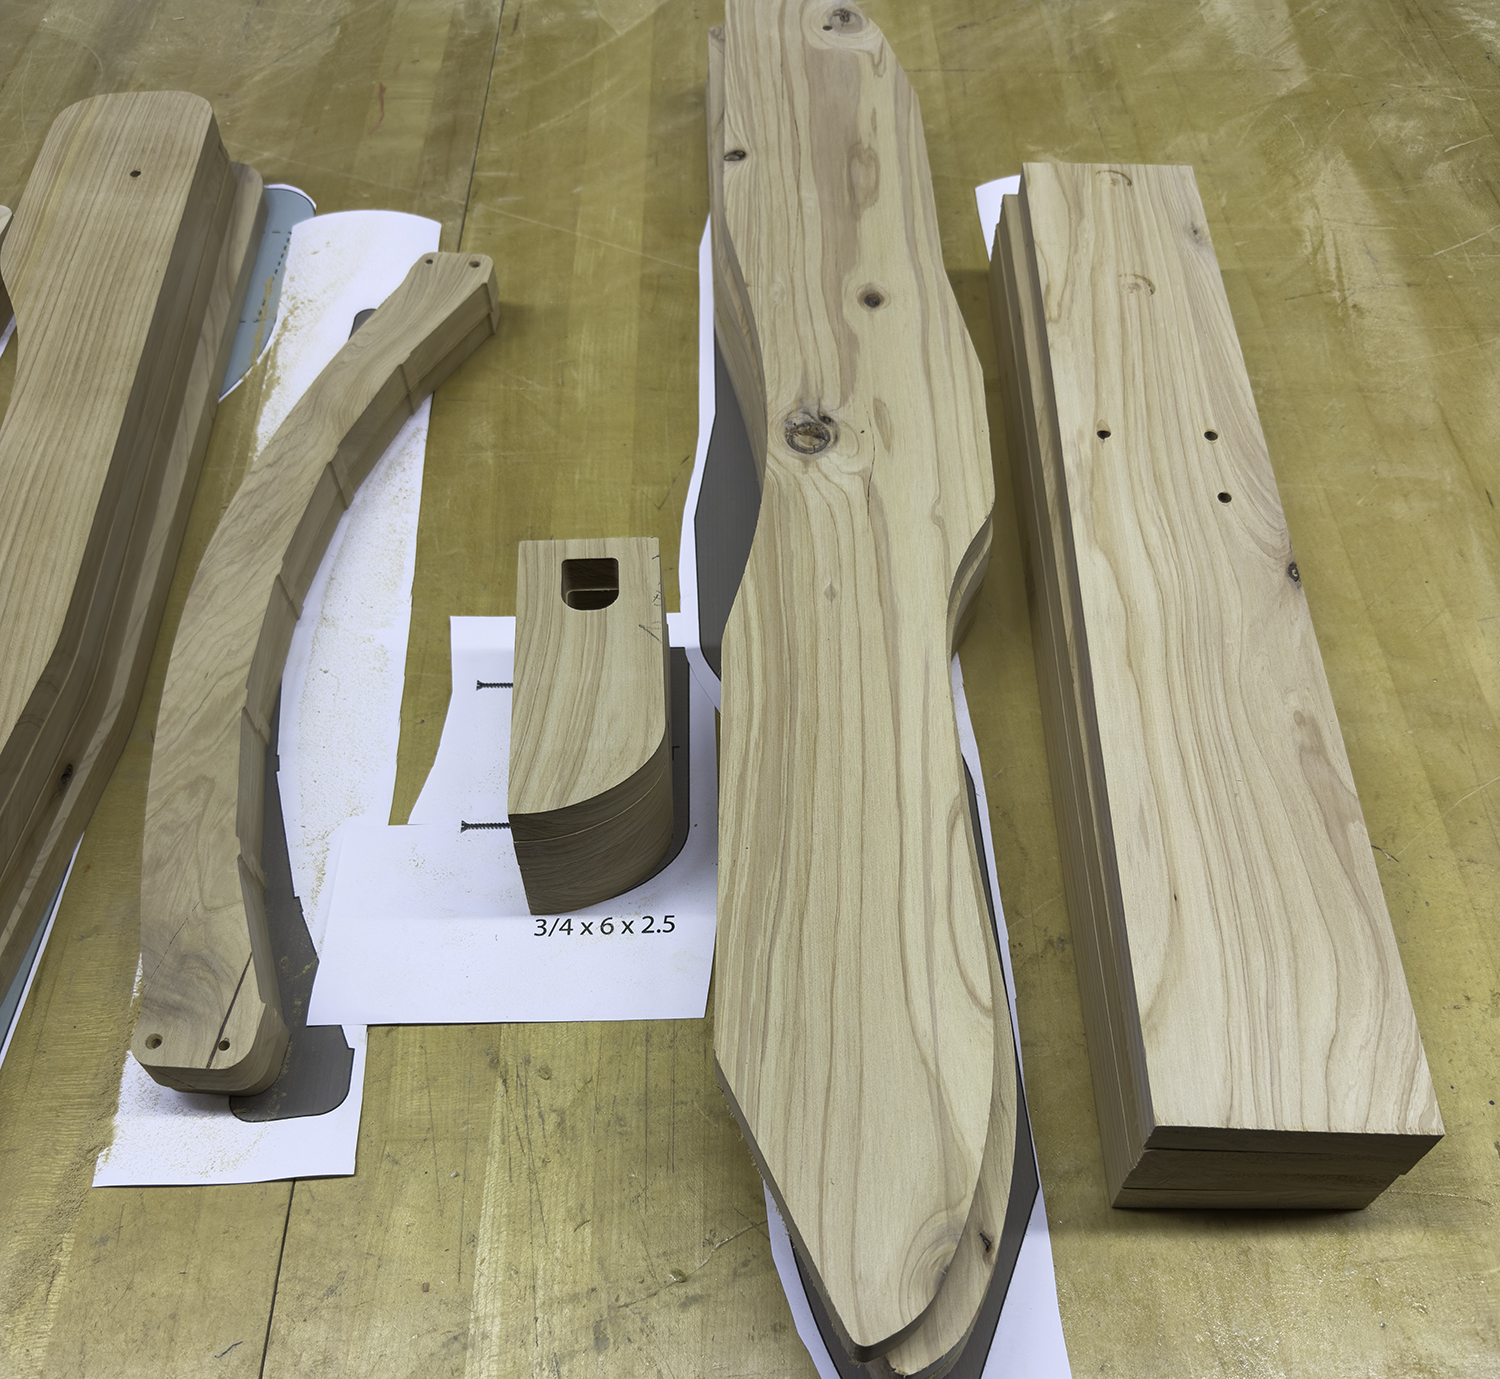
Almost all the parts I machined on the CNC machine were cut with tabs, those being little bridge connections that attach the part being cut to the parent board. These are designed to keep the board you are cutting from getting thrown out of position by the end mill (12,000 rpm!) that is removing material from that board. Tabs prevent damage to the part, to the machine, and potential injury to the operator in the most dramatic circumstances (this seldom happens).
A few of the boards I cut had small cracks that grew into large cracks as the boards were machined. Internal tension in the boards was significant, and sometimes that tension was released as a widening split. To correct this, I glued several cracked boards by injecting waterproof Gorilla Glue into the cracks, then clamping them back together, and allowing the repaired board to dry overnight. This made it possible for me to recover several boards that would otherwise not have been usable.
I removed all the small tabs using my disk sander, and I hand sanded every board in preparation for assembly. This is when the fun starts (just three months into this project!). I bought a can of Varathane acrylic exterior satin varnish for the chairs, as my plan is to leave them in their “natural” wood appearance. Experience has taught me that the wooden parts of any project must be coated or painted prior to assembly, as water has a clever ability to get between connected parts by capillary action, then rot sets in. With that in mind, I opened the can of varnish, and I painted the opposing surfaces of boards that will be bolted or screwed together later. A trick here: if time allows, it’s nice to let the varnish get sticky, then assemble the parts while they are “green” – this makes the seal more effective.
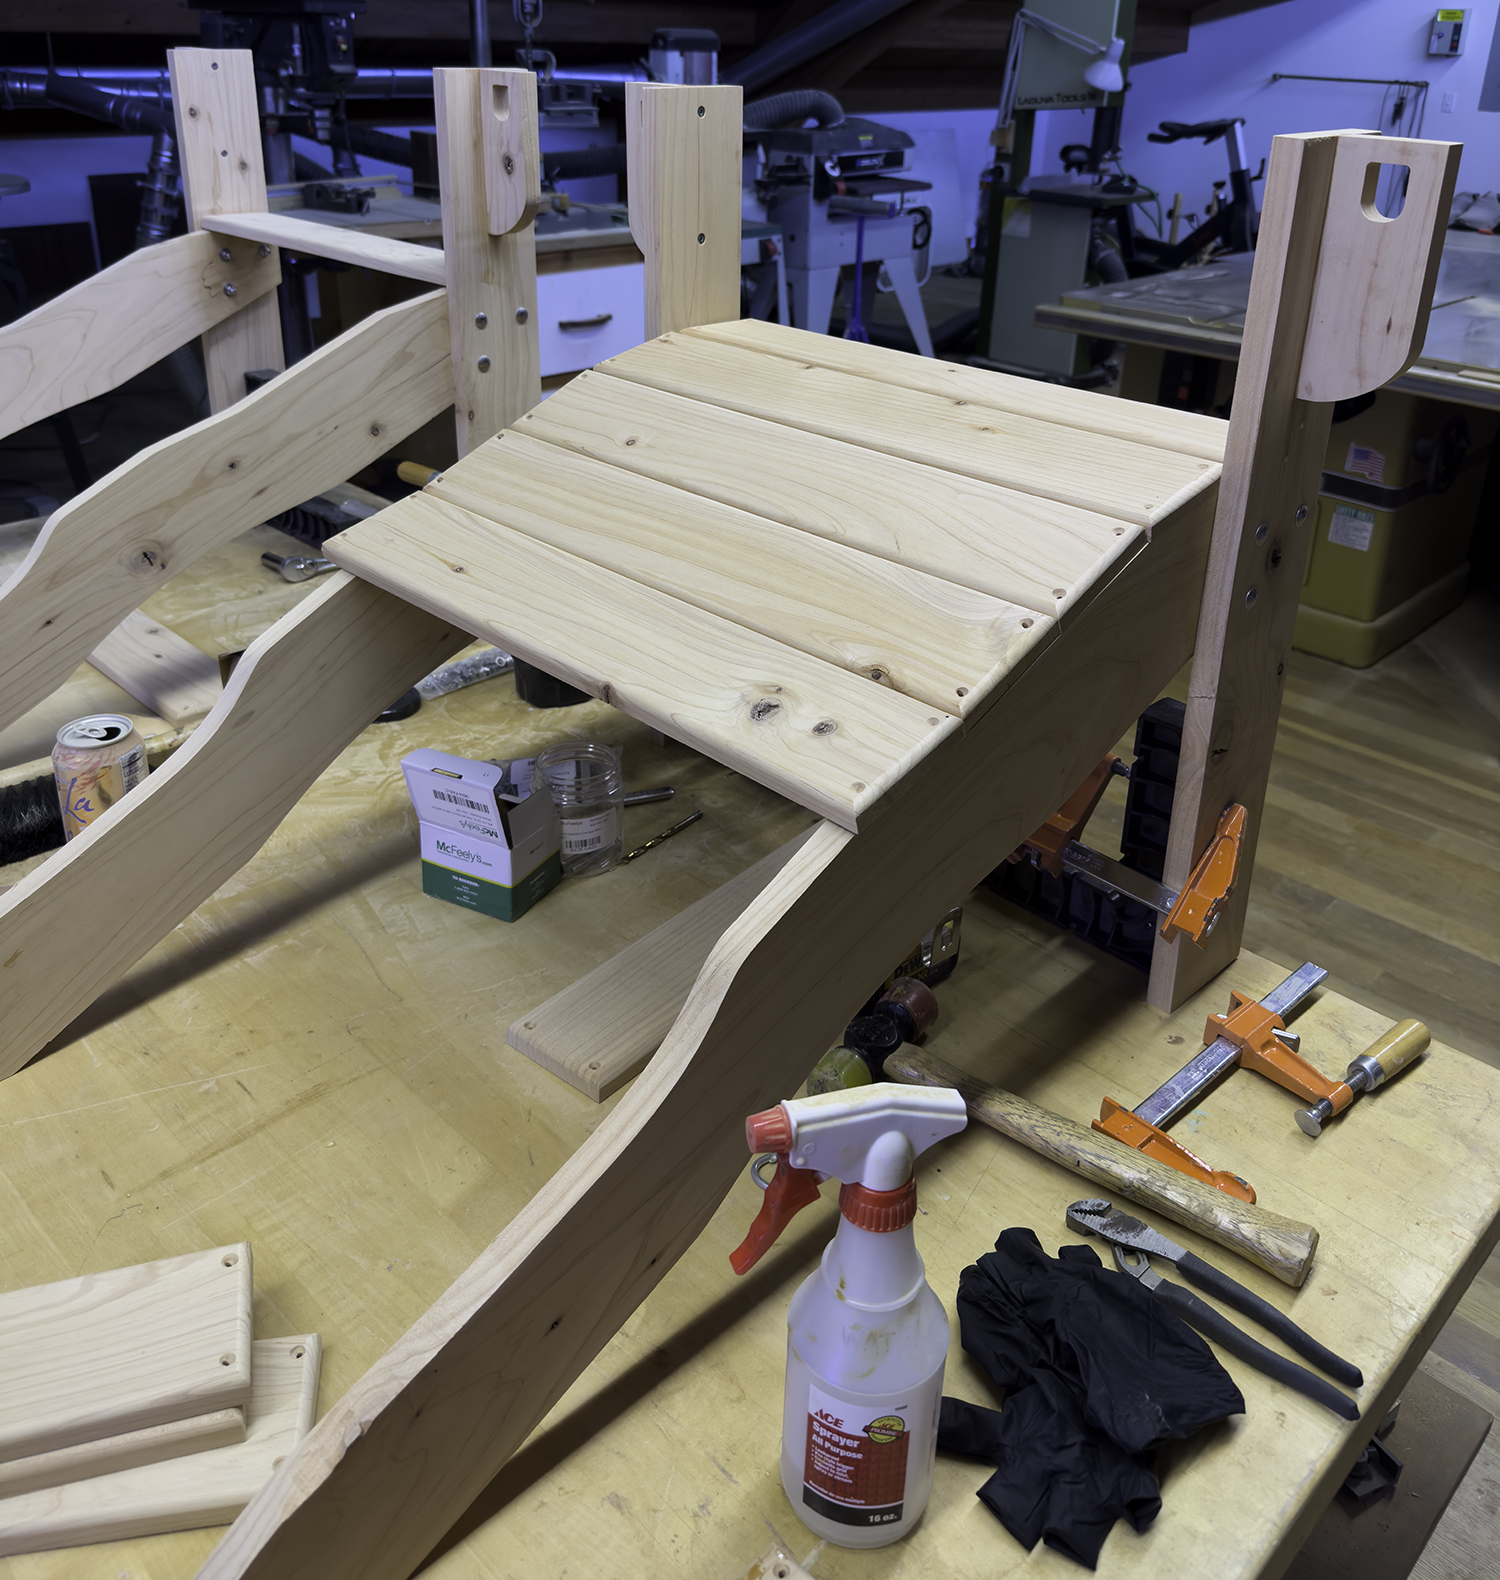
I bought a quadrillion dollars’ worth of stainless steel hardware for these chairs – about $35.00 per chair – and it is beautiful stuff! I bolted the legs together first using carriage bolts, washers and nuts, then positioned the frontmost seat board and the rear “foot” board, where the vertical slats are attached. Once those defining parts were in place, I attached the arm rests to the shoulder board with carriage bolts, and affixed those to the leg tops, using small 90-degree braces cut from the 0.75 inch stock.
Now the chairs are ready to be completed! More on that in the next post, which you can read here.