

You can read the previous chapter of this story here.
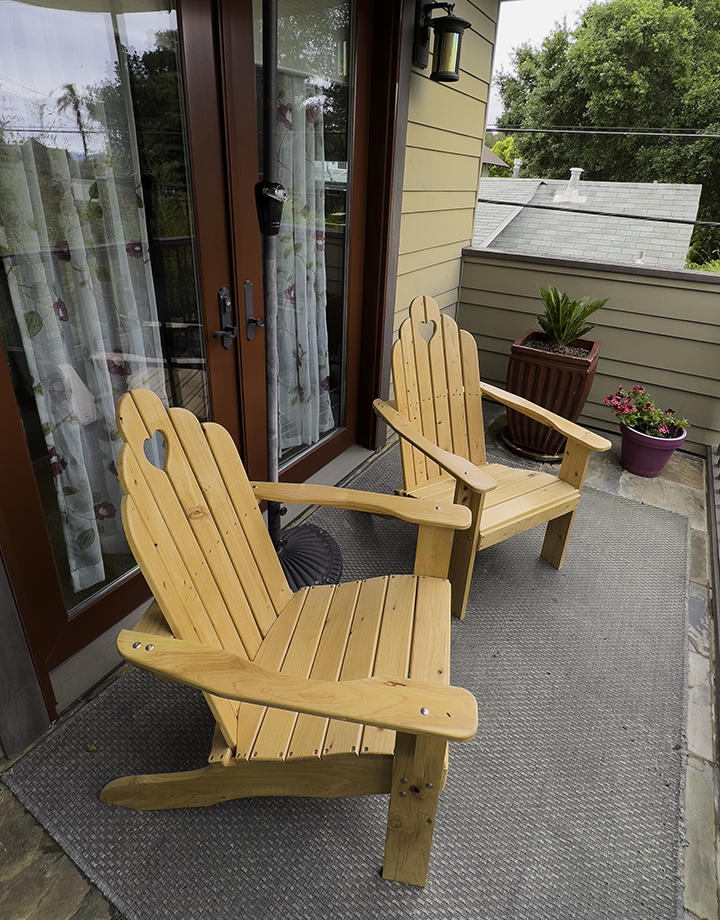
Late last year I decided to make a couple of Adirondack chairs for our upstairs balcony. These were designed to replace two chairs that we bought at a garden store. Those chairs, while quite nice, succumbed to the elements and finally fell apart.
I was determined to replace them with similar chairs made of a beautiful natural wood. After some deliberation, I chose Monterey Cypress custom milled at Pacific Coast Lumber in Paso Robles. The wood was cut for me, then kiln-dried for a month, and I took delivery in April.
I took the lumber to my shop where I let it acclimatize for a couple of weeks before planing it and finish-sanding it to two thicknesses for the chairs: 3/4 inch and 5/8 inch. The thicker boards are for the load-bearing parts while the thinner boards are for the seat boards and staves.
This wood came from a tree that fell in Morro Bay State Park during a storm. I like that provenance, as I have obtained other locally-milled lumber from nearby Cambria and from a tree that fell on a highway east my city. There would be a story here: storm-damaged tree converted to elegant outdoor furniture.
Working with this lumber was more difficult than the romantic picture that I had painted. From the moment I began planing, the lumber’s internal demons began to escape, causing long (and sometimes loud) cracks to appear. While resting one day during the sanding operation I heard a loud crack come from my stack of 5/8 inch lumber. This would not be the last such crack.
The neck board was surprisingly difficult to make and attach. I cut it on the CNC machine then fit it by sanding it on the spindle sander. Then I broke three of them, and made them over and over until I finally succeeded.
I cut all the pieces (covered in previous episodes of this story), and then reduced them to final size both on my table saw and on the CNC machine where necessary. I did some manual cutting on my band saw (where a curve also had a sharp internal angle). Then I followed that with a lot of hand sanding and preparation for assembly.
Almost every day when I was working on this project I was faced with another debilitating crack. These would open up in boards as I screwed them to the frame, or they would open up overnight while glue was drying. This week I had a problem with the final board not fitting the vertical staves correctly. I changed my design, then made a new piece on the CNC machine, and while sanding it, I dropped it to the floor. It shattered.
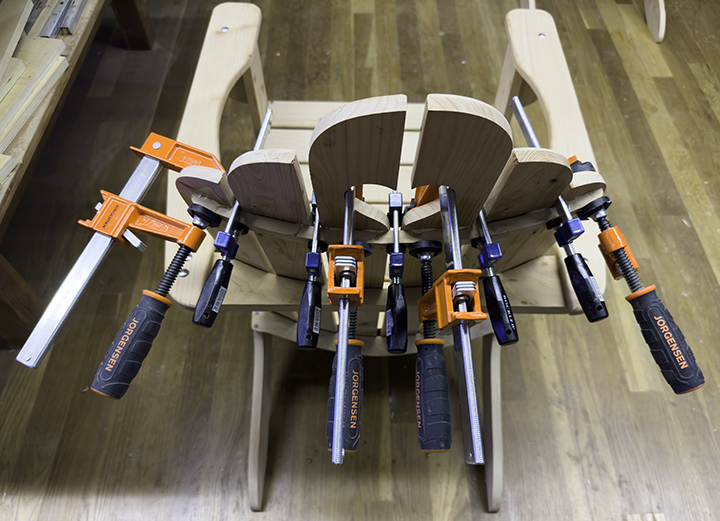
So I made another one and tried again. That one cracked and broke in half while being clamped in place. So I made yet another one that I was successful in mounting to the back of the chair.
While doing my final sanding, I noticed that a crack had opened up on one of the vertical legs of one chair. Since this is structurally critical, I disassembled the arm and brace, and glued-up the crack with Gorilla Glue (waterproof). I let it dry overnight, then sanded it and reassembled the arm to continue my work.
When I finally finished sanding the chairs, making them ready for a spray coating of clear acrylic, I stood back to admire my work. CRACK! I heard it, but I can’t find it, so I decided to move ahead and get the first coat of acrylic on the chairs. Perhaps the acrylic coating will hold the wood together!
The chairs have a wonderful color when coated. I call it light honey. I completed the first coat yesterday, and the second coat today. After a day to dry, I will do a light sanding and put another very light coat on top, finishing (?) the project. Then I will deliver the chairs from the shop to the house and my wife and I can sit on them in the evening as the sun sets over Cerro San Luis Obispo.
The epitaph:
Would I do it again? Absolutely. I will almost certainly make more Adirondack chairs. These are my sixth and seventh, and I really like the design.
Would I use Monterey Cypress again? No. I think it’s lovely wood, and I am sorry that my relationship with it has been so troubled. I think it’s too brittle for this kind of project. I am very happy with the overall appearance of the chairs. They are very nice. But I fear that the cracking is not over… I have recurring dreams about sitting in my chair on the balcony and having a crack streak up one of the rear staves.
Also, this wood was quite expensive compared to other woods available at my local hardwood store. I could probably have made these chairs out of Hard Rock Maple and spent less money on the raw lumber (and it would have cracked less).
What wood should I use next time? In my Adirondack chair adventures I have used Monterey Pine, Baltic plywood (a prototype), red Oak, and now Monterey Cypress. I might try Birch on my next chair, or perhaps Poplar (I have read mixed reviews about Poplar). Birch is hard to get right now, but I can probably find some.
Would I build them the same way? Yes, but I will make small changes to the design to get the vertical staves to fit better. That would make them easier to assemble and complete.
Would I spend the better part of six months building them? Who knows?
Meanwhile, I have started a new project! It’s a custom utility trailer that will carry a military surplus 5KW generator to Burning Man. It’s my first trailer, and it will be made entirely of steel. Since I am not a welder, I’m having the best welder I know make the trailer for me. It involves fabrication, assembly, powder-coating, licensing, testing and ultimately the installation of high voltage electrical circuits to provide power to the Pinhole Project camp at Burning Man 2023.
More on this as it is built.