

Yesterday I wrote about using the new AI Erase function in Adobe Camera Raw. You can read about that here.
This past week I photographed the annual Festival Mozaic summer music festival. That involved 19 events in both San Luis Obispo and Santa Barbara Counties. I drove over 600 miles in 12 days to photograph all of these events. It was worth it!
I have been the staff photographer for the festival for 20 years, I think. In that capacity I have the opportunity to shoot still photos of some of the world’s finest musicians in performance of – mostly – classical and baroque music. The music director is Scott Yoo, who has an award-winning television show on PBS called Now Hear This. Mr. Yoo assembles ensembles for the various performances during the festival by hiring the very best bassoonist, the very best flutist, the very best violinists, and more, for each performance. He does this by choosing the right people for each musical presentation.
This year’s festival ended with an orchestra performance of Mozart, Wagner and Beethoven, presented in the Performing Arts Center at Cal Poly, an auditorium that seats about 1,000 people. It was the first orchestra work presented by Festival Mozaic since the pandemic, and it was the finest performance I have seen in my life. Seriously.
Over the years I have developed techniques for photographing performers in the various locations used by the festival. At Cuesta College Performing Arts Center I work in the control booth, above the stage and at the back of the hall about 60 feet from the performers. From there I shoot with my 100-500 Canon lens on my Canon R5 camera. This combination usually works well because I can make a “portrait” of an artist from that distance and fill the frame, or close. There is an open window there so I don’t have to shoot through glass.
At the Cal Poly Performing Arts Center I shoot from the back of the hall, about 80 feet from the stage. It’s a bit far for these portraits, but I can take photos of groups of players, or I can crop a player out of a larger photo. The resolution of the R5 is high enough that cropped images are still adequate for small print work and perfect for social media.
And in that same hall I usually shoot a few panoramic photos. These are my specialty. Over the years the stitching software I use, PTGUI Pro, has gotten better and better to the point that it stitches these images with essentially no errors. It never creates distortions, never makes odd overlaps, and always maintains the images as they were taken – sharp, in-focus, appropriate for a panoramic image.
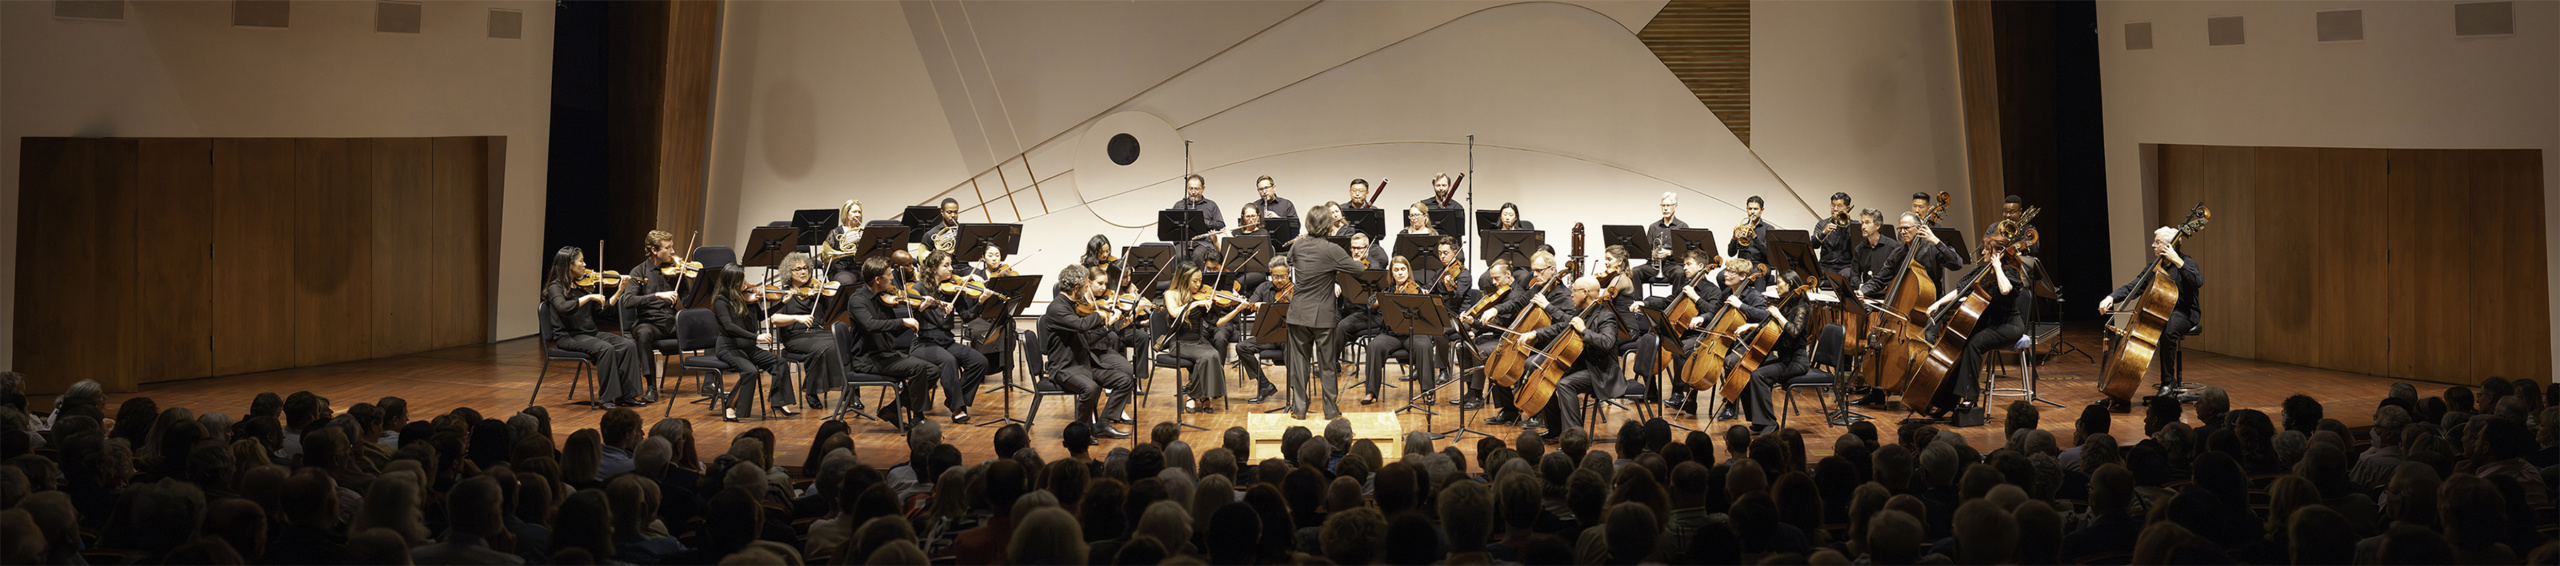
But shooting photos indoors of musicians in motion requires that I use a relatively high shutter speed – usually faster than 1/200 second – to stop the motion of the violin bows and the tympanist’s drumsticks. This requires that I push the ISO way up, because I am also trying to get enough depth-of-field in these photos to get every face in sharp focus. At Saturday’s concert I was shooting at ISO 12800.
On modern cameras such high ISO settings are not a big deal. 12800 is perfectly reasonable. I can use these images for print at full page size without the sensor noise being distracting. It’s certainly visible, but it is not going to prevent the use of the photos for high-resolution printing.
My work flow is to import my Camera Raw images through the Photo Downloader program that is an adjunct of Adobe Bridge (See my essay on that topic here). Though it is not the best software in the toolbox, it does this conversion correctly and quickly. The Canon CR3 files from my camera are read from the memory cards, converted to DNG files, renamed, then saved to my hard drive – all in one streamlined action. The result is that my “original” camera images are all in DNG format.
From there I work in Adobe Bridge. There I view all of the images, score them with one to five stars, delete bad ones, rename them in groups to describe their content, and organize them for editing. I touch every image, with very few exceptions. Most often my technique involves adjusting the exposure, reducing the highlights, expanding the shadows, increasing the contrast, and often adjusting the color temperature of the photos.
I open photos in groups that are similar, and apply these modest (and sometimes gross) adjustments and click “Done” to return them to their folders. Every photo gets a title, often applied in batches. I also embed extensive IPTC data into every photo. These entries include lists of the performers, the venue, the location, sublocation, the event, copyright, contact information, key words, and more.
For the panoramic photos I look at the source images to be sure that they were stepped acceptably when I took them (usually a 20 percent overlap). I look for troublesome images that might cause the stitching software to hiccup. Then I group each set of photos into folders named for their content: Orchestra pano 2, for example.
Most of the panoramas I shot last Saturday were about one-half stop overexposed. I open the whole batch together into Camera Raw, Select All, then adjust the exposure on all of them at once. I often also reduce highlights, expand the shadows then check the color temperature (theatrical lighting can be a bit warm). Then I click Done, and move to the next step.
Enhancing with Artificial Intelligence
Adobe Camera Raw has had a noise reduction control for several years, and it is quite effective. I usually consider its use when I zoom in on an original image and I see the telltale pattern of noise that is created by shooting at high ISO settings. This, I have always believed, gives me about one stop of noise reduction – it is the equivalent of setting the camera at a lower ISO setting – after the fact.
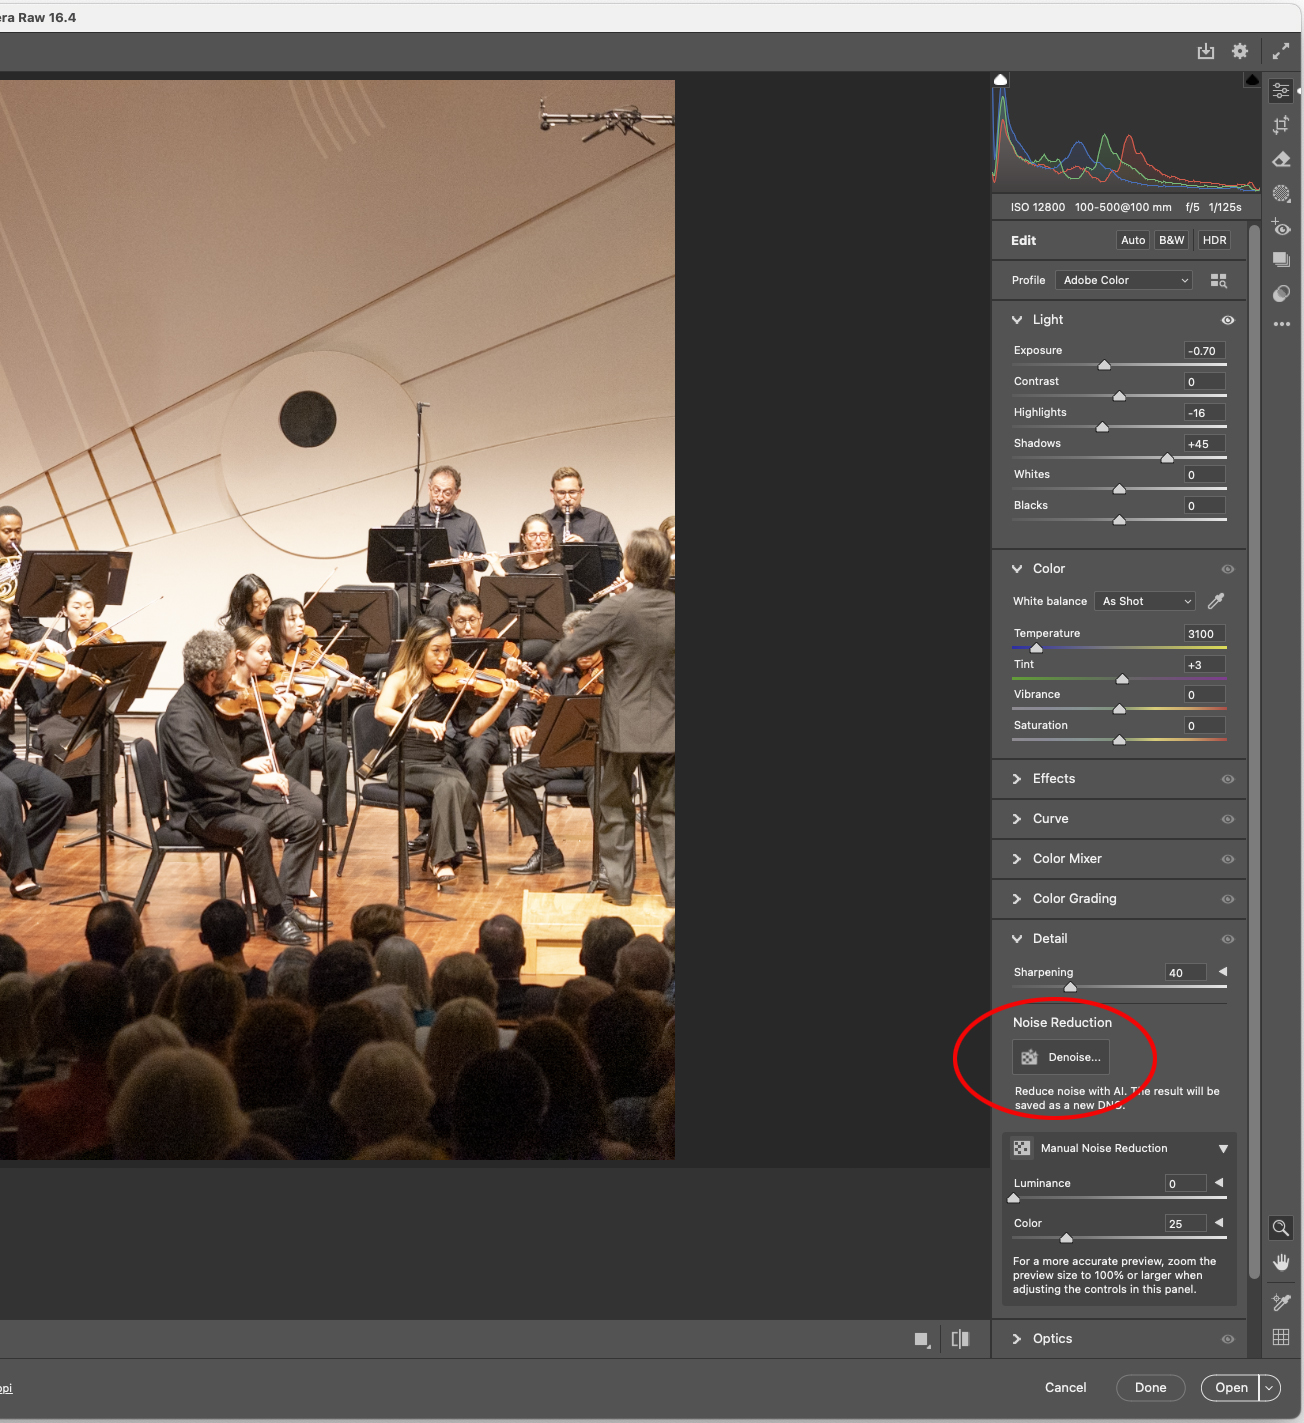
Artificial Intelligence Noise Reduction
The new feature in Adobe Camera Raw is a button that says Noise Reduction – De-noise. When you click on that button, a dialog opens with a slider allowing you to set the amount of noise reduction. The text in that window says that the program will use AI to reduce noise. The default setting is 50 units. I have found that using this setting works well. When you click the Apply button, Camera Raw applies its de-noise algorithm to clean up the image(s). When finished, it creates a duplicate file and names it with the original name plus -Enhanced NR.
Click on the image to see an enlarged view.
It’s important to carry out these steps in this order to reduce the work needed in Photoshop once these files get there. In my case, the duplicate Enhanced NR files also carry the XMP data for exposure, highlight suppression, shadow enhancement, color temperature, etc.
Once Camera Raw is finished, I click on the Done button and return to Bridge.
Sending the files to PTGUI Pro
My stitching software – PTGUI Pro – can read JPEG and TIFF files directly, and I discovered today that it can read DNG files directly.
For the past few years I have been converting my DNG files into TIFFs, but perhaps that is no longer necessary. It would save one step, and might reduce the chances of errors occurring in the conversion (though I have never seen any). I ran a test of this work flow. I added exposure and color temperature modifications to the DNG files, then I opened them in PTGUI and processed the panorama. PTGUI read the files and stitched the image, but it ignored the embedded modifications I had made to the DNG files. So, this technique does not work for me.
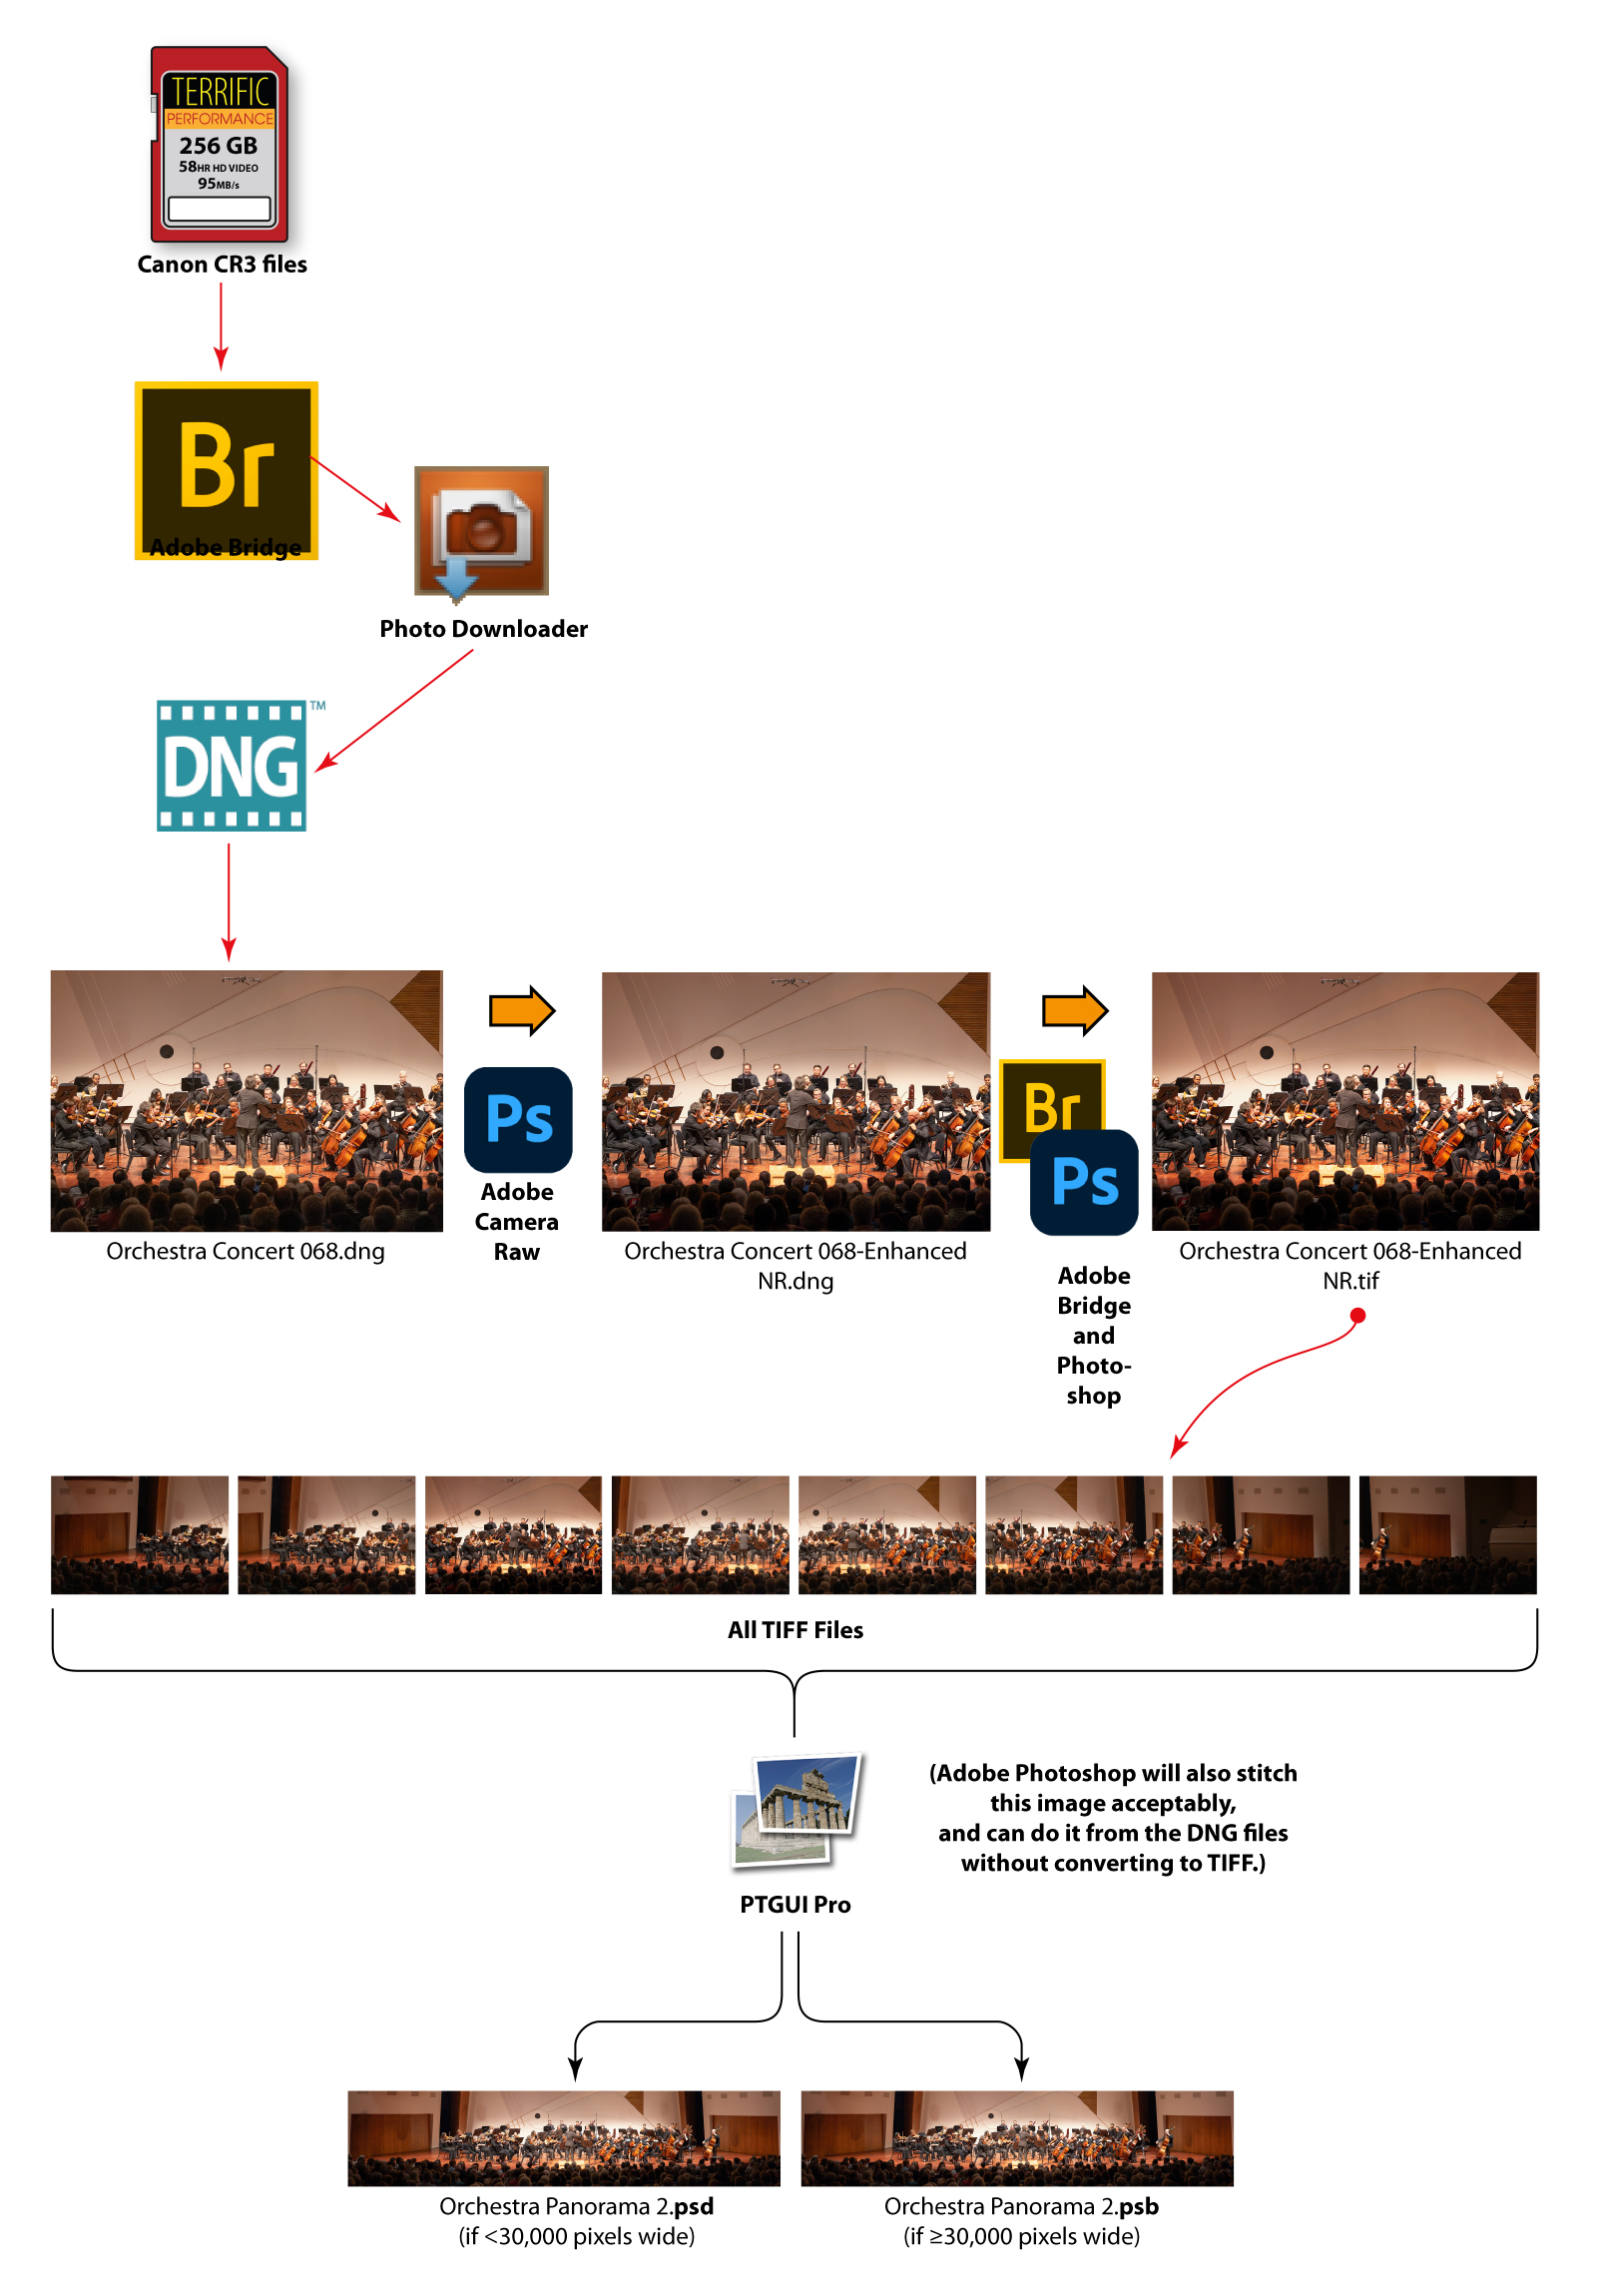
To get the files into PTGUI, I select them, choose Tools in Bridge, then Photoshop, then Image Processor (This opens the famous image conversion software invented by Adobe’s Russell Brown). Image Processor converts files in batches. There are numerous options in Image Processor; one of them is to convert to TIFF. I run this on all the selected images without changing resolution. Each image is opened momentarily in Photoshop, then saved in a new folder named TIFF.
From there, I open that folder, select all the TIFF files, then right-click and tell the computer to Open In PTGUI Pro. In that application I align the images as necessary, then stitch them into a cohesive panoramic image. This is so fast in recent versions, and with my new Mac Studio computer that its processing time is negligible.
Option: stitch in Adobe Photoshop
It’s also possible to stitch panoramas in Adobe Photoshop, but this does not work as well. Photoshop often makes errors when stitching panoramic images. It is found under File>Automate>Photomerge. I tested this today and found that Photoshop did a fine job of stitching the panorama from these files.
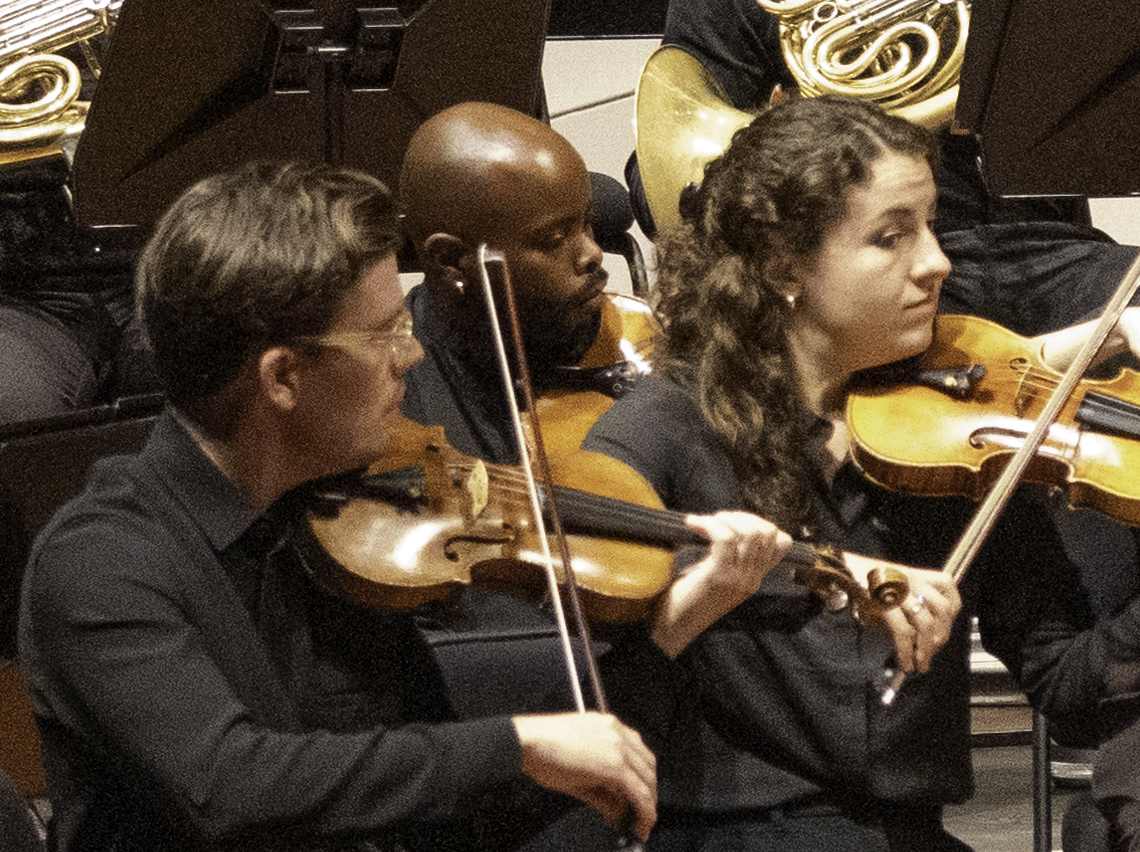
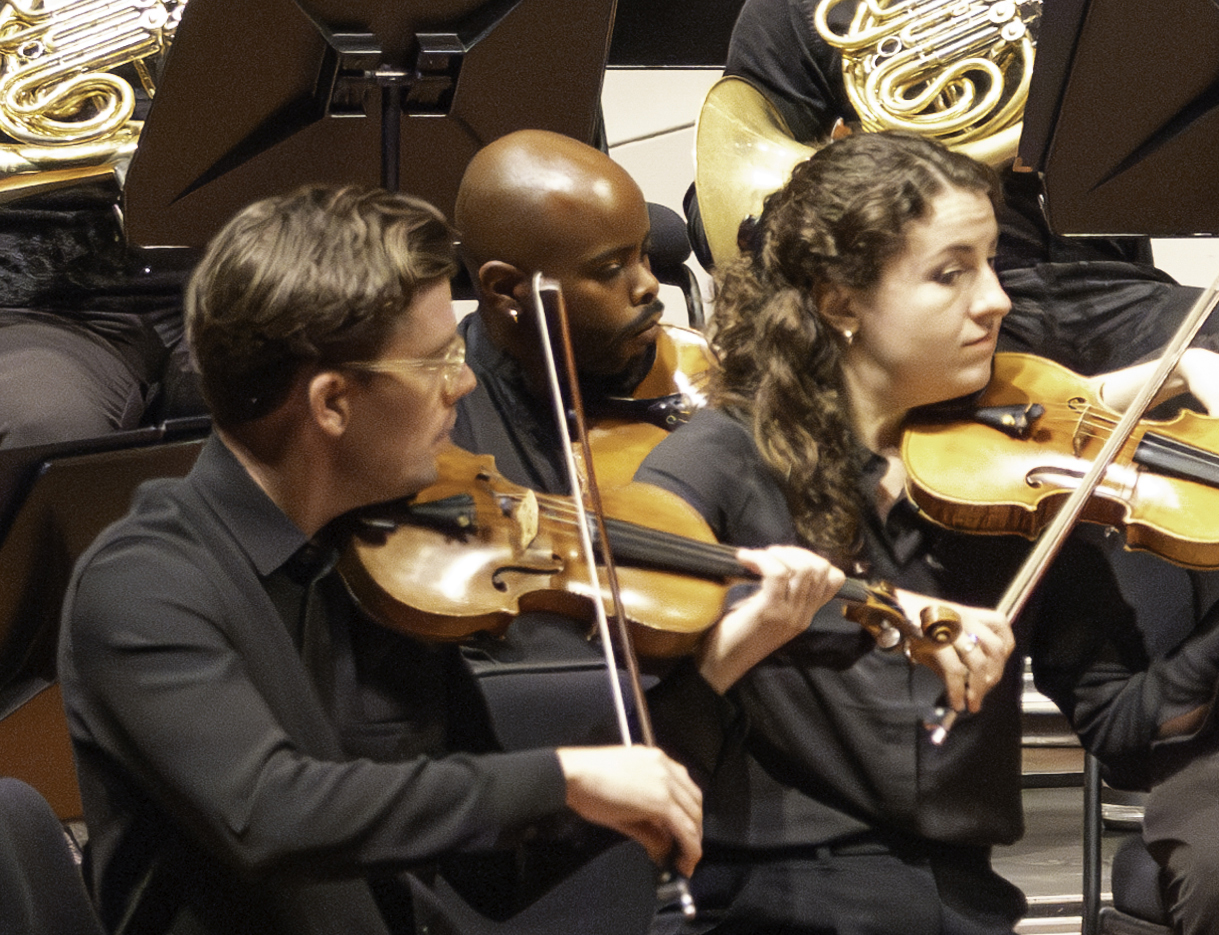
Extraordinary noise reduction
The final product clearly shows enhancement, and I think it is remarkable. It is visibly superior to manual noise reduction (or no noise reduction). The skin tones are smoother; shadows are free of the lattice-work of noise I usually find there. It took just one try to discover that this use of AI in the Adobe products is worth the effort, and it lives up to the hype that Adobe and others are making about artificial intelligence. This enhancement step adds about two minutes to the work for each image processed, maybe less. In the end, it is worth the effort, as your photos will look better immediately, and will not exhibit the tell-tale noise we usually see in high-ISO photos.