

In my recent series of blogs about reproducing line art from 19th century copper engravings (and similar line art) using modern digital technologies I showed how scanning as grayscale and converting to bitmap format (with the 50 percent dither option) creates the best line art reproductions.
In the weeks since, I have had a chance to put this to the test on the 29-inch four-color Heidelberg press at Cal Poly. My students and I developed a test sheet for my Color Management course, and across the top of that sheet I placed a series of variations of the line art I had scanned for this blog earlier in the month.
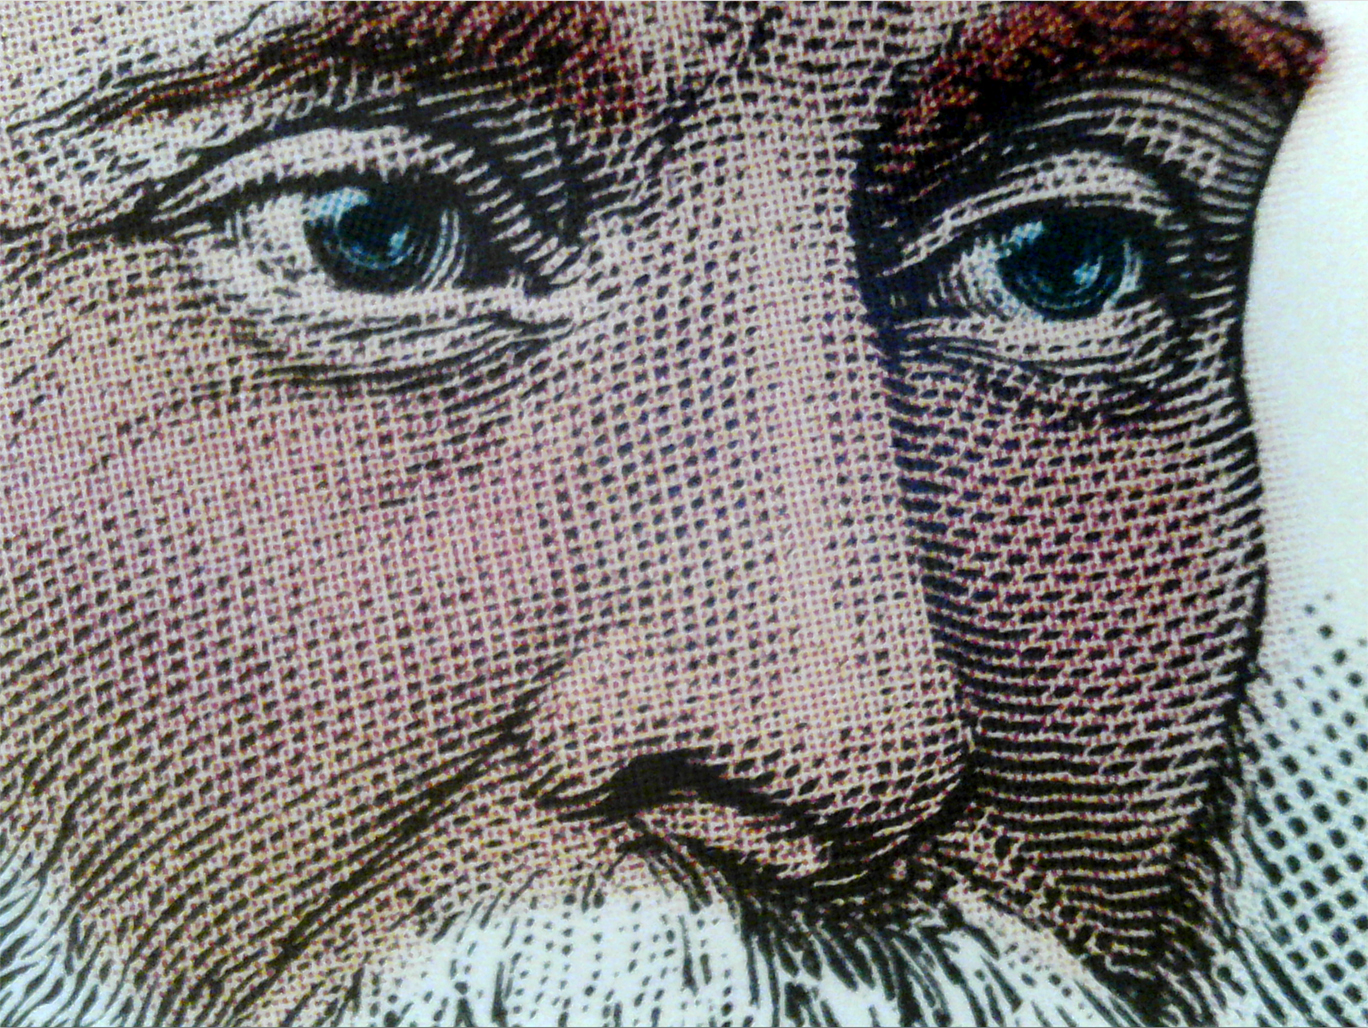
This photomicrograph shows the line art of the original scan (still at 2400 ppi) with color halftone dots overprinted (the Heidelberg prints in KCMY order). This proves my theory that Prinergy’s halftone engine observes the integrity of black-only bitmap images even when they are part of a CMYK tonal image.
I also pushed the technique one step further to introduce a color overlay on top of a bitmap file to colorize the image. The purpose of this was to test my theory that once converted to bitmap (sometimes called “one-bit” art) I could return the image to grayscale and add a color overlay without affecting the line art on the black channel.
The work flow I proposed in my earlier blog works fine for strictly black and white reproductions, but a bitmap file cannot be a color file, so adding the color overlay requires another few steps to ensure success. First, as before, scan at very high resolution. I recommend 2400 pixels per inch because this will capture the finest detail in nearly any engraving. Curiously, the resolution of our Kodak Trendsetter platesetter is also 2400 machine spots per inch, so the two happen to be the same resolution. Having more resolution on the platesetter might result in a better image, but I can’t test that at present (hint to Kodak: Cal Poly needs a new Trendsetter).
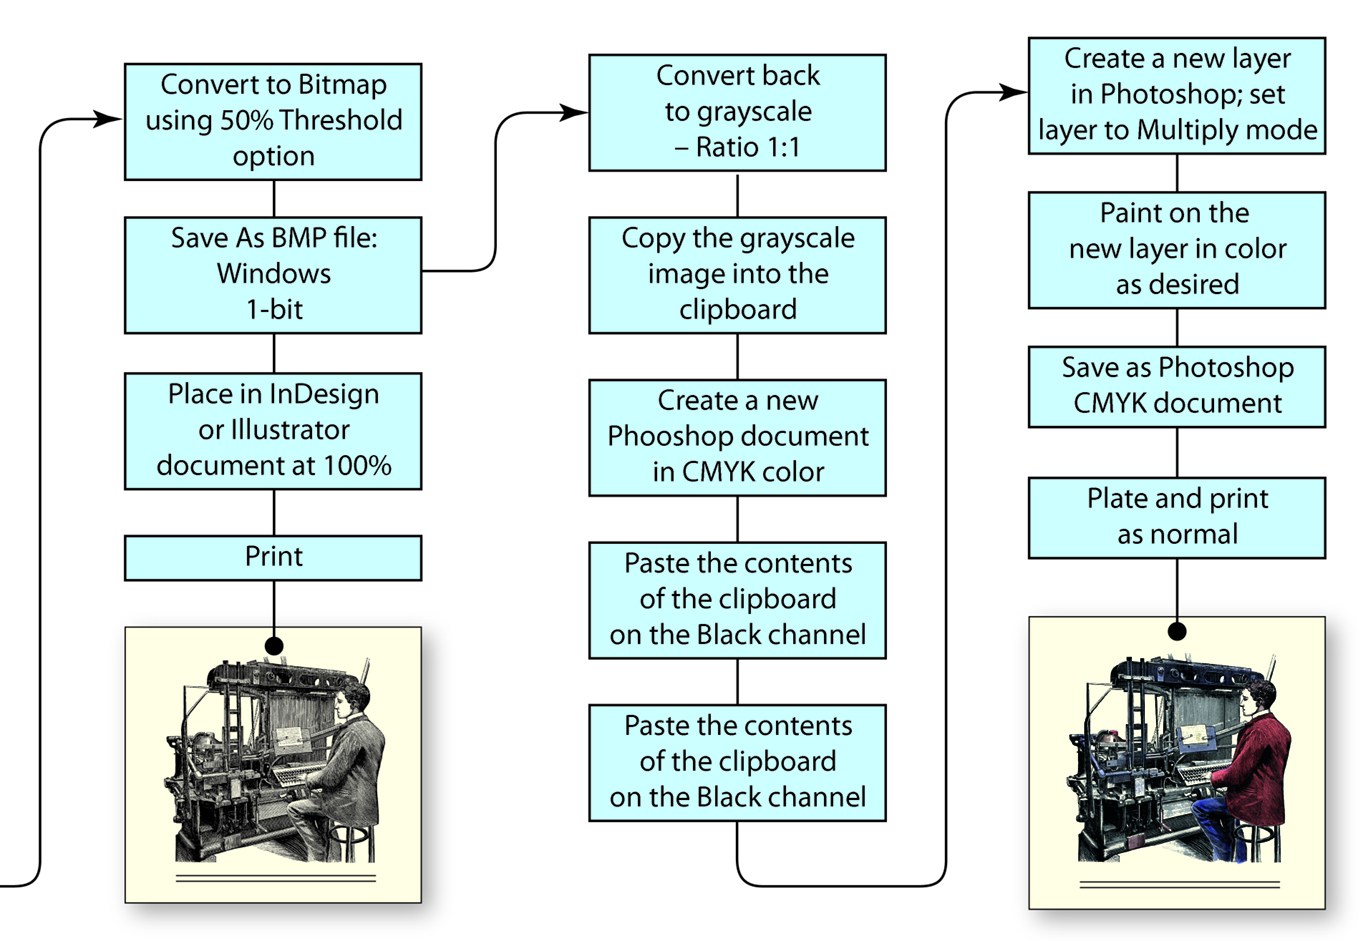
This is the continuation of the work flow diagram I presented in a previous blog. This one includes the conversion of the scan to bitmap, then back to grayscale, and the addition of a second Layer in Photoshop for a color overlay.
Adding a color overlay layer to the bitmap layer requires that the file format be able to contain color. To do this I converted my scanned image to bitmap at 2400 ppi (using the 50% threshold technique) and then immediately converted it back to grayscale (using a Size Ratio of 1) which leaves the art as it was modified to bitmap. The pixels are either 100 percent black of 100 percent white.
Once I have the image back in grayscale, I copy the image to the clipboard. Then I create a new document in Photoshop in CMYK color (Photoshop already knows the pixel dimensions of the clipboard). Once that file is created, I paste the contents of the clipboard onto the black channel, leaving C, M and Y alone.
The safest way to proceed is to create a new Layer in the illustration and paint any color you want on that layer. I set the Mode of the layer to Multiply, and I am then free to draw or paint in color on top of the line art. I choose strong colors – a pink for the skin tones, rich blue for the jacket, etc., and I paint with those colors at 10 percent opacity level in Photoshop. Because the entire layer is in Multiply mode, all artwork on the layer is overprinted on the final file.
The result of this is charming. The illustration holds its original character, but color is added. And, the result of my test on the Heidelberg shows that an image, once converted to bitmap, remains a bitmap file even when the illustration is converted back to grayscale. The color overlay in this example is converted in Kodak Prinergy to halftone dots – which are essential to the appearance of the final illustration – while the line art remains one-bit black and white line art. The result is excellent, and I have learned that the behavior of the Prinergy halftone engine exempts one-bit information from being converted to halftones (which are harmful to the character of the original engraving).
This technique also works for comic book art, allowing the artist to work in black and white, and then later add a color overlay to the work. The benefit here is that comics that print on black-only presses can be printed with the black channel, and those that have CMYK available can print with all four colors. The only difference is whether to apply the color layer to the art or not.