

At Cal Poly we recently dedicated the Raymond J. Prince Shakespeare Press Museum Resource Room. It’s a library of printing-related books and magazines, and it’s a study room for our students with desks, computers, a scanner, and comfy chairs. The room was upgraded in the last year with about $30,000 from donations for construction, and contributions of books from numerous people in our industry.

This is the page from my notebook for the Raymond J. Prince sign. The final signs turned out to be very much like these sketches.
Most notable of those donors was Raymond Prince, a longtime graphic arts professional with ties to GATF, PIA, NAPL and other industry associations. Mr. Prince has been a consultant, writer, troubleshooter, philosopher and advocate of the graphic arts industry. Mr. Prince contributed to the collection of graphic arts books, and he encouraged his many friends and acquaintances to contribute also. As a result the university received many books for the Resource Room.
The result is that we now have over 1,000 books on printing, typography, bookbinding, design, and graphic arts processes. The books are as old as the mid 18th century, and as new as current-day publications. Inland Printer magazine (later called American Printer) contributed a complete collection of their magazines, from the first issue.
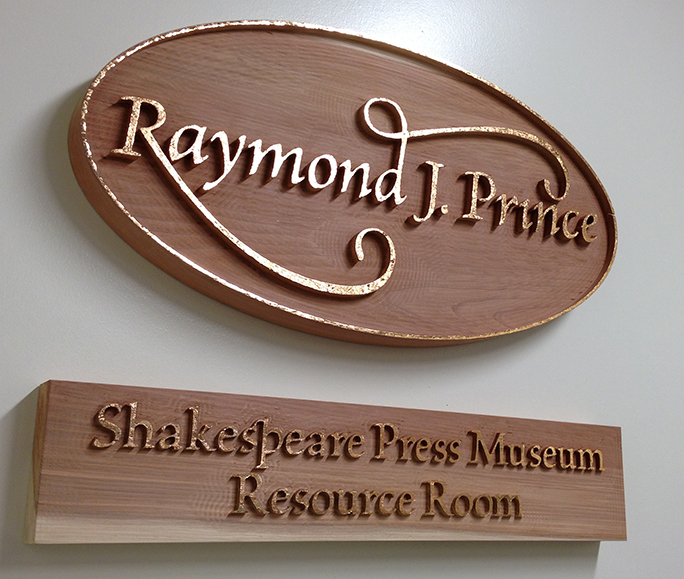
These two wooden signs now adorn the wall of the Raymond J. Prince Shakespeare Press Museum Resource Room at Cal Poly. I’m letting the wood dry for a couple of months, then I will take them down, retouch the gold leaf, add a coating of oil to the wood, and put them up again.
Graphic Arts Monthly sent their entire collection, a set of bound volumes dating back to the very early 1900s.
To honor Mr. Prince, we printed a large banner and hung it on the wall, and we added a framed portrait of him. I decided to add a carved wooden sign to finish the job. This began as a sketch in my notebook, then I translated that into an illustration in Adobe Illustrator. I used a font named Brioso Pro, and then converted the letters into outlines in Illustrator.
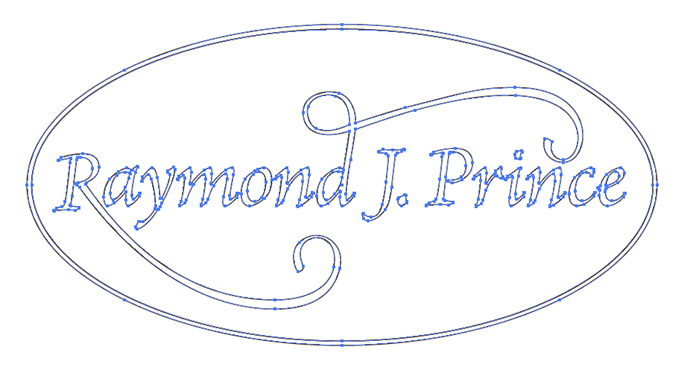
This is the Illustrator file for the elliptical sign. I drew this at finished size: 29 x 15 inches in size, then exported a file in DXF format for the milling machine software. The letters on this sign were cut to a 0.5 inch relief above the background of the wood.
Once the letters were outlined, I modified them slightly to add big swashes, and to thicken some of the thinnest parts to prevent them breaking off in the machining process. From the final illustration I made a DXF file, commonly used to control computer-aided machines. This sign would be cut on a Bridgeport CNC four-axis milling machine located in the shop of my friend Phil Schack. Phil usually machines exotic parts for aerospace applications and precisely-made metal parts for racing cars and motorcycles. Carving a wood sign was not his usual fare.
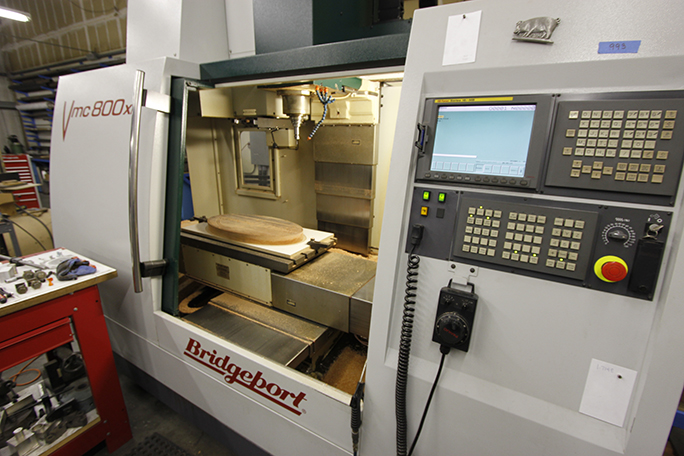
This is the Bridgeport mill with my elliptical sign mounted on its working surface. When the mill runs, the material moves and the cutter remains stationary. The cutter is raised and lowered into the material by the milling machine in precise increments. Its precision is said to be 0.0001 inch.
Curiously, the wooden sign turned out to be significantly more difficult than Phil or I expected. It challenged his equipment because wood is so delicate compared to metal, and that required Phil to reduce the depth of his cuts, and ensure that the chips were ejected efficiently so that they didn’t bind, and break the delicate letters as they were cut. Slowing the process caused the primary sign to take several hours to cut.
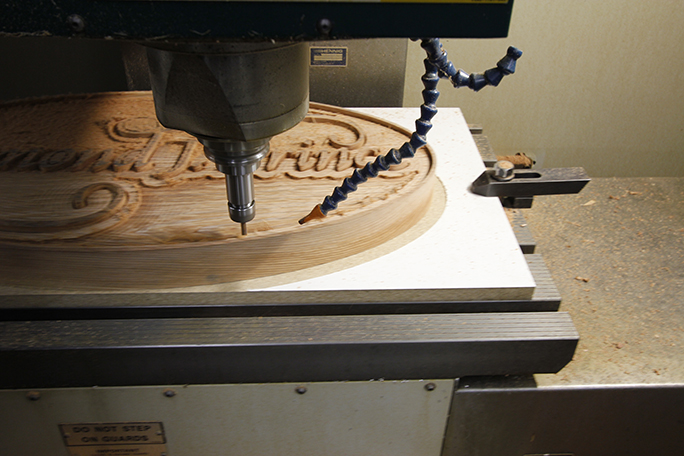
Here the large redwood board is moving against the cutter to make the perimeter cut. You can see two levels of wood against the lettering. The whole process took several hours to complete as it was cutting only a few hundredths of an inch on each pass.
I started with a visit to Pacific Coast Lumber in San Luis Obispo. This firm is owned by my friend Don Seawater, who runs the “urban lumber mill” making finished lumber from locally cut or fallen trees. Don showed me some clear redwood he had recently cut. The section of the log we were admiring was clear wood, almost two feet thick, two feet across, and four feet long. I needed only 29 inches by 15 inches for my elliptical sign (defined by the size limits of the Bridgeport mill). Don’s large lumber-cutting bandsaw sliced a plank about four inches thick off this redwood log, and then he put it in the dry kiln. His kiln is a converted box trailer with heaters and blowers installed to dry lumber over a long period of time – usually weeks.
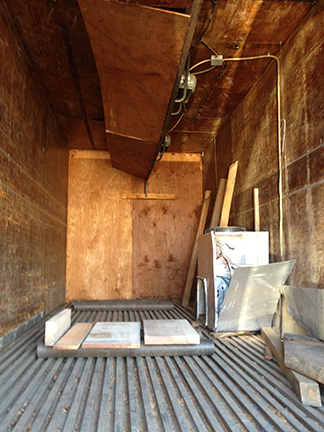
This is the dry kiln at Pacific Coast lumber with my sign parts within. On the right is the heater, at the ceiling is a row of fans used to dehumidify lumber.
My board was supposed to spend a whole week in the kiln, but my schedule forced us to take it out a bit sooner. When it went on the milling machine, it was still damp, and that worried Phil. Damp wood might have caused the cutter to work inefficiently, or the chips to clog in the kerfs, but it worked pretty well in its damp condition. With just a week to go to the dedication day, Phil cut the basic shape of the ellipse, and surfaced the plank to precise flatness. Then, using my Illustrator-created DXF file, he began the process of cutting the sign.
Normally, the milling machine cuts at a startling speed, with metal chips flying, a spray of liquid coolant blasting at the cutter head, and a slurry of metal chips and coolant collecting in the base of the machine. For wood carving, though, Phil used only a blast of air to remove sawdust from the cutter head. He ran at normal cutting speeds, but reduced the depth of each cut in some areas to just a few hundredths of an inch to prevent chipping. This went long into the night. I joined him for the best part of it while the letters were being formed.
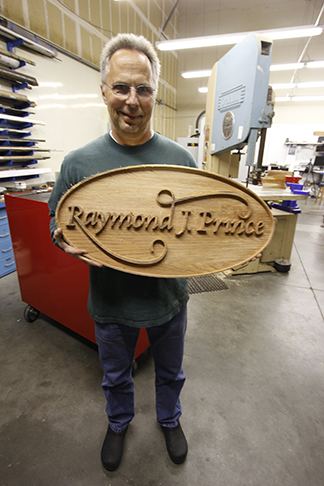
Phil Schack holds the machined elliptical sign. From here I took it to sand it and add the gold leaf.
He cut the elliptical sign first, then followed that with the rectangular sign. That wood was considerably dryer than the ellipse, so he had to cut shallower letters to prevent chipping; this took longer than the ellipse, but he was able to cut all the delicate letters without a mishap.
When the cutting was complete, I took the wooden signs to my woodshop, and very carefully sanded the surfaces to eliminate small residuals and “holidays” which were left behind by the mill. I had to do this with extreme care because the letters could break off with the slightest incorrect pressure. I treated the process like a surgical procedure.
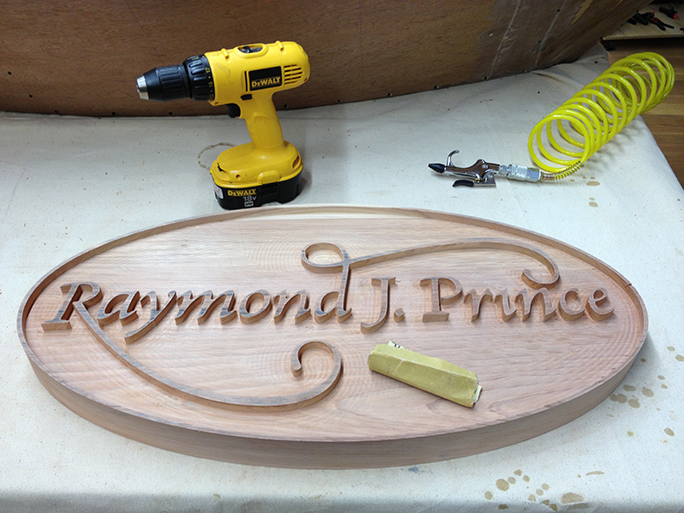
Sanding proved to be a delicate process. I hand-sanded it with 220-grit paper on a hard sanding board, and I was really careful not to damage any of the letters.
Once I had that done, and just 12 hours before the signs had to be up on the wall in the new Resource Room, I took the signs home to apply the gold leaf. It had been many years since the last time I applied gold leaf to anything, and that anything was not redwood – it was vellum, which is a smooth and reliable surface.
I prepared a traditional gelatin size, used by gilders throughout history, and I began the process of putting the gold leaf onto the relief surface of the sign. Since the wood was still quite damp, this didn’t go as planned. The wood wouldn’t accept my size, and the gold would not stick to the size. But, I persevered, and using a steam iron (don’t tell my wife!), I managed to dry the surface of the letters adequately so that the size would adhere, and the gold would stick. In the end, it looked great, even with a few places where I simply couldn’t get the gold leaf to adhere to the surface. I decided to call this an “antique” finish, and I declared victory.
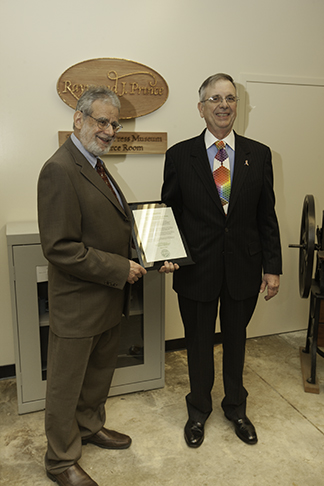
In this photo my department head, Harvey Levenson, presents a plaque to Raymond Prince, honoring him for his contributions to the new Resource Room. On the wall behind them are the two signs described in this article.
My able helpers Bob Pinkin and Eric Johnson at Cal Poly inserted sturdy wall anchors, and hung the signs in the new room. Just minutes later the audience arrived, accolades were spoken, and Mr. Prince addressed the students and faculty. One would never have known that just 24 hours earlier the ellipse was a slab of redwood, and the gold leafing was not even started.
Oh, I love a deadline!
My god, I love this post, Brian. What a story and what a delight to read in a little break in my day as I, too, race toward a deadline. Thanks so much!
Thank you, Stephen.
I always seem to be doing this sort of thing in the middle of the night.
And, it pays off!
Brian