

For years I have been making writable DVDs as archives for my files. I compile a selection of about 4GB of material in a folder, and when it’s reached that size, I write a DVD. Then I catalog that DVD in a software catalog that lets me search for file names, dates and folder names.
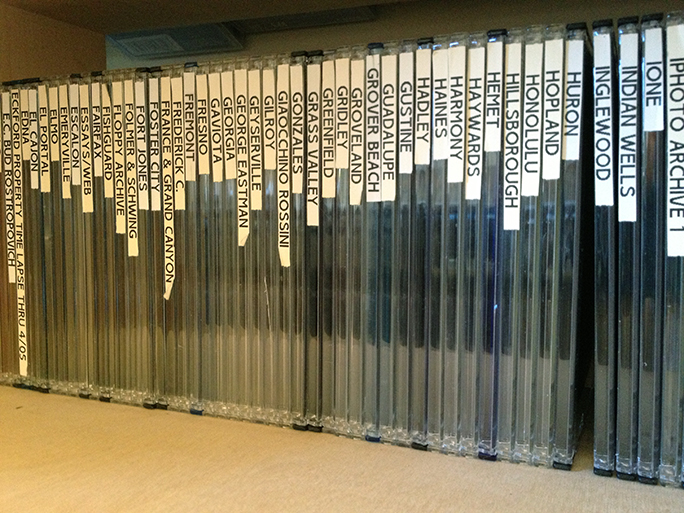
…just a few of my over 300 DVD archive discs. I name them after California cities and other strange things. Then I catalog their contents on a cataloging application that allows me to search for their contents quickly and easily.
My archive is now about 300 DVDs, representing over 720,000 files. But in the fall, I retrieved one of those DVDs and inserted it into my computer, but the computer would not read the disc. It had failed somehow – probably the dyes faded – and now it’s nothing more than a plastic disc. The data on it are lost forever (in this case I had another copy of the files that I needed).
I realized that I need to move the files off of these DVDs and back onto hard drives. So, I began the search for an appropriate storage server to hold all this material. After about a month of research, I decided to build my own server using off the shelf parts and a free-ware operating system called FreeNAS. NAS stands for Network Attached Storage.
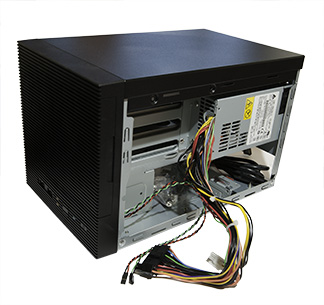
This is the chassis for my new Network Attached Storage computer. I have been accumulating the parts for the last two weeks, and finished building it this morning.
I have been buying the parts from Amazon and Newegg, and from my favorite local computer store, MacSuperStore. I have almost everything now, and I am looking at it as a delightful challenge. I have never built a computer before, but I’m doing it now.
Back in the 1960s I built a lot of electronics, some from Heathkit, some from parts and wires. I was a ham radio operator when I was a teenager, a hobby I did not pursue after I went to college. By comparison, my NAS server should be easy. No soldering.
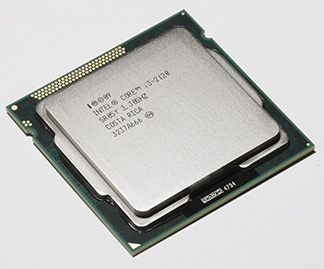
This is the Intel processor in my server. I’m awfully impressed by this. It looks small and unimportant, but it’s surprisingly heavy, and it has a whole world of computing inside!
I am following the instructions of a fellow named Sam Kear whose blogs include one on making this machine. His web site is beautifully illustrated and has links directly to the suppliers of each part of the server. Ordering was easy; I just opened my wallet and started clicking. Days later, the parts started showing up. The operating system is freely downloaded from freenas.org, and I have that ready to run today also.
My NAS server is fitted with four 4TB drives from Western Digital, giving me a disk capacity of 16TB before formatting the unit with RAIDz, the FreeNAS version of RAID storage. I’m not sure how much space I will have once it’s running. The operating system itself is stored on a USB memory device mounted on the logic board.
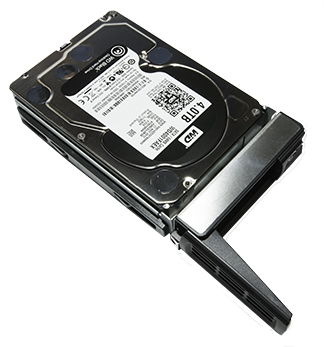
This is one of my four 4TB drives mounted in its cartridge. These can be hot-swapped if a problem occurs. All it takes is another Western Digital 4TB drive and a screwdriver to make a replacement.
The processor is an Intel i3, and I have 8GB of RAM on the logic board, so this machine should run quickly and efficiently. NAS servers are connected via Ethernet on a local computer network, and my plan is to store this machine close to my desk in a location where it doesn’t make much noise.
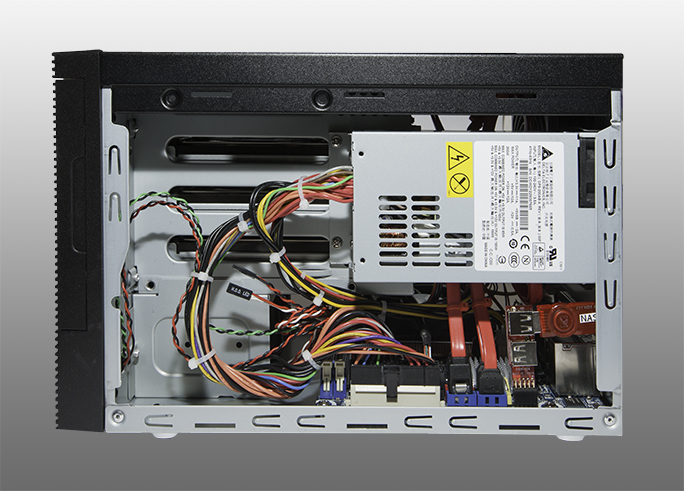
This is the right side of the wired server. The power supply is on the top, with its bundle of wires running down to the logic board. The wide red cables are SATA cables that connect the hard drives to the logic board. On the right you can see the Kingston 8GB USB card squeezed into the case. This has the operating system on it.
Curiously, the capacity of the NAS will be so great that moving my approximately 300 DVDs will represent a small part of the available storage on the unit. If each disc were full, the total of my discs would be about 1.5 TB. My secondary plan is to adopt an open source Digital Asset Management system. More on that later.
This is the first time I have built my own computer, and this server is a complete computer. It has an Intel i3 processor, 8GB of RAM, all of the inputs I could need (and some I don’t need) and it’s ready to go today. I have not yet had the guts to plug it in, so I’ve invited my friend Eric Johnson over to witness the “smoke test” later today. This test is named for electrical tests when you first flip the switch, and hope that no smoke comes out.
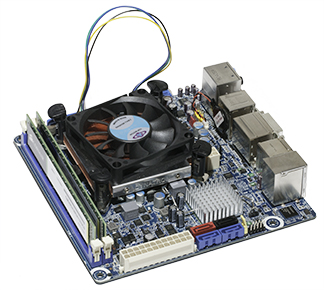
This is my complete Intel logic board before it was wired. The cooling fan is attached to a heat-sink which draws heat off the processor. The boxes along the right side are IO ports that go out the rear of the chassis. There are USB, SATA, S/PDIF optical, audio, Internet and more back there. It’s an entire PC on a 7.5 inch square board.
Configuring the FreeNAS operating system will be interesting. It runs from a USB drive plugged into a small “header” that sticks up from the logic board. I will report back on the performance of this server once I have it running, so stay tuned!