

I left my detailed plans for the generator trailer with my friend Hank Van Gaale, who is the best welder in the universe.
Then I flew to France, and went on to Switzerland and Germany for four weeks.
While I was gone, the trailer took shape. Hank welded the parts for the frame, attaching the spring brackets, the springs and axle, and then added a diamond-plate deck to the trailer. This piece was water-jet cut by my other expert friend Frank Canaan, proprietor of Central Coast Cutting. Water-jet cutting is one of the most amazing technologies I have ever seen. I wrote about it in a previous posting about the restoration of an antique typographer’s table saw.

Frank’s amazing machine cut the diamond-plate steel with incredible precision, leaving holes for D-rings and bolt holes. That was then welded to the frame of the trailer. The hitch was welded on, the fenders added, and now the trailer looks a lot like it will when finished. What remains are the side railings, the front wall, and electrical conduits for the lights.
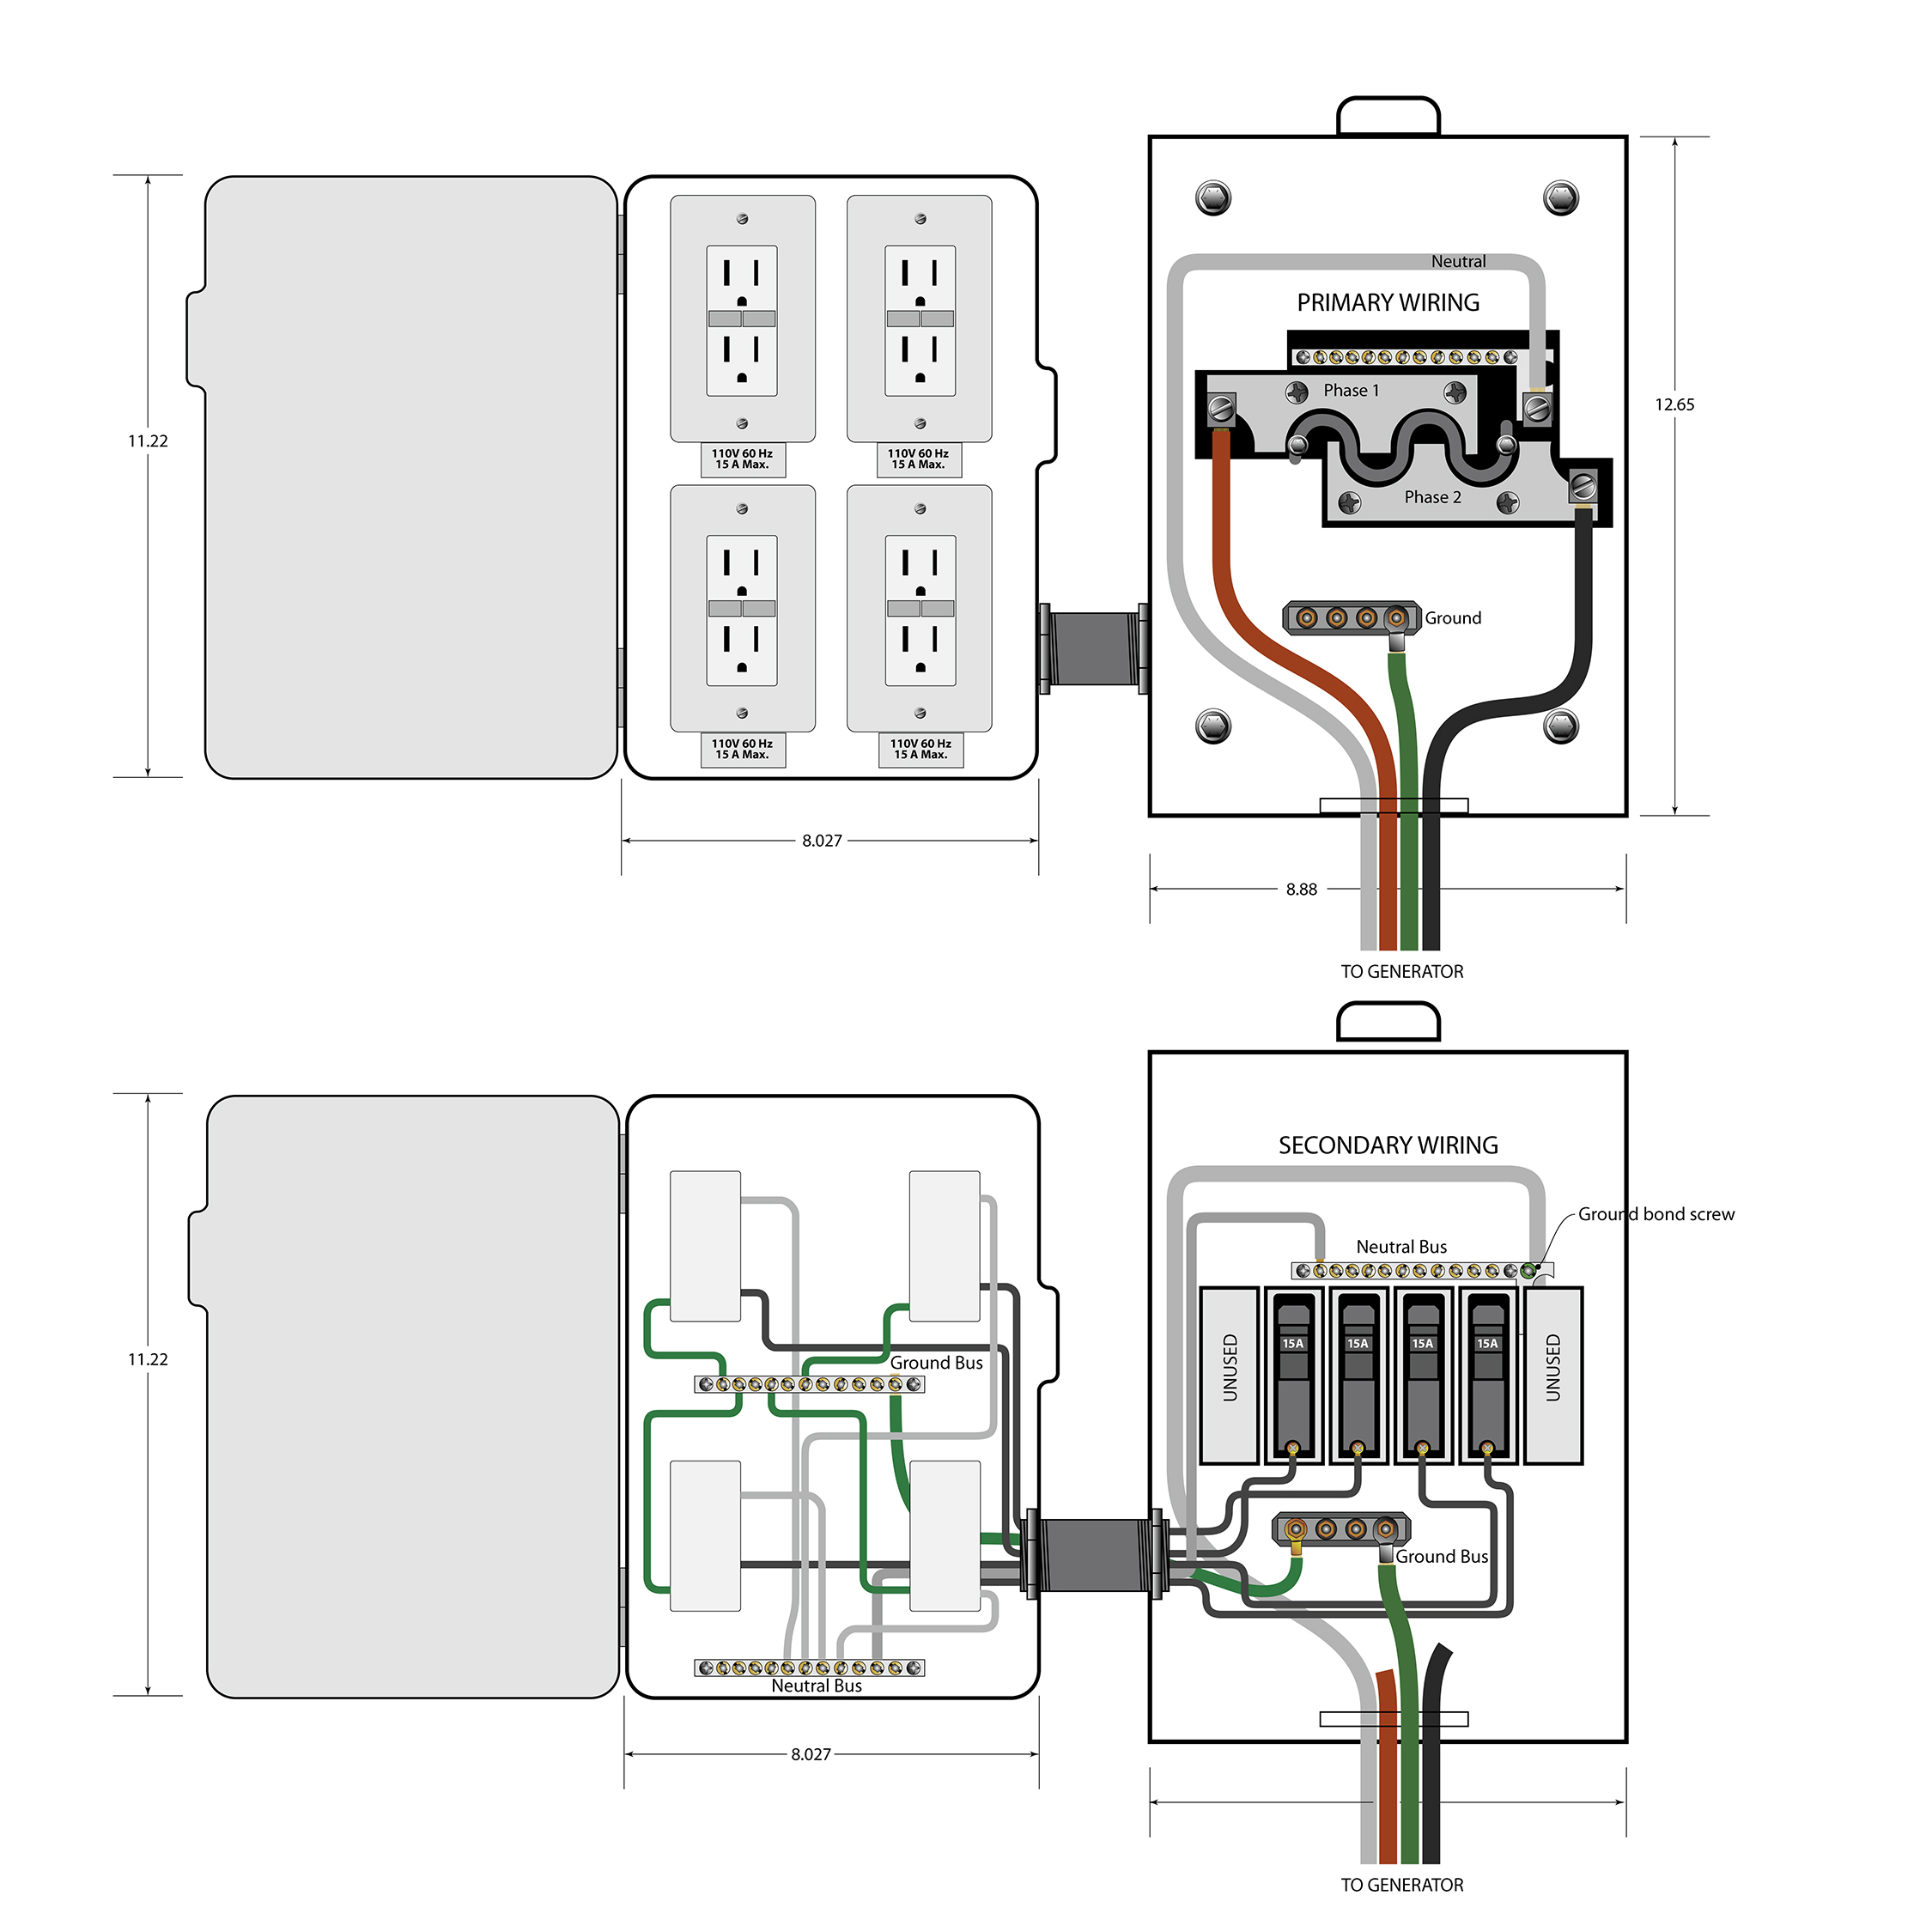
Ultimately what we are making is a portable electrical power plant. On the front of this machine will be an electrical distribution panel and breaker box. From there, up to eight power cords can be plugged in to provide electricity to our Burning Man camp’s refrigerator and freezer, several air conditioners, and the darkroom lights. We will also be able to provide power for our photo gallery.
The generator, which is a military surplus 5 KW diesel machine, can deliver electricity in three forms: 110 volt AC, split-phase 110/240 volt AC, or 208 volt three-phase. I have chosen to run it as a split-phase device, delivering two 110 volt primary lines to the breaker box. There, I will split the power to four 15-amp breakers, then feed the output to four ground-fault interrupter receptacles for powering the appliances in camp.
Running power of this kind requires some big wire, #2 gauge, from the output of the generator to the breaker box. I’ll be running these wires through two steel conduits that run under the trailer from back to front. At the breaker box the wires arrive as if from an electric utility.
From there, the power is distributed as if in a commercial building.
The trailer is stout – adequate to hold the 800 lb. generator and a 50-gallon fuel tank which, when full, weighs another 400 lbs. Add to that the electrical equipment and the spare tire and a tool box filled with filters and supplies, and the trailer weighs-in at just under 3,000 lbs. With any trailer it’s a combination of the overall load and the weight of the tongue of the trailer. We’re trying to keep that weight down so it doesn’t overload the vehicle that pulls it. This is done by moving the center of gravity forward or backward by moving the load or moving the axle. We have reduced the tongue weight to a reasonable value now, and the trailer’s load will be secured in these positions.
In order to drive with this trailer, I first have to register it with the California Department of Motor Vehicles. The way that is done is to take the finished trailer to the local office, showing them that it’s correctly built, and that it has stop lights and turn signal lights and marker lights. They check it for safety, then they issue a VIN to the trailer and give me a license plate to affix, and I can hit the road. For that to happen I have to wire the trailer, then get it through registration, then unwire it to get it powder coated.
For the electrical connections, I bought the breaker box and the distribution box on eBay, and I bought the wiring and parts from the local big box store. Now it’s just a function of doing the wiring. This is just like commercial wiring, where all wires are contained in steel conduit (residential wiring does not require the conduit). It’s easy and reasonably fast work to get four outlets wired to the breakers in the box. I did buy exterior boxes for this project, those being able to get wet without water getting inside the boxes. I connected the two boxes with a watertight steel nipple, so the wiring goes between the boxes without risk of water incursion.
I’ll follow-up when I’m ready to get the trailer licensed and powder-coated.