

In our industry we throw around lots of arcane terms – offset, litho, ink-jet, gravure, roto, screen printing, make-ready, prepress, flexo, etc., etc.
I’ve been doing my best recently to learn similar terms in German, some of which don’t have an exact counterpart in English. One of my recently captured words is “Gegendruck.” Gegendruck means “back pressure” in English.
Though it is close, it’s not an adequate English translation. The closest I can come is “counter” or perhaps “counter-die” – which is not really accurate because the term describes a thick card that is used to push against the back of the paper on a steel-die engraving press.
Counter-dies are common in foil stamping and embossing. They are three-dimensional bases that push the paper into a metal die that is either stamping or embossing that paper.
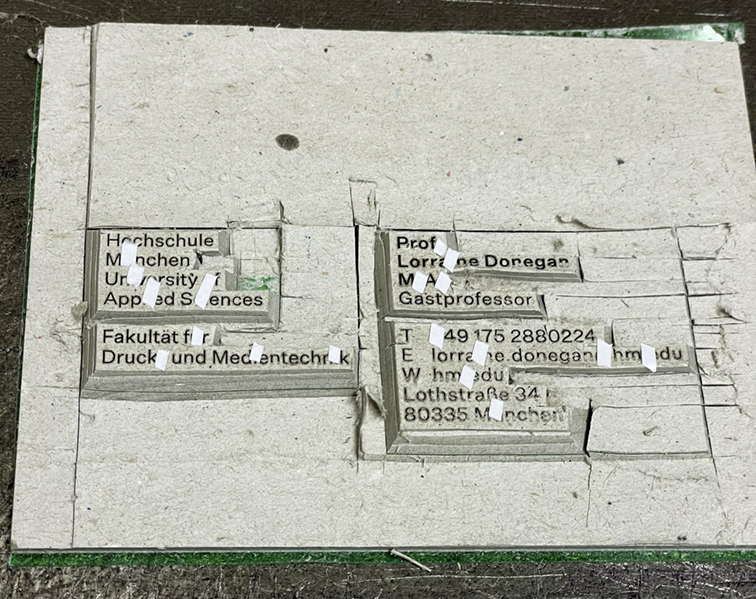
The Gegendruck is made on the press by making one impression of the steel intaglio die onto a thick card base (about 10 mm thick). These Gegendrucken do not have detailed relief except that they push against the image areas of the printing plate. They cover areas of the impression, not the lettering or the image.

After printing on the Gegendruck, using an X-Acto knife, you cut away the non-image area of the card, leaving blocks that support the text or image being printed. Those areas are flat. In the plant where I learned how to do this (I made one myself), the press operator also adds tiny bits of sticky paper to accent marks, and to periods and commas that might be slighted by the impression on the press if not enhanced.
Once the Gegendruck is finished, it is secured to the underside of the impression area. Above it is the tympan (this term describes it generally) and above that is the frisket, a mask that covers the parts of the sheet not being printed by the die.
I have seen many intaglio presses over the years, some of them roll-fed (roto-gravure) and some of them sheet-fed (intaglio or steel-die engraved). Until a few weeks ago I had never seen a hand-fed steel-die press, nor had a chance to see one working.
This type of printing is reserved for classy business and personal stationery, for fancy invitations and social printing, and security printing on a small scale. Currency is printed on the same technology, but on much larger machines that are machine-fed.
On this occasion, I was having business cards printed for my colleagues at Hochschule München. The cards, which we printed on Gmund Soft White 300 gsm paper were printed in two colors: the black lettering printed on the steel-die machine (called “Stahlstich” in German) and the red university logo printed by letterpress on a Heidelberg Windmill press (called a “Tiegel” in German).
The printing company, on the outskirts of Munich, is called Martin Schall GMBH. The firm specializes in security printing and specialty steel-die engraved printing, foil-stamping (“Prägedruck” in German) and extraordinary combination foil-stamping with embossing. Their presses include two 53 cm. Heidelberg offset presses, three large 100 cm. Heidelberg cylinder letterpresses with foil-stamping modifications, one Heidelberg 74 cm. cylinder press with foil stamping modifications. The firm also has two Heidelberg Tiegel machines for foil stamping and printing with ink.
The firm’s four steel-die presses were all built by Friedrick Heim & Co. in Offenbach, Germany in the 1960s. I can’t find any evidence that the company still exists.
The making of steel dies for printing has always been an art practiced by master engravers who cut into soft steel plate with engraving tools (called “gravers”). It is a complex and painstaking process, with extraordinary results (look at currency for examples of this skill). Another technique is to make a photoengraving into steel or copper using photo-resist, a film negative, ultraviolet light and sulfuric or hydrochloric acid to etch the image into the steel plate.
At Schall, the company has a master engraver, Maximilian Schall, son of the founder, and an artist with extraordinary skill with a graver.
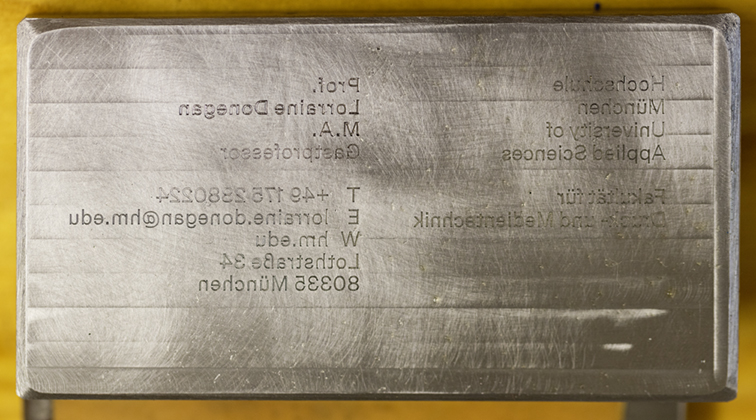
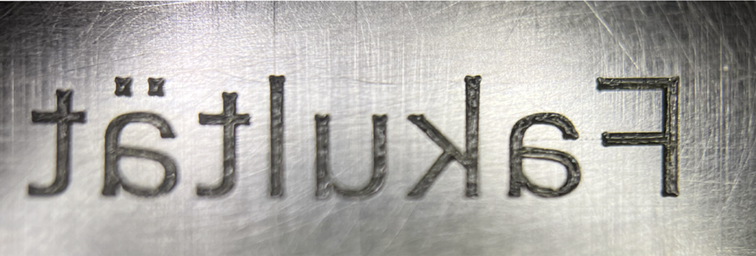
For commercial projects like mine, the company uses a CNC milling machine with precision carbide cutters. Digital files like those I created are converted to outlines in Adobe Illustrator, then cut into a steel plate about 0.5 in. thick. The depth of the engraved image is 0.05 mm (0.0127 in.). Because the machine is cutting with a rotating tool, all of the internal corners of the plate have round-corners. Max uses a hand graver to cut into the corners and sharpen those up to make them more faithful to the design.
Once the plate is machined, it is mounted in the Heim press and inked. The ink is American-made Cronite water-based ink for intaglio. The press floods the plate with ink, then a wiper removes the ink from the surface of the plate, leaving the ink only in the recessed areas of the engraving.
Impression is several tons, pushing the plate onto the paper, and forcing the ink to transfer to the paper. This gives the printing that legitimate raised effect, where the ink stands out from the paper.
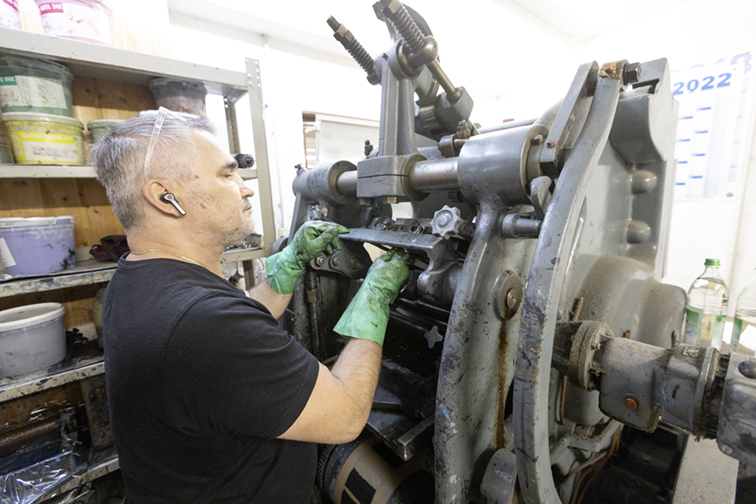
The Heim presses are hand-fed, and the operator uses one hand to lift a fresh sheet of paper, put it against the register guides and print. Then, using his other hand, he flips the paper around for a second impression on the same sheet. Finished sheets are laid out on a counter to the operator’s side.
The process is not very fast. Each impression takes about 10 seconds, limiting the output from these machines to 300 to 400 impressions per hour. After printing, the cards must dry overnight before going to the next process – printing by letterpress in my case, then the letterpress printing must dry overnight before the cards can be cut to size.
Overall, the quality of these cards is stunning. They are the classiest business cards in our university I am sure. We printed enough that it’s unlikely that any of the professors will run out in the coming years.