

The first true panoramic camera was patented by William J. Johnston in 1904. Century Camera Company brought that camera to market in 1905 as the Century Cirkut Camera. The company later became a part of the Eastman Kodak Company, which made the cameras until the mid-century, when they spun it off to the Graflex Company to meet the terms of a federal law prohibiting monopolies.
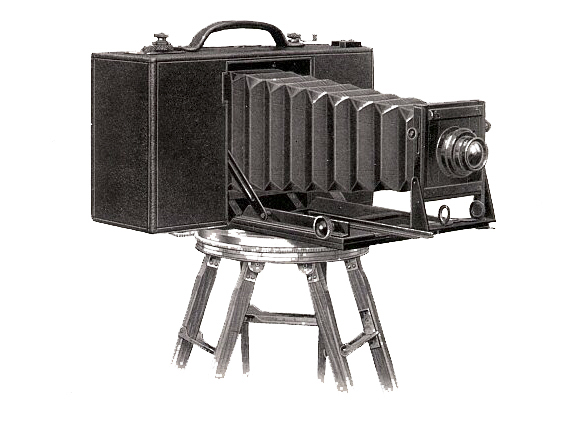
A Century Cirkut panoramic camera, probably a No. 8. date unknown. Note the gear wheel as the camera base. The motor, located in the housing, drove a small gear on a driveshaft that turned the camera on the tripod base. Meanwhile, the same motor pulled a roll of film through the camera.
The Cirkut camera is a clever combination of mechanics and optics, where the camera rotates on a tripod, driven by a spring motor. As the camera turns, a roll of film inside the camera passes across a narrow vertical slit to make a continuous strip of film with an image on it. Only a tiny amount of the image is recorded by the film at any time. The image on the roll is a record of what happened in front of the camera for a very small amount of time. The camera does not record anything else.
These cameras have been used over the last century to record breathtaking landscapes and group photos with hundreds of people in them, each one recorded with precision.
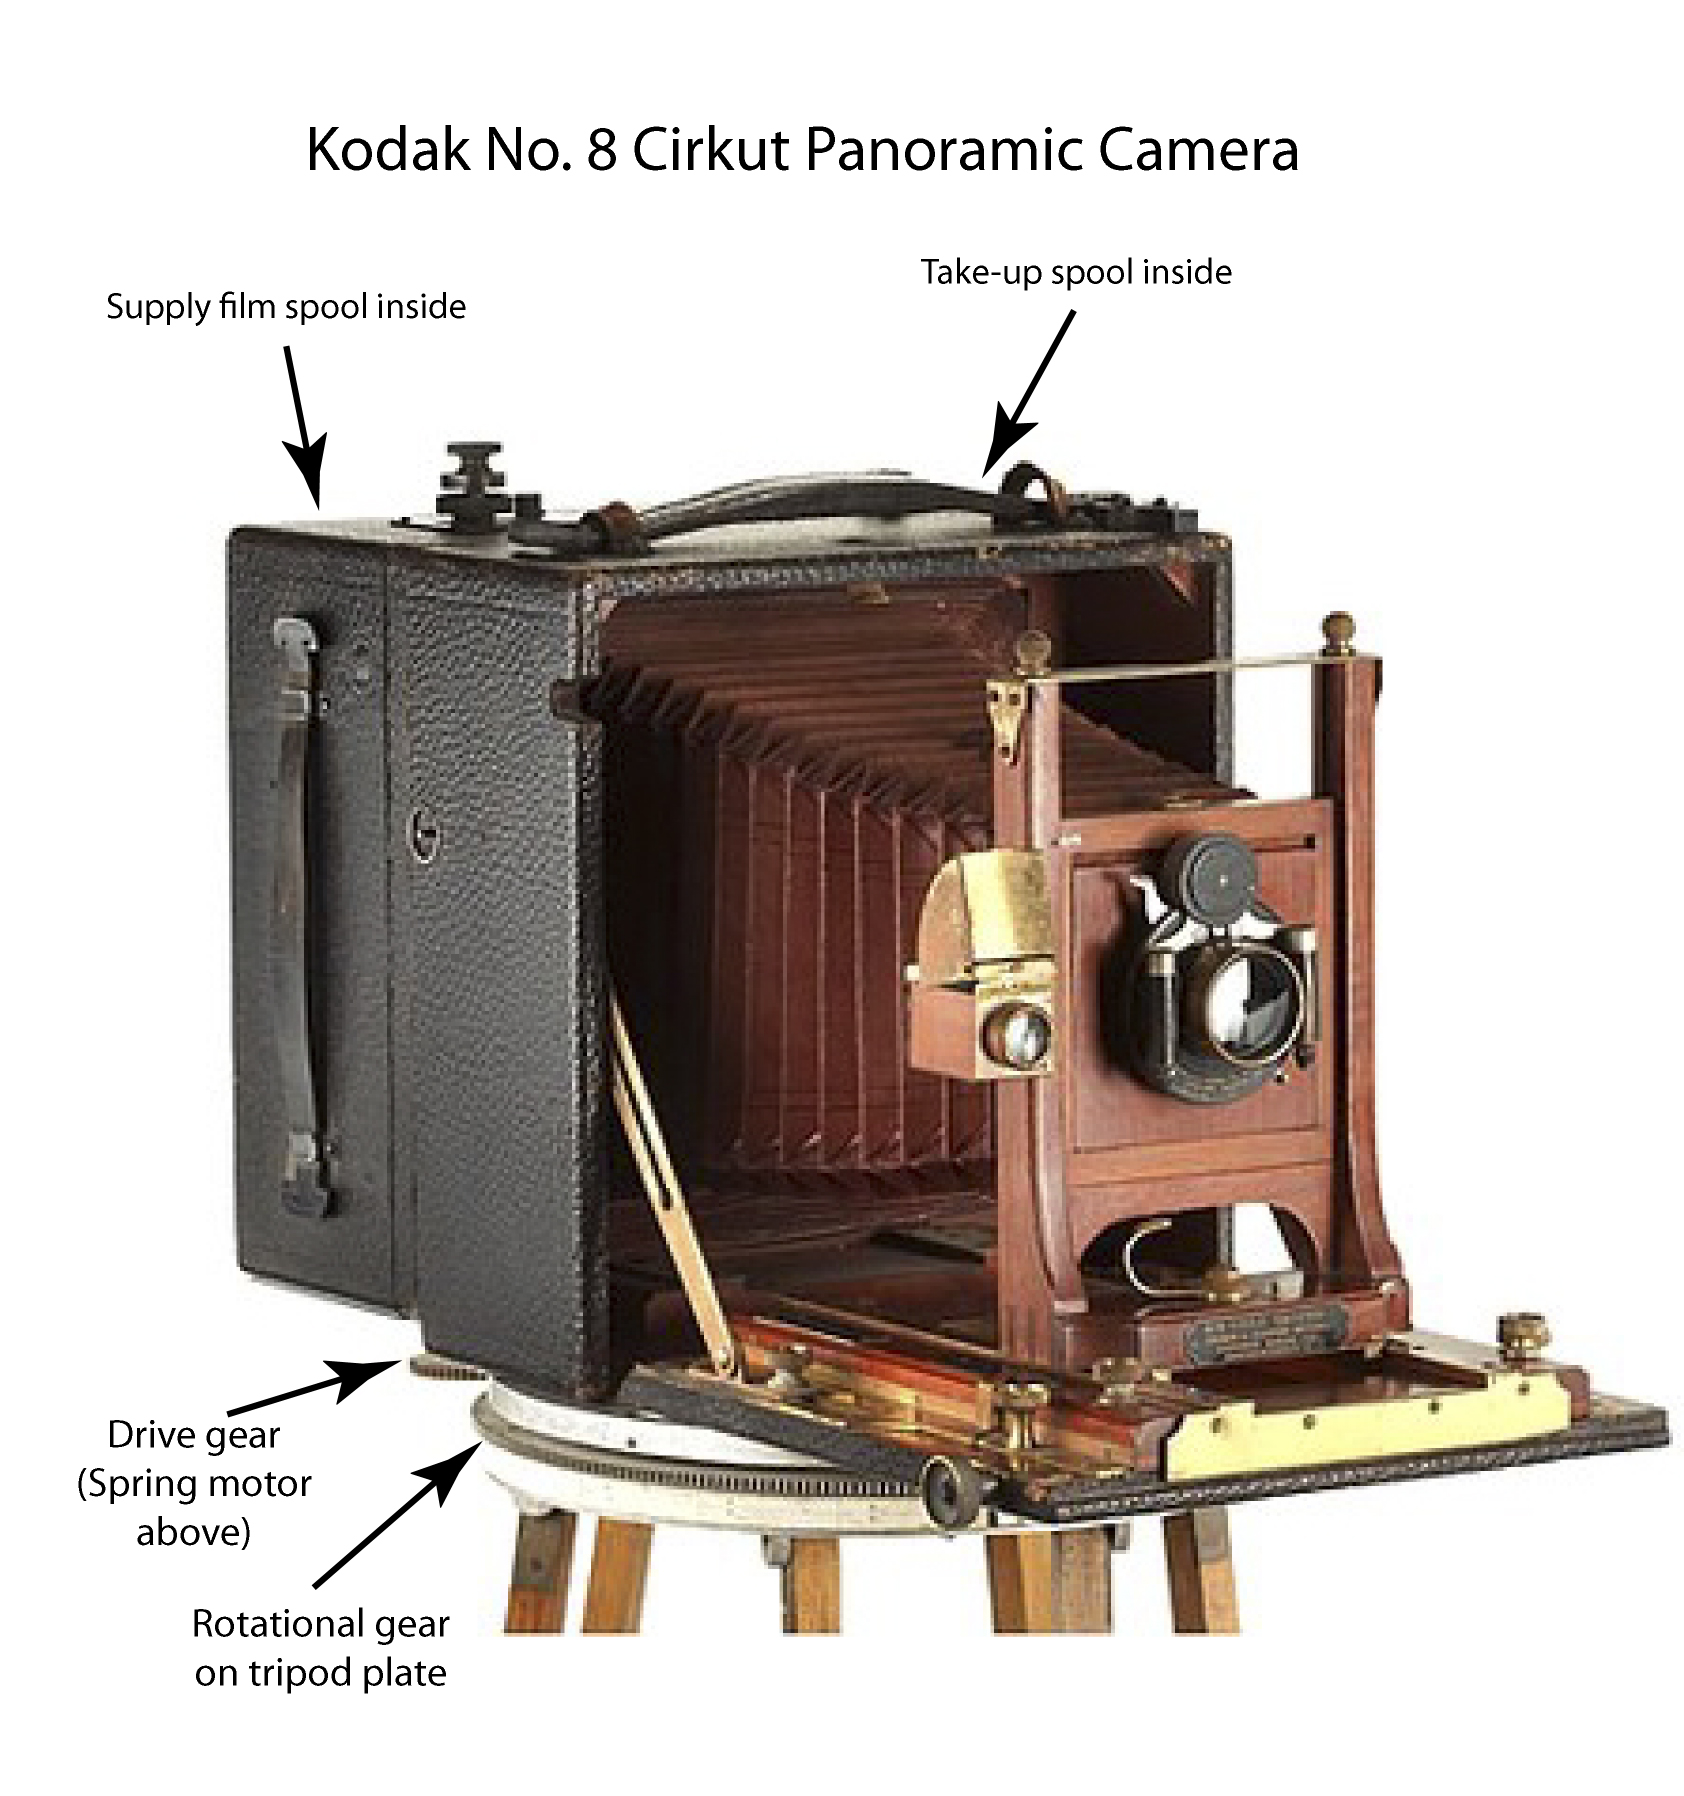
This is more modern version of the Cirkut No. 8, this one from the 1920s (judging by the lens). The drive gear can be seen in this image. They are beautiful instruments, and they take amazing photos.
The key to the success of a panoramic image taken with one of these complex cameras is that the rotation, the point-of-rotation, and the speed of the film must all be perfectly coordinated for the image to come out without distortion. If the film runs too fast, the photo will be disproportionately narrow. If the film moves too slowly, the image will be distorted. If the camera turns too fast or too slow, the same errors occur.
The mesh of the gears must also be perfect to avoid gear-chatter, which is an inconsistent movement of the camera (or the film) as it runs. The spring motors on most of these cameras, most of them being nearly 100 years old, do not run smoothly enough, and modern users of Cirkut cameras often replace the spring motors with smooth DC motors that run on battery power.
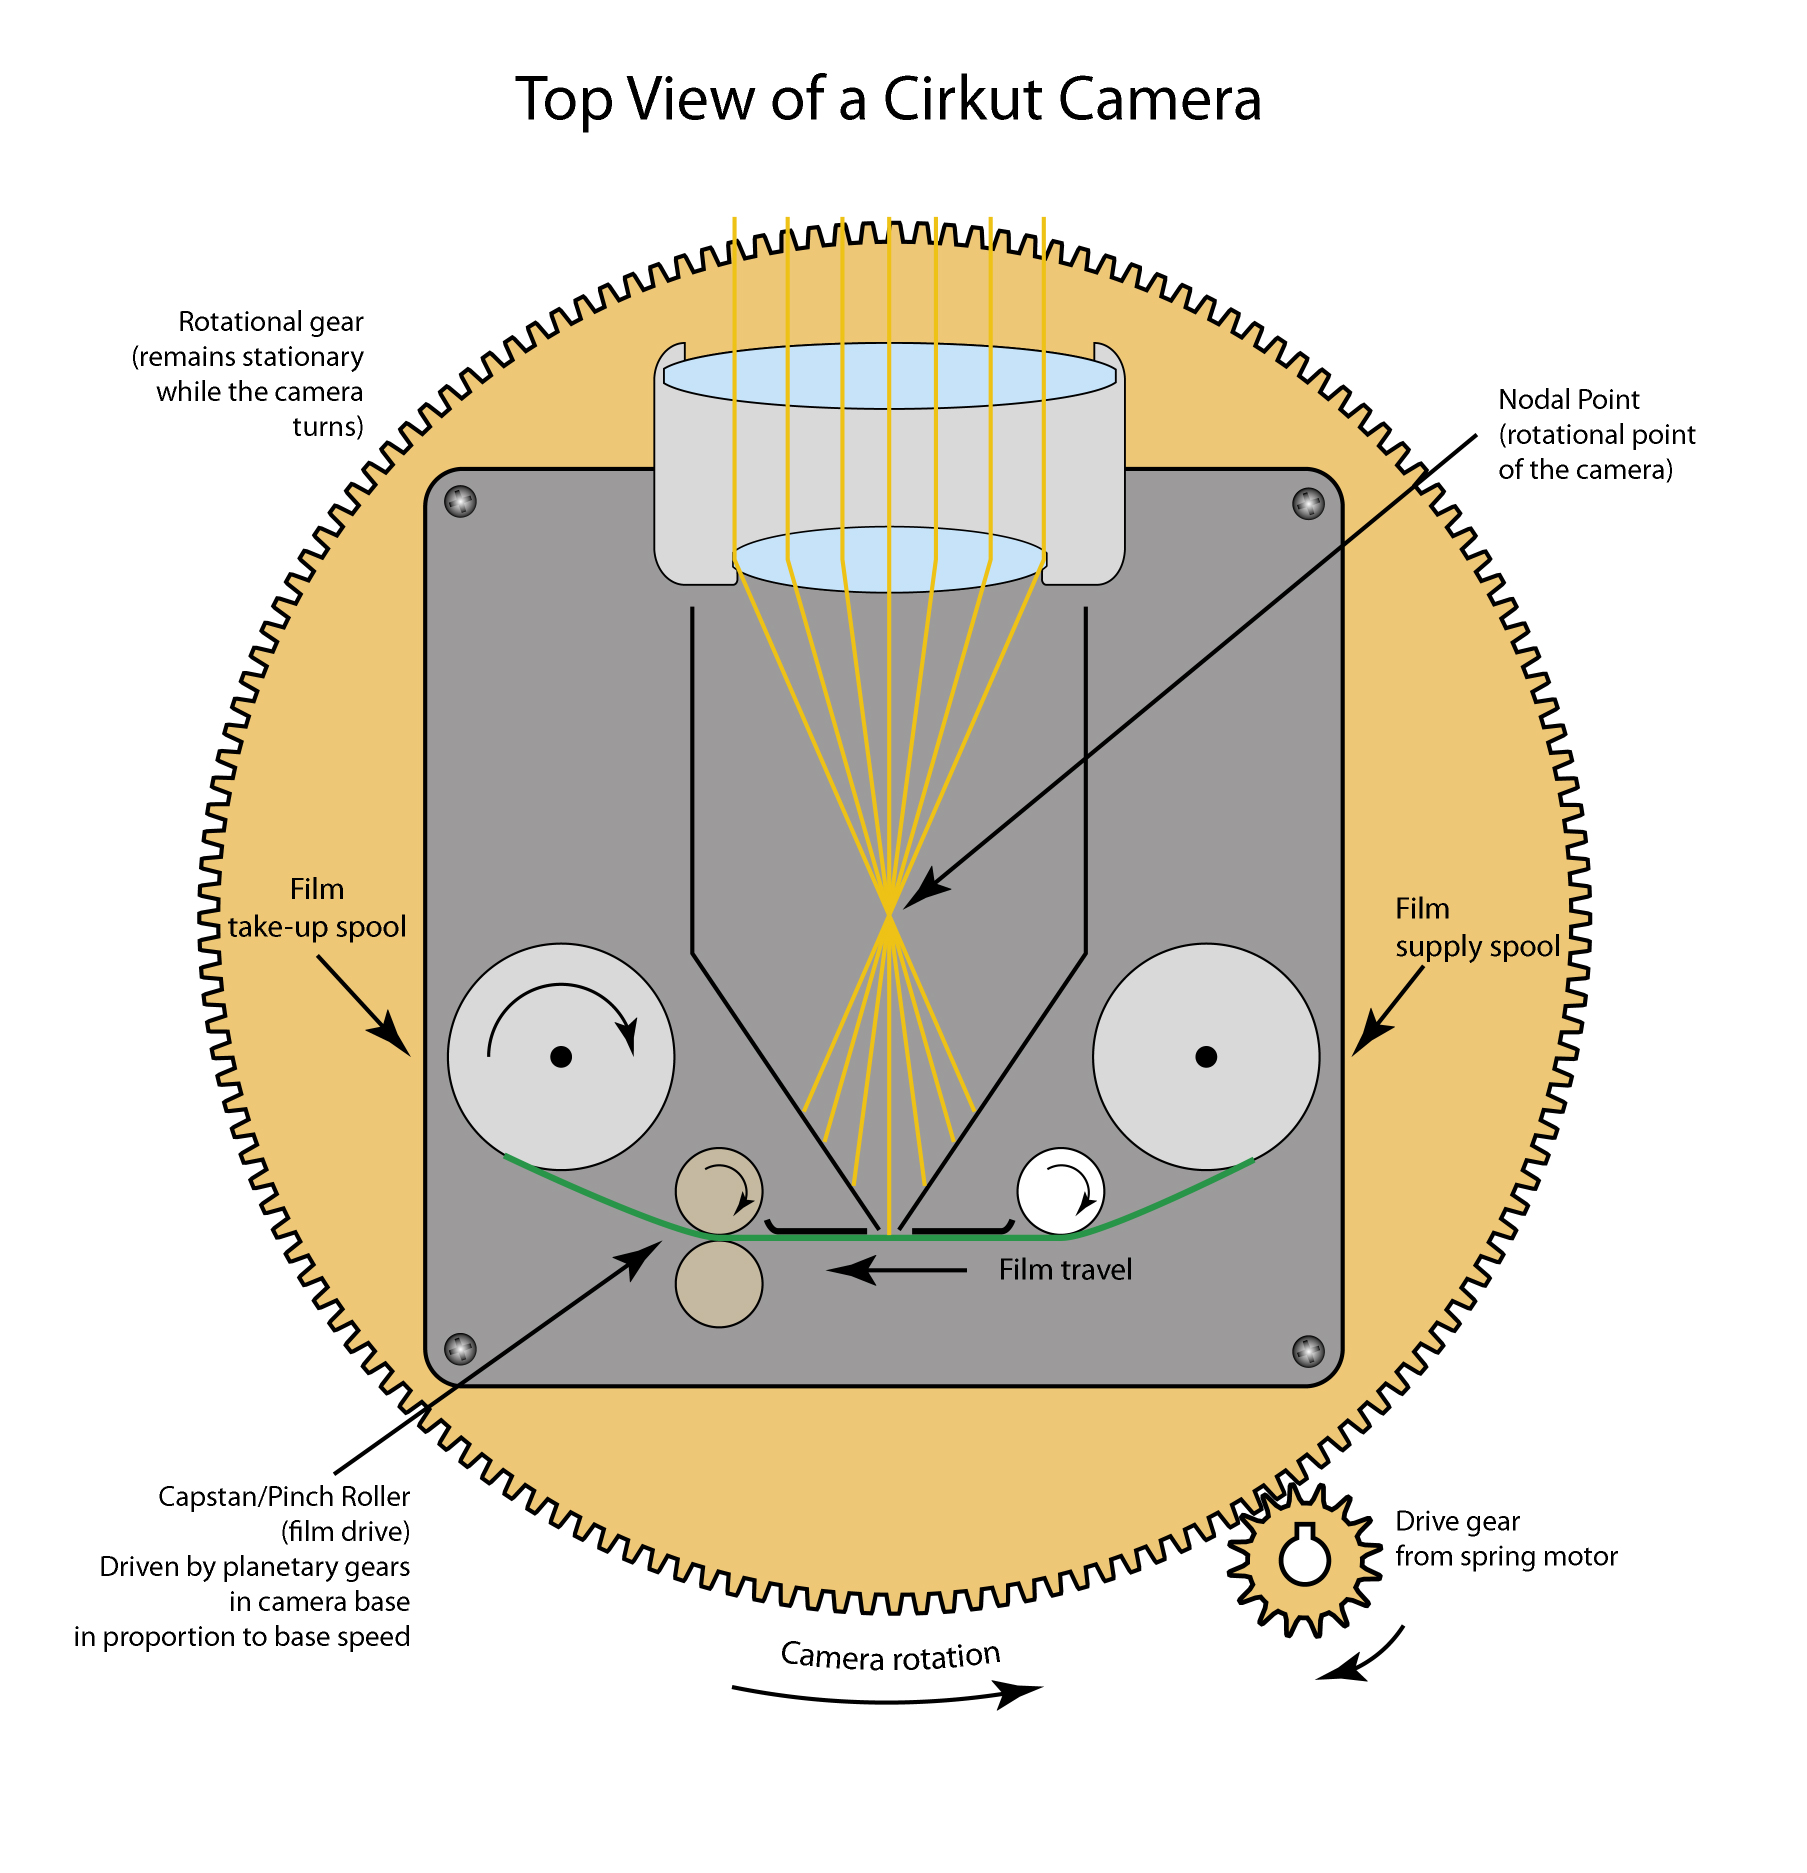
This illustrates the mechanism of a Cirkut camera. I have taken some liberties with the size and shape of the parts in the interest of clarity.
A Cirkut camera owner will have a box of gears with various numbers of teeth to set the speed of the camera’s rotation. Choosing the correct gear is done by consulting a chart where focal length and distance to the subject are the variables. The result is the size of the gear used the drive the camera’s rotation speed. Outdoor photos, where there is a lot of available light, take just a few seconds. Indoor photos require sometimes extremely long exposures – 30 minutes or more – to collect enough light to record the image on film.
In one historic panoramic photo I had the opportunity to study, the entire military base at Camp San Luis Obispo was photographed using a rotating Cirkut camera. It was obviously taken during daylight hours. While retouching the scan of that photo I noticed that in its over 50 inches of imagery there is not a single human being in the image! This would indicate that the camera was moving so slowly that anything moving in the scene moved too quickly to be recorded on the film. There are also no moving trucks or cars or trains. Nothing. My guess is that the photo (which also has some visible blurring) probably had an effective shutter speed (there is no shutter in a panoramic camera) of 30 to 45 seconds – enough time for a person to walk through the scene, or a truck to drive by without being recorded by the camera.

This is a scanning set-up I configured for scanning original Cirkut negatives. I made wings for my Epson scanner with register bars along the back edge. Then, moving the film in increments through the scanner, I made high-resolution scans of the film in sections, later putting them back together in Adobe Photoshop using its Photomerge function – which works well in this application. This particular film was 8-inch material. The length of each image varied from about 30 inches to over 72 inches.
Getting film for a panoramic camera is not impossible, but it will eventually be so. Batches of large roll film suitable for panoramic images can be purchased today, but must be ordered in adequate quantity and with enough lead time to allow the film manufacturer to coat, roll and package the film for these specialized cameras. In the not-too-distant future it will become impossible to purchase film in this format.
For those who have such a camera, and who can get film, the process is straight-forward. It requires attention to detail and careful planning, and it takes time. The camera is set up, focused (the panoramic film holder and motor mechanism are removed from the camera for focusing) and prepared. A light meter is consulted for proper exposure. As there is no actual shutter on a panoramic camera, exposure time is determined by how long the vertical slit is exposed to the film surface. This is a function of film speed, which is a function of rotational speed. The Century Cirkut camera has a chart showing the effective shutter speed at different motor speeds.
After the exposure is made on a Cirkut camera, that long roll of film must be processed. Numerous sizes of Cirkut cameras exist, measured in inches on the vertical slit. There are the Number 6, 8 and 10, the three most common, that record on rolls of six-inch, eight-inch and ten-inch film, respectively. There was even a Number 16, which recorded images onto 16-inch rolls of film!
For processing, some photographers use a technique called dip-and-dunk, where the roll of exposed film is submerged in diluted developer in a large, deep tank. The film is rolled back and forth during the long development time, giving every point on the film emulsion an opportunity to be in contact with the solution long enough to be processed evenly and correctly. Others had the opportunity to roll the exposed film into a canister that held the film in a spiral frame, and allowed the development chemicals equal access to the film’s surface during processing. This is a far better system, as it is easier to control and the results are much better.
After development, a quick trip through a “stop-bath” of slightly acidic solution, will stop the development. Finally, the film is immersed in a fixative, typically a bleaching chemical like sodium thiosulfate, which dissolves the undeveloped grains of silver in the emulsion, and clarifies the non-image areas of the photo. The fixative is a critical step to stop the light-sensitivity of the film, making it permanent and usable for photographic prints.
After the three-step development process, the film is washed thoroughly to remove these processing chemicals, then allowed to air dry. The result: a strip of film 6, 8 or 10 inches in height and as long as necessary to record the image. Many Cirkut panorama films are 50 or 60 inches in length.
There is no way to enlarge a panoramic film image, so the method of delivery has always been to make a face-to-face contact print of the Cirkut negative onto photographic paper in a large pressure contact-frame. This is also done in a darkroom, as photographic paper is sensitive to white light. The unexposed paper is placed in a frame, face-up, and the negative is placed in contact with the paper, emulsion-down. A glass cover is placed on top, typically with clamps surrounding the glass to apply an even pressure to the sandwich of film and paper.
Then, under red or ochre “safe” light, a contact exposure is made using a pinpoint light source overhead, which allows light to pass through the panoramic negative to the photographic paper underneath. The resulting print is typically processed by hand in a large tray of developing chemicals. Gentle agitation of the chemicals on the photo paper allows the image to be developed evenly. After several minutes of processing, the print is be stopped with an acidic bath, the fixed by immersion in a tray of sodium thiosulfate to fix the image and dissolve the unexposed parts of the emulsion.
Washing the prints, followed by air drying results in beautiful, long panoramic photos with amazing amounts of detailed information. It is a process involving hours of work, and the results are usually excellent.
Many of these cameras still exist, though few of them are in working condition. If you find one that is not in a museum, snatch it up (they sell used for as much as $25,000 in perfect condition).
In another blog I will write about more modern cameras and panoramic methods.
