

Last week I wrote about my immersion into scanning 19th century panoramic film. These negatives kept me up nights for about ten days. My total output of scans was 26. I carefully sorted through over 150 pieces of film, selected those that interested me, then scanned the best of those to make high-res scans.
I wanted to scan essentially as much information as could possibly be gotten from each piece of film. I experimented with different resolutions of scans, coming to the conclusion that 800 ppi is excellent for this work. Most of the negatives are over four feet in length, and either seven or 11 inches in height. I scanned each one on the Epson Perfection scanner at full size, and slid the film across the bed of the scanner with about 20 percent overlap so that Photoshop’s Photomerge function could reassemble the images successfully. This worked well, and most of the images turned out acceptably.
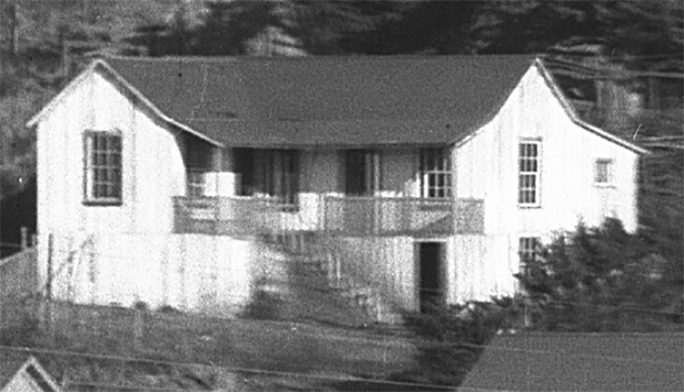
This is a close-up of one of the negatives, enlarged approximately 20X. In this image you can see the amount of detail in the original film, and you can see slight gear chatter from the Cirkut camera’s wind-up spring motor and drive mechanism. Some of these films exhibit more of this flaw than others.
At 800 ppi the scan contains visible sharp grain, and at the point where you are scanning grain you have gone about as far as you can go. Any higher resolution seems to be unnecessary, as I reached the maximum amount of practical information in each image at that resolution.
The resulting files are from about 500 MB to over 1 GB, depending on the size of the original. Each one required a lot of retouching, and I feel that there is much more retouching to do, but time will not allow for this, so I have declared victory, and I am moving on with the next part of the project, making modern day replicas of photos in the same locations.
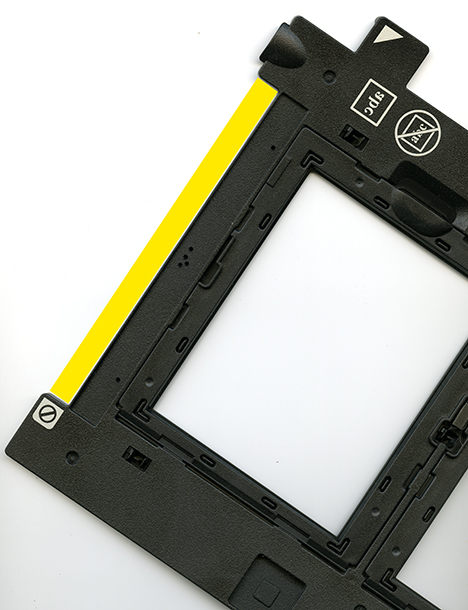
This is Epson’s 4×5 film scanning bracket. The area marked in yellow, above, tells the scanner that it’s working with film, and allows the machine to get a baseline exposure and white balance. Without one of these film area holders or a similar indicator, the scanner will not work correctly.
Scanning film on the Epson scanners requires the presence of one of its Film Area modules. There are several that came with the scanner, one for 4×5 film, one for 35mm film, and one piece of plastic with a large open area in the middle, but with the requisite window at the top to allow the scanner to adjust exposure for the baseline of any scan of film. Without this small space at the top, the scanner will refuse to scan film correctly.
I experimented with this, and I found that even a strip of black gaffer’s tape carefully placed on the top of the scanner window will do the trick. This leaves the majority of the bed available for the film – which I used to the fullest with my huge panoramic negatives.
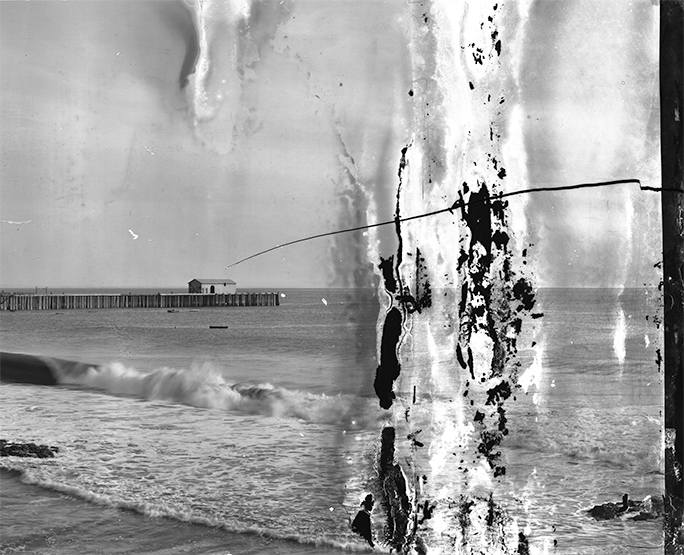
This is an example of the damage that was typical in the film I scanned. These films, you may remember from the last blog, had been under water back in 1973, and were severely damaged by water and silt. In 1983 I carefully soaked and separated the film, but many of the works suffered from this kind of damage. When I completed that task, the film was not able to be printed photographically, so I stored it for 30 years until technology caught up with my needs.
I also used a sheet of regular glass to weigh-down the wrinkled edges of my subject material, and to hold the film against its natural tendency to curl back into a roll. I thought that I might need to purchase a sheet of anti-Newton Ring glass for this, but the regular glass did the trick; I don’t think it was ever in adequate contact with the film to cause Newton Rings. And, the depth-of-field of the Epson scanner is extraordinary. It did not seem to matter that some of the film surface was nearly 0.1 in. away from the surface of the bed. It all came out in focus.
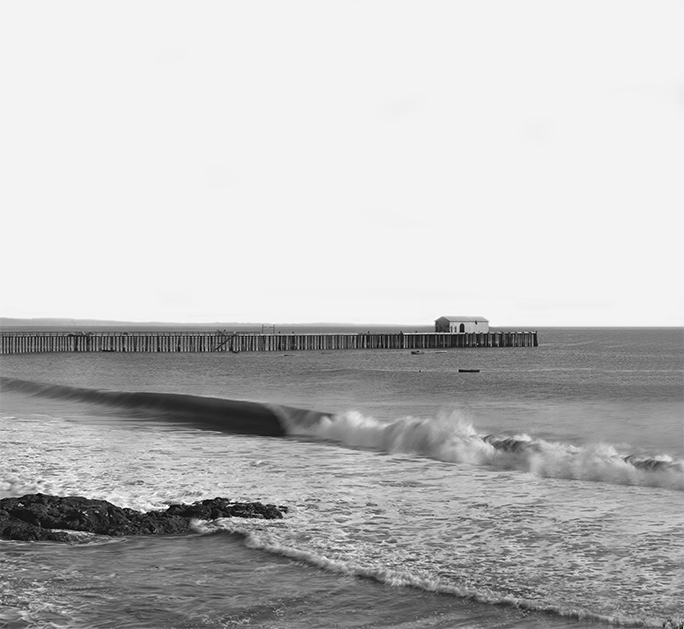
This is approximately the same area in the retouched version of the image. On the right I just cropped the damaged part of the ocean out of the image – that’s a lot easier than trying to retouch it (call me lazy!). The resulting image is quite acceptable.
The scans have an amazing amount of detail, and as a result of the age and prior handling of this film, an amazing amount of tears and scratches and spots. I spent countless hours zooming in and retouching the obvious, then repairing damage to the emulsion as best I could. The resulting images are amazing, and I will be presenting them to the public this coming February in a show at the San Luis Obispo Museum of Art. More on that as the show date approaches!