

A dear friend of mine, now deceased, handed me a box of film about 30 years ago. The film had been in a flood in the garage of his friend who obtained the film from the original photographer who died in 1966. The film had been partly or fully submerged in the garage for a period of days, and then damp for many weeks thereafter. It looked ruined.
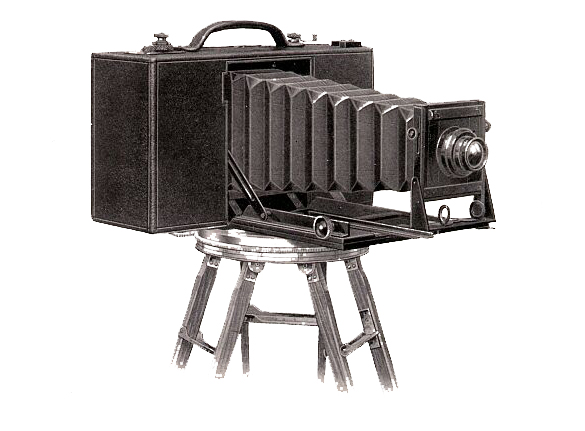
This is an image of a latter-day Cirkut camera. At the bottom of the camera is a geared wheel. A wind-up spring motor powered these cameras, allowing them to rotate and to move film inside the camera simultaneously to make a true panoramic image.
The film rolls, each between three and six feet long, and seven to 12 inches tall, was originally exposed in a Kodak Cirkut camera, a panoramic camera made by a division of Eastman Kodak Company called Folmer & Schwing, then later by Folmer-Graflex.

These are the rolls of panoramic film on my dining room table last weekend.
The original plan was that I would take these films to the photo lab at my business, Tintype Graphic Arts (1973-2003), and restore them to printable condition. Many were ruined because the water-soaked emulsion glued the layers together, and those could not be separated. Others were loosened up by soaking in water and preservative chemicals for several days. Those that I could separate were thoroughly washed to remove the mold and crud of the floodwaters, and then carefully dried.
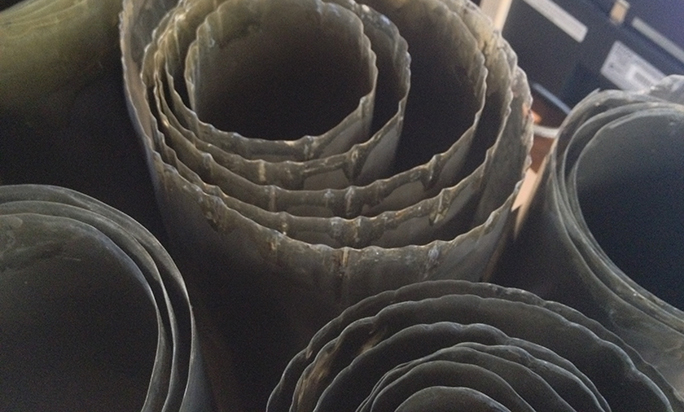
This is the edge of several of the panoramic films. These wrinkles pose no problem for the Epson scanner, which does a great job of capturing all the detail in these historic photographs.
There are more than 100 rolls of panoramic film in the box. Some are exquisite, while others are badly wrinkled along one edge. Some have severe damage to the emulsion, and others are very clean. At the time, my plan was to attempt to print them they way these photos were printed in the early 20th century – by contact printing. But the wrinkled films wouldn’t cooperate, and my attempts to print the negatives were fruitless. I put the box aside, hoping to figure something out later that would make them printable.
All of the images are of local subjects. There are scenic panoramas, community events, military parades – everything a commercial photographer would have been involved with in the early part of the 20th century.
I have a passion for panoramic photography (which is well documented in other blog entries on this site). I have been taking panoramic photos for decades. And, I have a show coming up at the San Luis Obispo Museum of Art, a show of panoramic photographs that will run from February 14 through March 30, 2014.
Last Sunday I went out to my garage and dug out the big box labeled “Photography.” It is like many other boxes of photos in my personal collection except a bit taller and deeper. When I opened the box I remembered the flood-damaged negatives and was about as excited as I ever get. Wow! Original, local panoramic photos!
And, in the 30 years that have passed since I had last opened that box, technology has advanced significantly. Today I have a digital scanner that can make images even from wrinkly flood-damaged film.
Last Sunday evening I built some extension tables for my Epson Perfection 700 scanner to support the long-roll panoramas, and on Monday afternoon I made my first scan of a four-foot long film negative. I am doing this in sections of about eight inches, with an overlap. I built into the extension tables a guide edge to bank the film against, and when scanning, I slide the film (carefully with cotton gloves!) across the table, into the scanner, and I scan a segment, then I repeat the process until I am done.
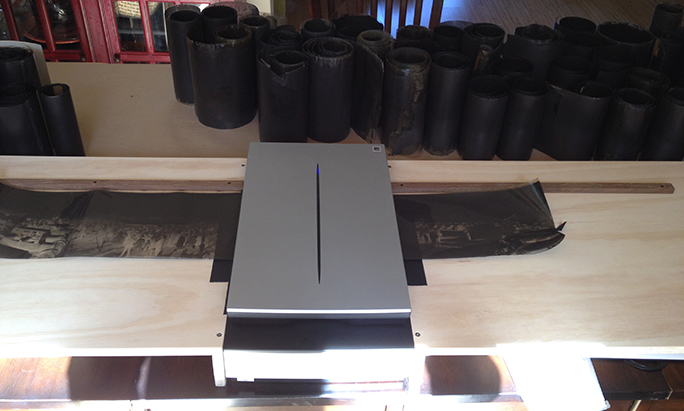
This is the Epson Perfection 700 scanner with the two extension tables I built to support and to register the panoramic films as I scan them.
Once I have the scanned sections complete, I pass them to my desktop computer and I run them through Photoshop’s Photomerge function, which can put them back together in minutes, almost perfectly every time.
Once the merged image is done, I flatten it, then spend an hour or two retouching, correcting scratches and other marks, and making the photo as nice as I possibly can. I scan at 800 ppi, which makes a composite image in the 500-600 MB size range. This size is needed because I plan to enlarge these photos to about six feet in width, then hang them in my show above or below a recent photo I have taken from the same location.
Finding the exact location to take these photos is not as easy as it seems. San Luis Obispo has been on a tree-growing crusade for the past thirty years, and most of the downtown is now lined with (admittedly lovely but…) troublesome trees. My modern replicas are in color, and are or will be taken with the GigaPan robotic camera mount. The result is ultra-high-resolution images that can be enlarged manyfold larger than my film-based historic images can be.

This is one of the panoramic images taken from a hill called Terrace Hill. At the time this photo was taken, that hill was about 100 feet taller than it is now (thus the name “Terrace Hill”). A much smaller San Luis Obispo is visible in this image. Click to see the image at twice this size.

This is one of my GigaPan images, taken January, 2013 from a location about 150 feet to the left of the image above. It’s possible to see how much the community has grown in the years since the upper image was made. Click to see the image at twice this size.
My method for scanning is to use Epson Scan software, which controls the Perfection scanner, and allows me to set the resolution and to adjust exposure, color balance, and more. These images are monochromatic, so I am scanning them as grayscale images, then turning them into RGB color and adding a color overlay to tint the resulting prints the way an original photo from the era looks. As a model for that color, I have one original print made by the photographer from a negative that I – curiously – do not have in this collection.
I have six completed so far. So, at this pace, I can get them all scanned in about half a year. Meanwhile my wife and I can’t use the dining room table because it’s covered with panoramic film, the scanner and the extension tables and computer. I will figure something out to solve that problem.
And, as I finish scanning the images, I am putting each negative, rolled gently into a cardboard tube with plastic caps, with a label describing the subject of the film, the quality of the image, and a warning that the film is of the nitrocellulose variety, and therefore very flammable and not very stable. Once this project is complete, I will return the negatives to the family of my late friend who allowed me to clean them up, then hide them in my garage for three decades.
And, come February, some of these wonderful images will be hung in my show at the Museum of Art where everyone in the community can enjoy them.
Wow, Brian! What an awesome story. As always, you tell it so well. What an amazing trove of old film and what you went through to resurrect it. I, too, have a much smaller bunch of ancient, water- and heat-damaged film and now you’ve inspired me to take a stab at seeing what I can get out of it. Thanks! (And thanks for the tip about your show next year. I’m definitely putting it on my calendar!)
I have been working with a no. 8 Cirkut outfit for the last 22 years. My work involves landscapes, machine shops, cafes, churchyards, schoolyards and various scenes around the United States as well as some work in Canada. I have finally found a way to present my work online in a manner which allows the viewer to zoom into the image . Here is a link to that page of my website http://richardmalogorski.webplus.net/page52.html
Hello Richard,
I really like your stuff! The full-resolution images are excellent.
I especially like the machine shops and car shops. Those are fascinating photos.
Thank you for commenting on my blog.
Brian P. Lawler