

I have a GigaPan device. It’s a computerized camera mount that moves a camera to take a photo, then moves the camera, and takes a photo, and continues doing that until a series of images are taken that complete a very large panoramic image.
I have done a lot of these over the years, and I am very fond of the device (I am not fond of carrying it and its tripod).

This is a screen shot of the GigaPan Stitch software with my 992 photo panoramic image ready to stitch. Completing the image took hours. Completing the project (retouching, uploading, etc.) took 15 hours, some of which I spent sleeping while the machine carried on without me.
The largest photo I have ever made was at Cal Poly, very near my home in San Luis Obispo. I climbed to the top of Cal Poly’s local mountain (unnamed, above the big “P” on campus) and I made a 360-degree panoramic image with the GigaPan rig that eventually stitched into an image that was too large for Photoshop to open (Photoshop’s limit is 300,000 pixels in either dimension). I wrote a blog about that. Over the years I have made numerous other GigaPan images that are high in resolution, but not so high as to break the software.
On Wednesday this week my students and I descended upon the Marienplatz in the center of Munich to make a number of photos. I brought the GigaPan and I positioned it in a fourth floor window opposite the city’s famous Rathaus, a building that was built in 1867 (and onward) in the city center.
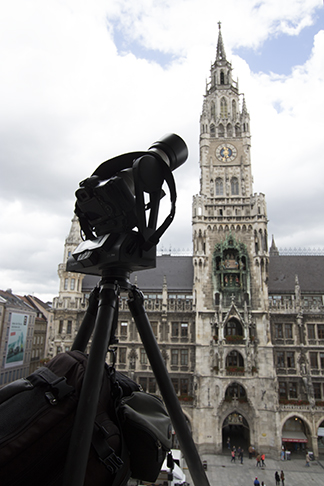
Here is my GigaPan on its Really Right Stuff carbon-fiber tripod in the window of the business on the Marienplatz in Munich. My camera bag, with four other lenses in it is hanging on the hook in the center of the tripod to prevent it from moving.
The building is a landmark partly because of its famous glockenspiel, which plays a musical and animated program at 11:00, 12:00 and 5:00 each day. Hundreds of people stand in the plaza each day to witness this charming presentation.
My objective was to make the highest resolution photo ever taken of the building, something I believe I have now done (I welcome anyone to challenge this claim).
Several weeks ago I contacted a company that has its offices in the building opposite the Rathaus and asked for permission to use a window on their floor of the building for a few hours while I took my photos. They were open to this idea, and welcomed me into their lovely office.
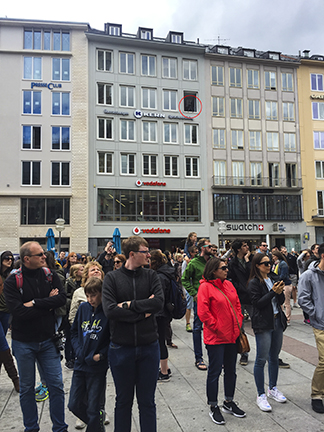
The crowd in Marienplatz waits for the glockenspiel to make its musical presentation. Up on the 4th floor, circled, is my GigaPan and camera. It took more than 90 minutes for each of my two GigaPan photo series on this day. I captured a total of more than 2,000 frames – each 63 MB in size when open.
On Wednesday I arrived, three tripods, three cameras and two backpacks in hand. I set up in the window of their offices and put my GigaPan rig in the window. Two of the tripod legs were outside the window frame on the narrow ledge and one was inside, which was a bit scary. I really didn’t want to see my equipment topple into the square, so I weighed the tripod down with my camera case (there is a hook in the center of my Really Right Stuff tripod that works well for this), and this made me more confident that it was safe.
Meanwhile, my students took the other tripods and cameras to make street-level panoramic images with those. We were experimenting with a new 3-stop neutral density filter on one camera. It looks almost opaque, and cuts the light coming through by half of half of half (which is 1/8). The reason this is a valuable accessory is that it allowed us to make 30-second exposures in broad daylight. By doing this, most of the people on the plaza disappeared from the photos, making almost eery images of the buildings without crowds of people nearby (More on that in future blog).
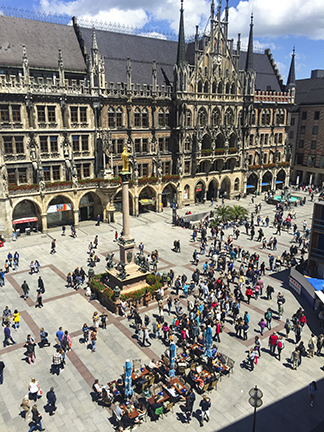
This is a look out of the window where I was working. My students are down there in the center-right with another two cameras and tripods, taking street-level panoramas and time-lapse videos.
Up in the fourth floor window I set up the camera and the GigaPan. My lens choice was the 100-400mm Canon telephoto. I set the zoom to 300mm, which was appropriate for this shot. At that focal length, the photos for the image would be close enough to zoom in and see tremendous detail, and it would allow me to finish the project in a reasonable amount of time.
The GigaPan does its work by calculating the lens’s field of view in degrees, then building-in overlaps between adjacent images so that the stitching program can put them together successfully. It asks you to position the image in your viewfinder at two spots, and by motor movement, it calculates the angles. I performed this setting, and it calculated the field of view at 4.1 degrees vertical.
After you establish the field of view, the GigaPan instructs you to identify the upper-left corner of your image, then the lower-right corner. I did both, and the GigaPan determined that I would need 992 images to complete my shot. The physical limitations were the frame of the window in which I was working, otherwise I had an unhindered view of the plaza.
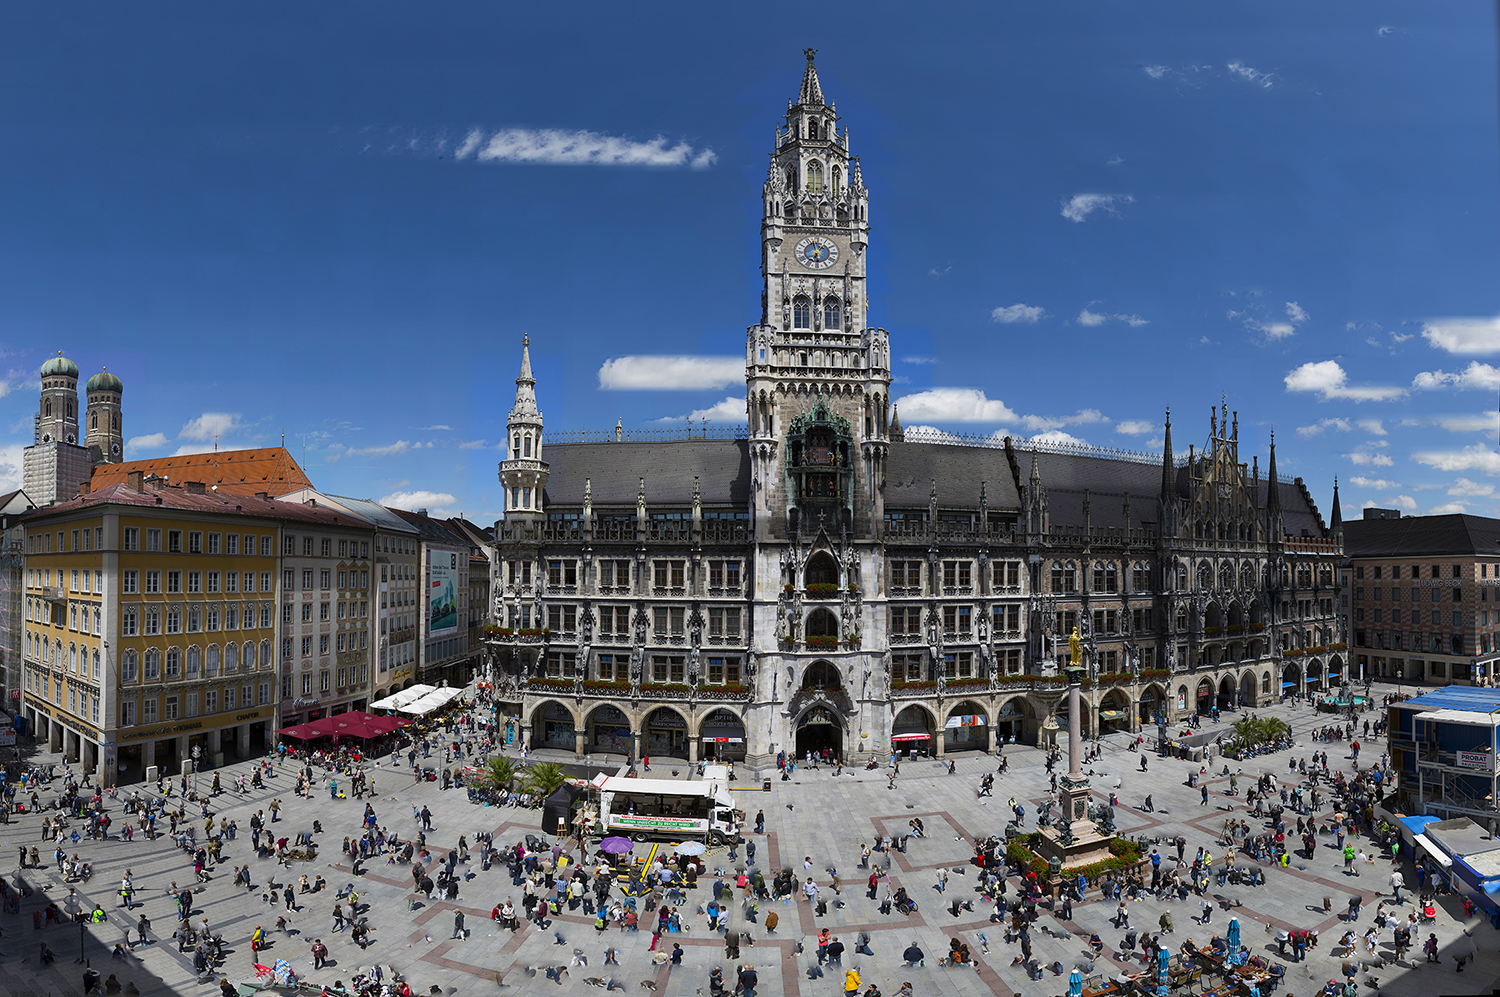
This is a reduced-resolution view of the final GigaPan image. There is mayhem in the plaza in the image because people were not photographed in their entirety (the camera was making multiple passes horizontally). As a result, there are many partial people in the image, but no one was injured in the making of this image! I promise.
The GigaPan then steps you through a series of questions to stop you from making dumb mistakes: Is the camera on? Is the zoom locked? Is focus locked? Is exposure locked? Is the strobe off? Are you sure? Yes, I indicated, and it began its work. The LCD display counts-off the photos as they are taken, and it indicates how much time remains. I needed one hour and 21 minutes to make this series of shots. The sky was cloudy with blue showing-through in patches.
About twenty minutes into the series, the sky turned dark gray and it rained. People ran from the plaza and took cover under the umbrellas of stores along the Marienplatz. About ten minutes later the sun came out again and the sky turned to a lighter gray. The photos continued all the while.
At the end of the first series of photos the sky turned a beautiful blue with scattered white clouds. I decided to do it over, so I started it again; that is the image I ended up using. In the end I captured over 2,000 photos of the Rathaus in two series.
After I completed the photos, my students and I took some group photos in the plaza then headed back to Hochschule München to begin work on the images.
The taking of GigaPan images is the easy part; the processing of GigaPan images is most tedious. Back in California I have a Mac Pro cylinder computer with six processors and 128 GB of RAM and a GPU, all of which combine to make processing of projects like this go very fast. Here in Germany I am using a MacBook Air with an Intel 1.8 GHz i7 processor and 4GB of RAM. It’s a nice lap-top computer, but it is certainly not as fast as my machine at home. This was going to take some time.

Some of my photography students in the Marienplatz at the end of our photography day there. We were quite successful with what we set out to accomplish.
In the classroom we worked on the street-level panoramas, which will turn out beautifully. I took the GigaPan photos back to my apartment for a long night of processing.
Just downloading 2,000 camera Raw photos to the machine took several hours. I use Adobe Bridge and its Get Images from Camera tool to import, rename, and simultaneously convert from Canon CR2 to Adobe DNG. This takes time, but I prefer this work flow because it is obsolescence-proof. I watched a documentary about things that are underneath London (Netflix) while this was going on. Then I watched a second documentary about zzzzzz (I fell asleep) until the job was done.
GigaPan does not know what a camera Raw file is, so in order to do the stitching I must convert all the images from DNG to TIFF in order to stitch them (cynics are sniping right now saying, “Why don’t you just use JPEG? It’s just as good and it wouldn’t require all that work!”). They are wrong; JPEG images seriously compromise the quality of the gradients in blue skies. The damage is clearly visible and it shows in these ultra-high resolution images. I prefer quality over efficiency (and I don’t think of JPEG as efficient) so I spend the time necessary to do the job right.
Converting from DNG to TIFF took about one hour using the Image Processor in Photoshop (thank you, Russell Brown!). The folder containing the images consumes 23.4 GB of disk space (just the DNG raw files).
So, late, late last night I had my 992 photos in TIFF ready to stitch. I set up the software and told it to start work. Five hours later I awoke and it was still working. One hour after that it was finished.
The image stitched beautifully. The final steps take a long time also: first one must export the GigaPan from the stitching program to the local drive. GigaPan creates a Raw file that Photoshop can read; it’s an RGB interlaced image. In this case the image is 124,076 x 84,884 pixels. Exporting that image took about three hours.
I also save my GigaPan images and their work files (there are thousands of them), this keeps a record all of the stitching parameters in case I ever need to do it over. It is possible to discard the TIFF images once the stitching is done, as they are redundant.
Once the Raw file is written to the disk, I open it in Photoshop to do minor (sometimes major) retouching and color correction. This image benefitted from some Vibrance and Saturation adjustment. Just opening the photo (at about 27 GB) took 17 minutes. Cropping the scraps off the edges took another 15 minutes. There are lots of photographic mishaps in the crowds at the bottom of this image. I will spend some time cleaning those up before I print the image.
I haven’t totaled it up yet, but this image, like most of my ultra-high-resolution GigaPan images, has taken about 15 hours.
Uploading the image to the GigaPan took about three hours. It is available for public viewing, zooming and exploring now.
You can see the finished, navigable GigaPan here.
I hope you enjoy seeing the result of our work on this image.