

My wife and I traveled today to see a neighborhood in Munich that is famous for its street art. It’s called the Tumblingerstraße area, and it features some very sophisticated works of graffiti – much better than graffiti – that shows some amazing talent and creativity.
I am not a fan of graffiti; I prefer that artists not paint on buildings and train cars, etc. However, this neighborhood has become the canvas for some talented artists who use the urban landscape as their palette. Though there is a municipal sign at the edge of the neighborhood prohibiting graffiti and spray-painting (itself defaced by spray paint), the street artists who do this work must use scissor lifts, or at least ladders, to reach their canvases, and one does not do that kind of art in the middle of the night unseen by the Polizei. This work must be at least condoned by the authorities.
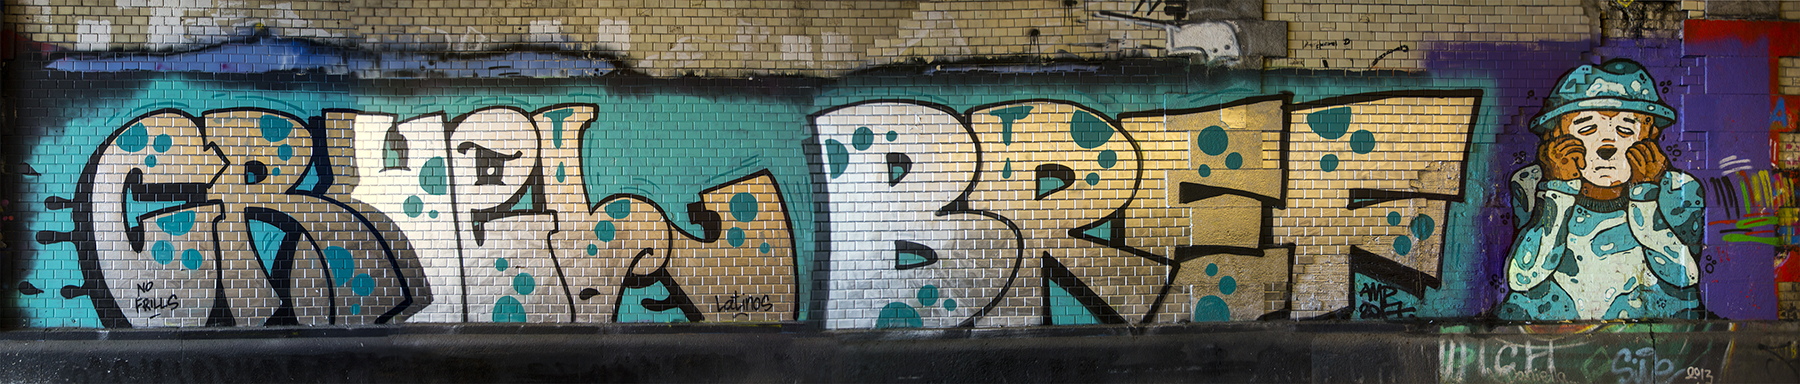
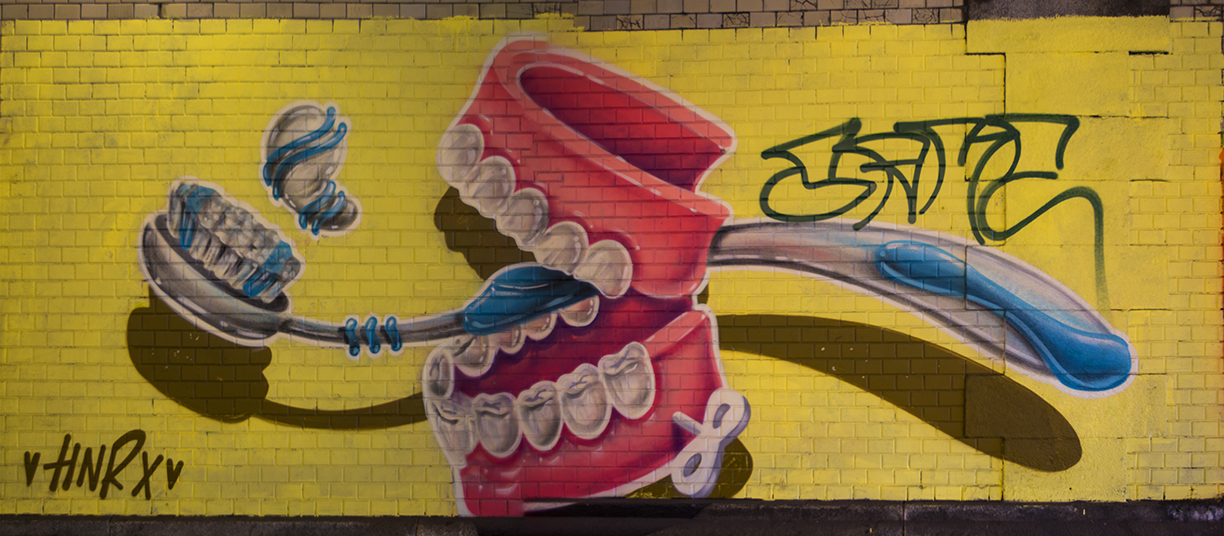
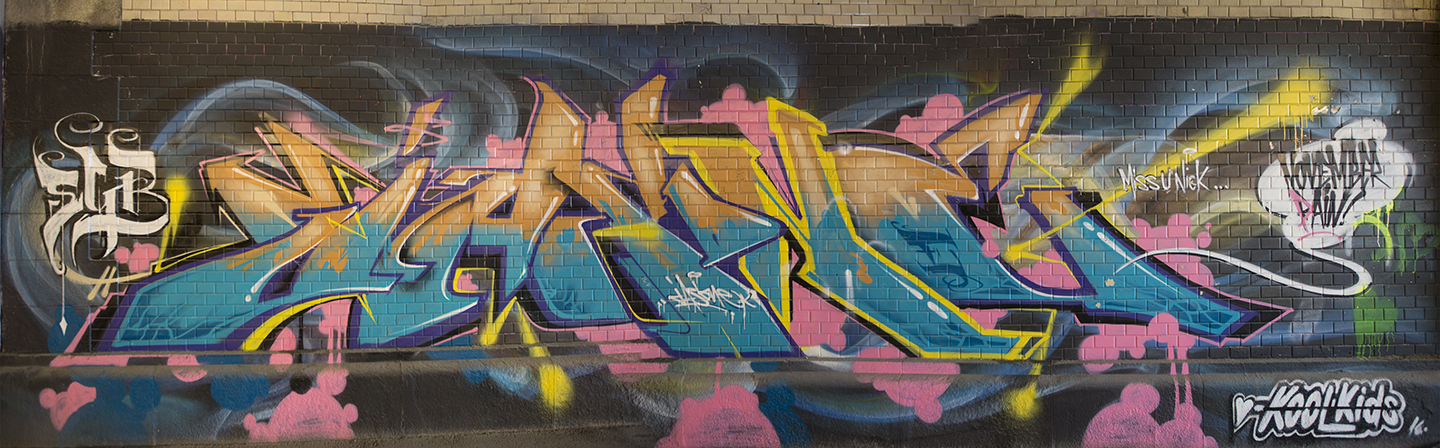
This example is over 20 yards wide, about 12 feet tall. I took seven horizontal images to make the complete image, and stitched them together using Photomerge as described here.
My objective today was to capture some photos of this work, so I took my trusty Canon 5D Mark III camera and my “street lens” (16-35 f2.8) with me to make the images. Tumblingerstraße is a moderately-trafficked street bordering an industrial neighborhood and the Isar river. A huge brewery is located just off the street, and there is a lot of train traffic that passes overhead.
There are cars parked everywhere along the street, making it difficult to step far enough away from the art to photograph each piece in one frame; the sidewalks are wide enough for people and bicycles, and barely wide enough for me to make multiple-exposure “panoramic” images of the art. The term “panoramic” infers that the camera is in one position, and that it turns on its own axis to make a long horizontal photo. In this case, the camera does not stand still and turn. Instead, the camera moves horizontally in increments, making a series of square photos that are later stitched into a large, seamless image that represents the original art in its entirety. I will call these repositioned panoramas.
They are quite difficult to capture and to stitch, and there is only one way I know to get them to come out correctly – straight and undistorted – and that is to use Adobe Photoshop’s Photomerge feature to assemble them into whole images.
Photomerge is very good at this. I used it extensively four years ago to assemble section-scanned film negatives of Kodak Cirkut panoramic camera film. These negatives measured about ten inches tall by over four feet in length. I scanned them on an Epson scanner using its transparency function, and then assembled the sections in Photoshop using this technique. It worked flawlessly. I had an advantage on that project though – the film had no perspective, and the scanning bed stayed absolutely flat and square for each scanned section. Assembling these into coherent images was relatively easy for Photoshop, and the resulting photos were extraordinary.
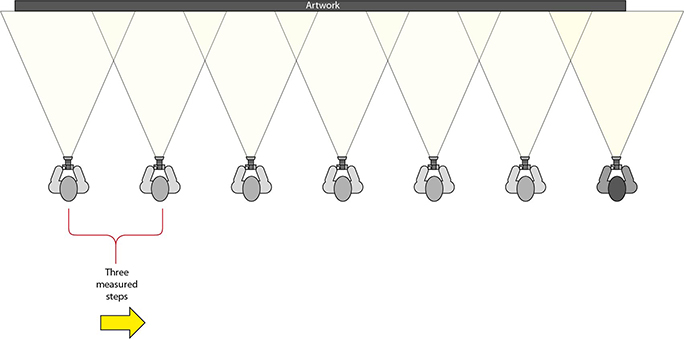
This is my shooting pattern. I stand square to the wall, find a horizontal reference in the shot (edge of the wall in this case), then take a series of images with careful horizontal indexing – I take three steps between each frame.
Today’s adventure was unaided by a tripod. I have one, but I did not take it with me to Tumblingerstraße. Instead I hand-held the camera and made very careful series of photos of each image I wanted to capture. I checked focus and exposure, then attempted to find something straight to use as a reference. Typically, I used the edge of the wall at the sidewalk for a horizontal reference in each frame. Then I took a photo, stepped three measured steps to the right, took another, and repeated this until I had a series of images that covered the art with significant overlaps.
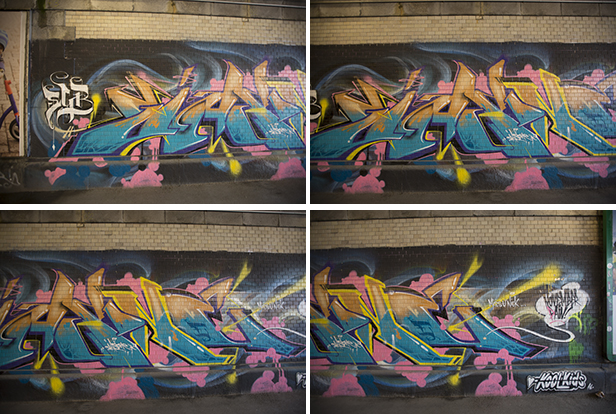
Four sequential horizontal images taken today to capture one work of art. Notice the overlap in the images – this is critical to the success of merging the photos into one.
Back in my apartment I assembled the photos in Photoshop using one of the techniques that Photomerge will practice to get sequential images to match and merge into one.
To get this to work, one must first be extremely careful to take effective photos. Unless you can go back and take the photos again, it’s best to get it right the first time. Check square, check focus, use manual exposure (and don’t change it!), don’t change the distance between the art and the camera (this can be challenging). The process does allow for some error, but it must be minimal.
I try for about 20 percent overlap between the photos. Photoshop needs a lot to find common areas and to blend the images successfully. I open all of the contributing images for a single work of art, then choose File>Automate>Photomerge to reach the Photomerge pane. Then, in that pane, I choose the technique that works best for this type of work: Reposition. The other six options will generally not work to assemble rectangular images correctly. A couple of them won’t work at all for this kind of photo.
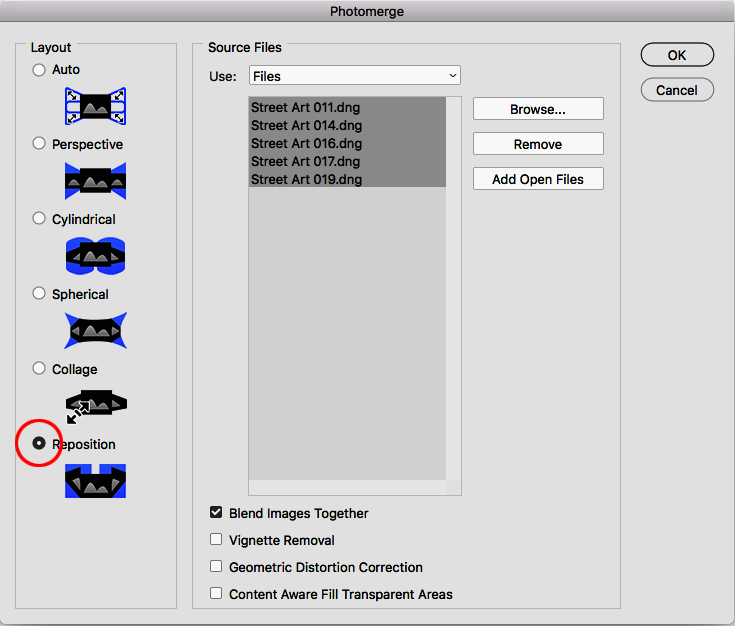
Photomerge in Adobe Photoshop, showing the selection of the Reposition mode, and the selection of the Open Files in the center. This is the most effective way to accomplish the task of making these images.
Choose Add Open Files then select them all: click, shift-click on the list to include them. Then click OK. It takes several minutes at the resolution at which I work (63 MB per image), but the result can be spectacular.
This is the composite image from the four source images shown above. Once completed, it needed only to be cropped to finish the image.
Note that the most visible difference between a true panorama and a sequential, repositioned panoramic image, is that these photos are straight, and do not display the arcs of a normal single-point-perspective panoramic photo. Photomerge has two modes that will do that, but then your straight lines become arcs, and that is unattractive for this kind of work. Notice in these images that the rows of bricks are straight from left to right.
In the end I recorded a faithful photo of each of the major works on display in the neighborhood. I am very pleased with the results. As with all of my panoramic images, the greatest amount of time is spent in front of the computer, as opposed to the relatively small amount of time spent on the scene.
I found myself enchanted by the street art today, and I applaud the creative people who make this work.
Please don’t do it on my apartment building!!
Addendum December, 2021:
I am back in Munich, and have spent a lot of time at Tumblingerstraße recently, photographing the artwork there. This time, my Master’s degree students and I have been documenting the artwork, and my students have been interviewing some of the artists. It has been very successful.
I have written a new blog about a more precise method I used this year to photograph the street art (note that I am not calling it “graffiti” anymore).
You can read the new article here.