

I was visiting a friend’s airplane hangar recently when we were suddenly aware of a louder than normal plane approaching on the ramp. We looked outside and were treated to the arrival of a beautiful Waco biplane, possibly the nicest airplane I have ever seen. With its impeccable paint job, it turned and stopped in front of the hangar.
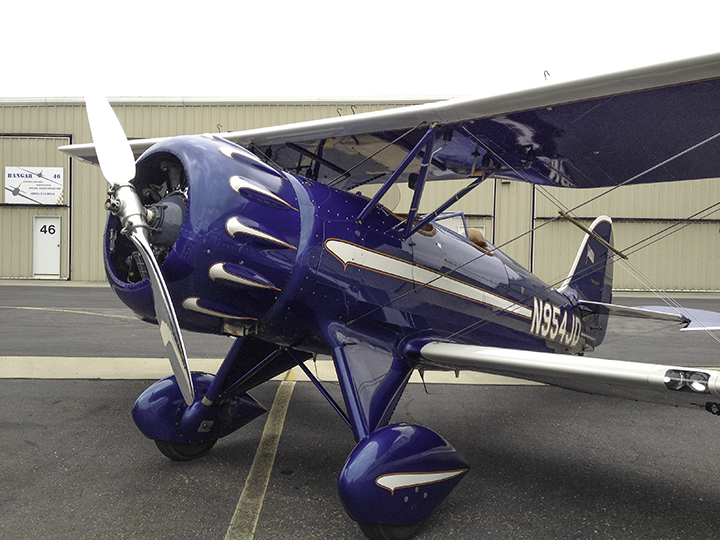
This is the original photo, reduced in resolution for this blog.
The pilot got out and walked to the adjacent hangar, while I snapped a few photos with my iPhone 4s. The sky was slightly overcast, making the light very nice, and the resulting photos are surprisingly good.
I have been teaching digital photography for several years now, and one of my assignments to my students is a masking assignment. I thought this might make a good one because the plane was photographed in front of an unimpressive steel building, yet it’s worth separating from its background to make the photo nicer. It also has criss-crossing cables from one wing to the other, and cables are a nightmare to keep in a mask while maintaining realism.
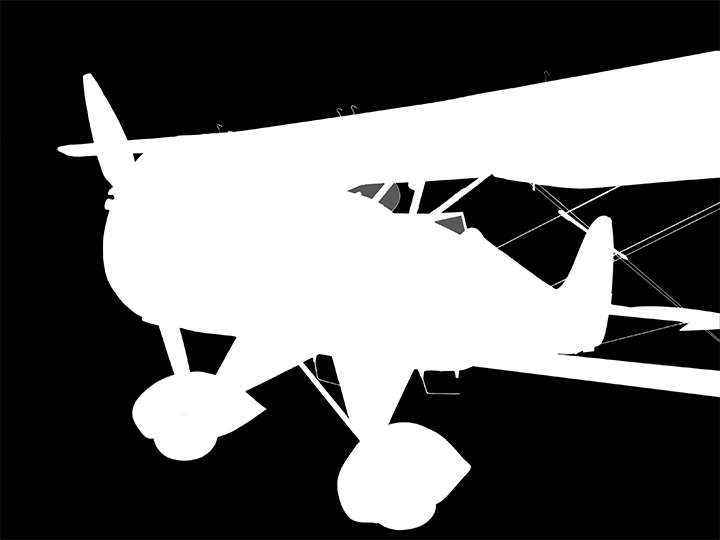
This is my final mask. It’s final until I open it again and obsessively correct it more than I have already corrected it several times, most recently August 3, 2103.
So, I started masking it myself, a test of how long it would take and how well I could do it. I used a number of tricks of the trade. I started by copying one channel, green, and adjusting its tonality with the Levels tool to make a starting mask of the plane. Then I used the brush tool to correct large sections of the interior of the body, then I started on the hard work of drawing the mask.
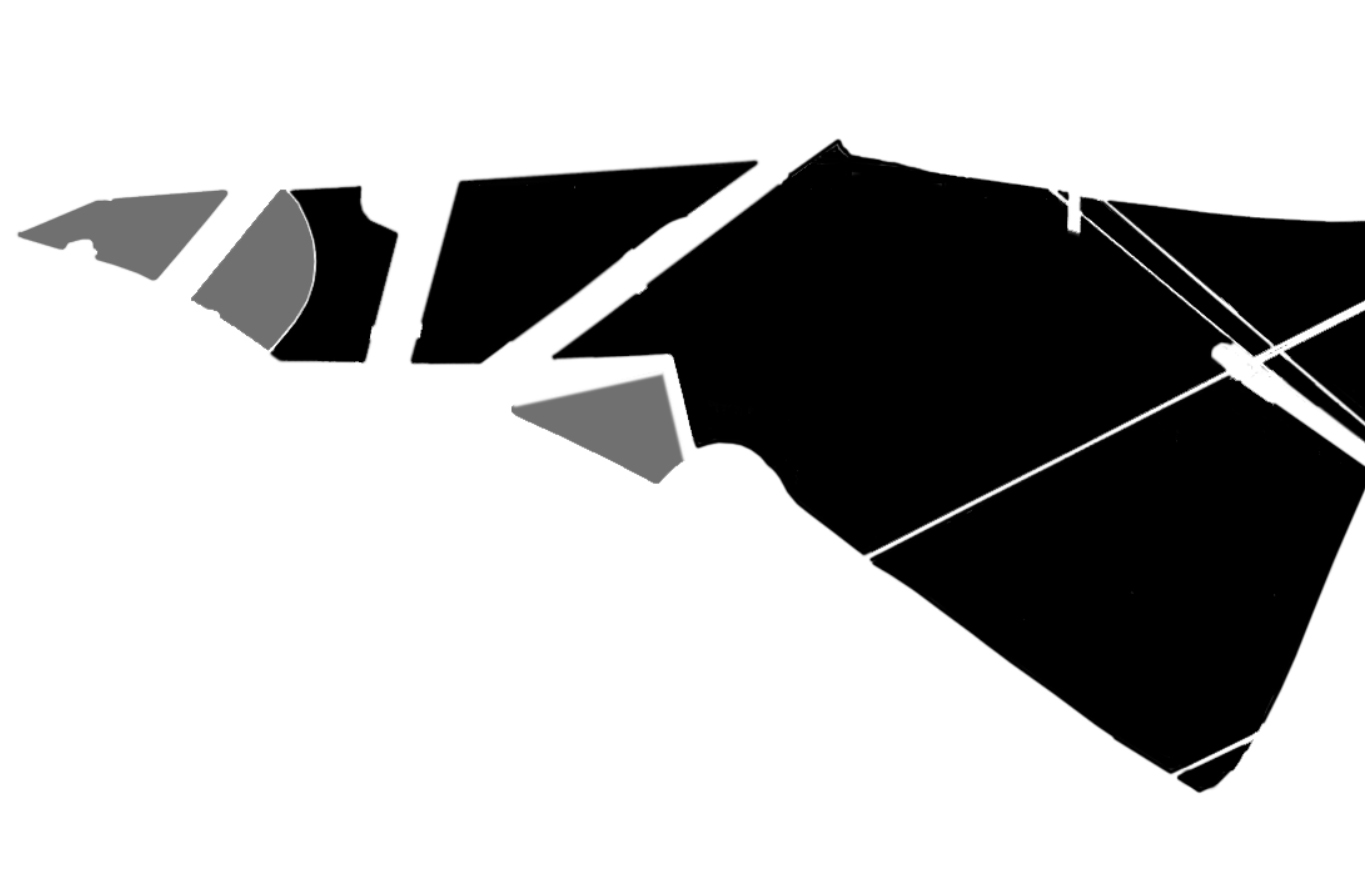
In this close-up you can see that the windshield areas are masked in gray, which lets part of the background through, making them look more realistic.
I also used the ellipse marquee tool to select the tires, where they cannot be seen clearly in the photo. I drew the ellipse as the tire should be, and then I drew my mask up against the selection. I did this a couple of times before I was satisfied with the shape.
To get the wheel covers, I used Photoshop’s pen tool to make smooth, flowing lines that followed the parts on the plane as accurately as I could. This works much better than attempting to do this with the brush, or any other of Photoshop’s tools. But, it’s easy for me because I am a longtime Illustrator user also, and the pen tool is very familiar.
In the end I have a mask of which I can be proud. It features mostly hard edges, though I adjusted hardness on the wing top, and the rear edge of the rudder to help make the light on those surfaces roll around the edge a bit. I didn’t want my mask to act like a cookie cutter, with edges so hard they make the plane look unrealistic.
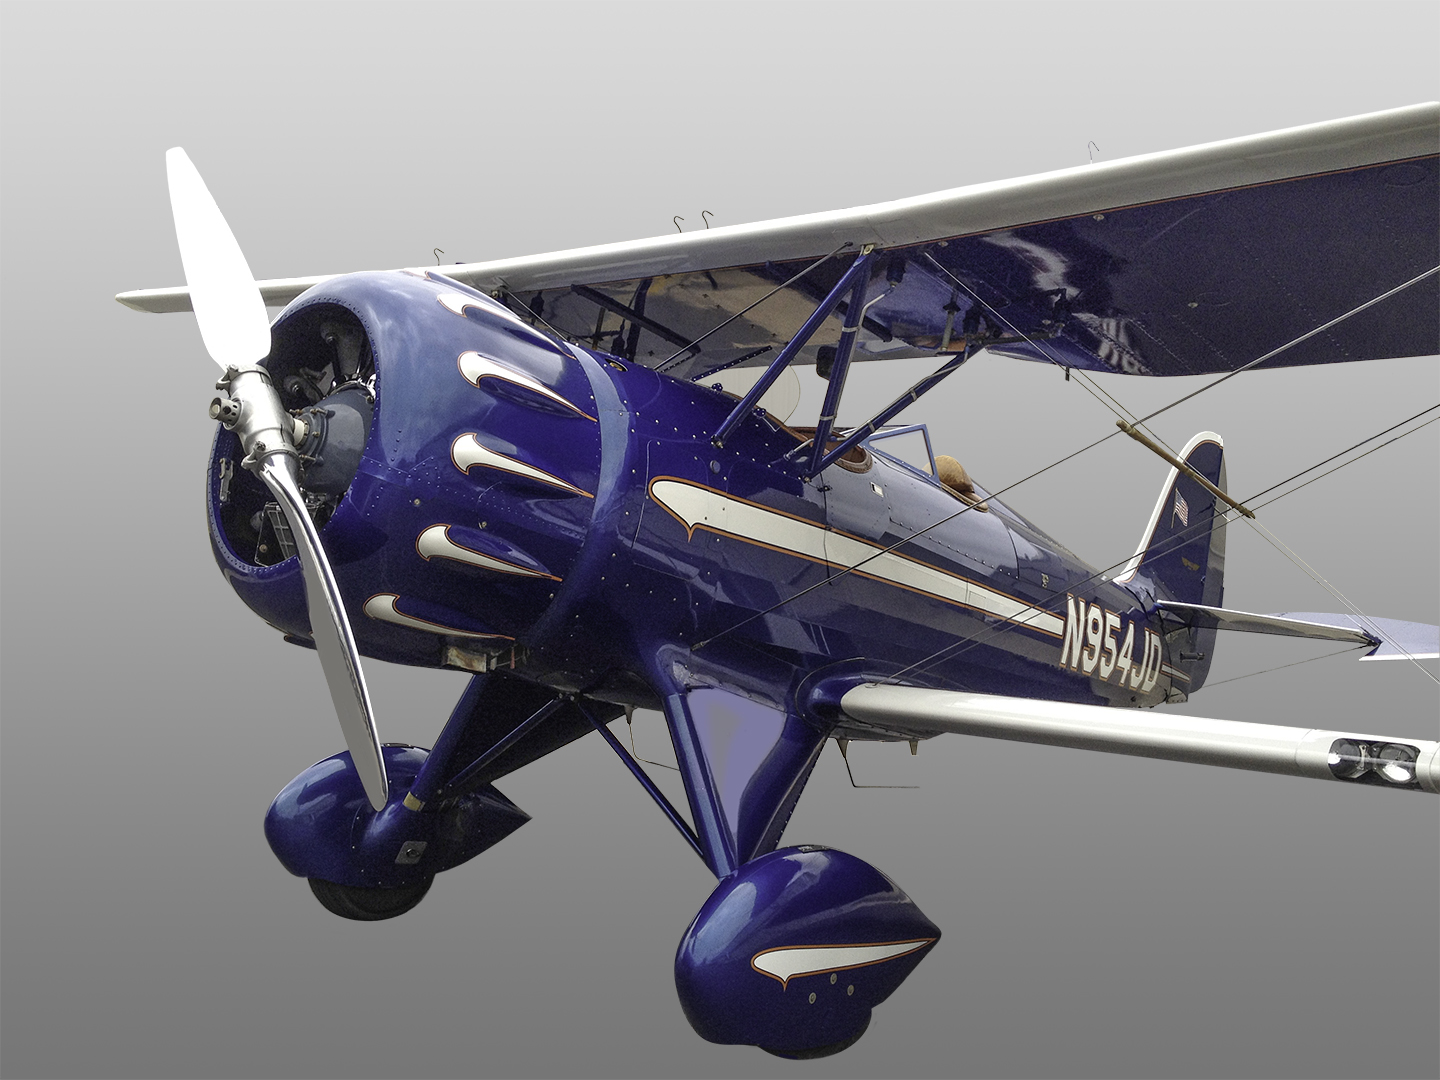
In the final photo I can drop any background behind the plane that I want. Click on the image to see it at higher resolution (updated 8-3-13).
For the windshield areas, I drew the mask, then changed its value to gray so that some of the background shows through, but I didn’t like the background, so I put in a new one to remove the hangar details behind the plane. I also took some liberties with the sheet metal on the edge of the wheel strut. There I over-painted the reflections on the original with some nondescript colors I chose from the plane itself.
It took me a long time: over one hour to perfect (and I am sure I can perfect it some more). Will I be using this as a class project? I fear that it is too time-consuming to use for my class, but I will keep it for a workshop I will be teaching down the line.